Introduction to ultrasonic sensors
Ultrasonic sensors are electronic devices that utilize sound waves to detect and measure distances or objects. These sensors work on the principle of emitting ultrasonic waves and measuring the time it takes for these waves to bounce back after hitting an object. The sound is inaudible to human hearing. The time interval in which the sound bounces back after hitting objects helps calculate the distance between the sensor and the object with remarkable accuracy.
Ultrasonic sensors are used in several fields, including the automotive sector and robotics. Ultrasonic sensors are very efficient, and accurate, and perform excellently in low-light conditions.
It is one of the most commonly used components in electronics projects.
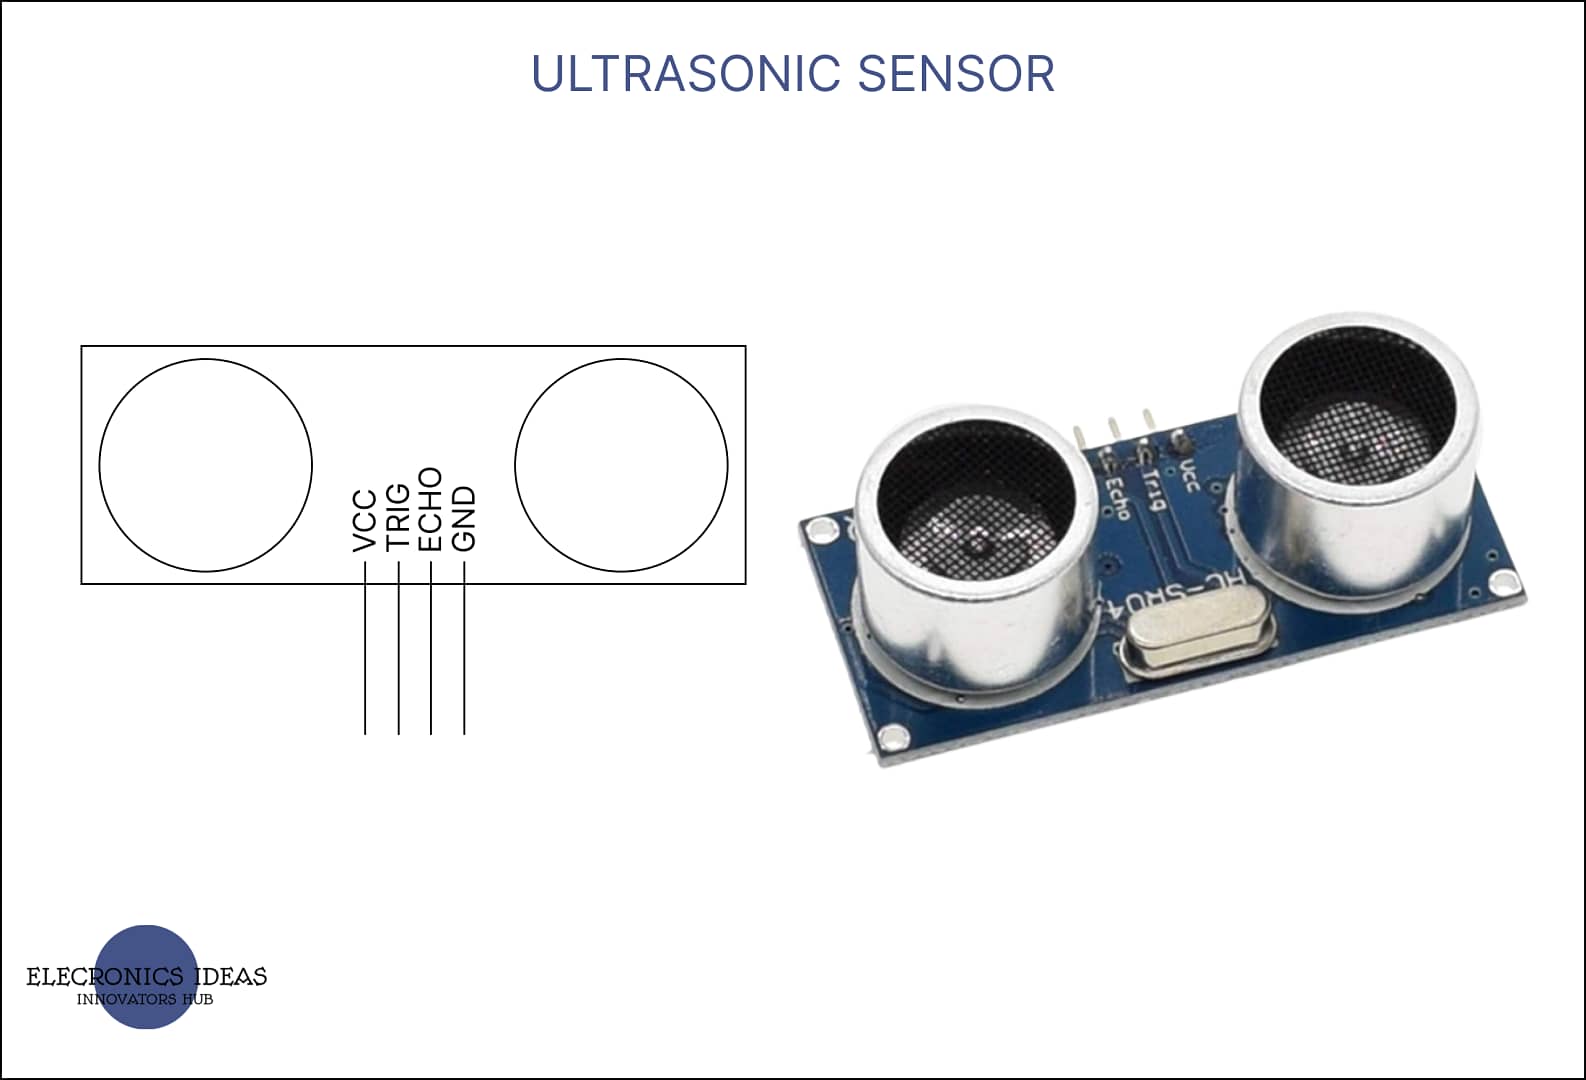
Schematic of ultrasonic sensors

How ultrasonic sensors work
Ultrasonic sensors work based on the principles of sound wave propagation. They emit high-frequency sound waves and then measure the time it takes for these sound waves to travel to an object, bounce off it, and return to the sensor. This time interval is used to calculate the distance between the sensor and the object.
Ultrasonic sensors are commonly used for proximity sensing, object detection, distance measurement, and even fluid level measurement. Their accuracy and versatility make them a popular choice in industries ranging from automotive to security, and robotics.
There are seven (7) steps in which ultrasonic sensors work, from wave propagation to the final output.
Emission of Ultrasonic Waves: The sensor emits a burst of ultrasonic waves, which are essentially sound waves with a frequency higher than what humans can hear. This waves is usually produced by a piezoelectric transducer, which converts electrical energy into mechanical vibrations.
Wave Propagation: The emitted sound waves travel through the air at a speed of approximately 343 meters per second (at room temperature). The waves propagate in a cone-like pattern from the sensor’s emitting element.
Interaction with an Object: When the emitted sound waves encounter an object in their path, they get reflected back due to the object’s surface. The stronger and more reflective the object’s surface, the more sound waves are reflected.
Reception of Reflected Waves: The sensor’s receiving element, often the same piezoelectric transducer, detects the reflected sound waves that have bounced off the object. This transducer then converts the mechanical vibrations of the received waves back into electrical signals.
Time Measurement: The sensor’s circuitry measures the time it takes for the emitted waves to travel to the object and return as reflected waves. This time interval is often referred to as the “time of flight.”
Distance Calculation: Knowing the speed of sound in the air and the time it took for the sound waves to travel to the object and back, the sensor’s microcontroller or processing unit calculates the distance between the sensor and the object using the formula: Distance = (Speed of Sound × Time of Flight) / 2.
Output: The calculated distance can then be presented in various ways, such as analog voltage levels, digital signals, or even as a distance value displayed on a screen.
How to use ultrasonic sensors in Arduino projects
Ultrasonic sensors are one of the most common components in Arduino projects. First, we would have to connect the sensor to the Arduino and then write the code for how or what the Arduino should do using the Arduino software (IDE). If you don’t have the IDE installed on your computer already, you can visit the official website to get the arduino software IDE.
For this simple example, we would need the following electronic components;
- Arduino board (We are using Arduino uno R3 in this example)
- Ultrasonic sensor module (we are using HC-SR04)
- USB cable for connecting Arduino to your computer
This simple example would be used to measure the distance of objects placed in front of the ultrasonic sensor, and the distance would be displayed.
We will try to keep this example as simple as possible, so we would use the Arduino software (IDE) serial monitor to display the distance of the object after a given time.
Let’s begin with connecting the ultrasonic sensor to the Arduino.
- Connect the VCC to the 5V supply on the Arduino.
- Connect the GND pin of the sensor to the GND pin on the Arduino.
- Connect the Trig pin of the sensor to a digital pin (Pin 6) on the Arduino.
- Connect the Echo pin of the sensor to another digital pin (Pin 5) on the Arduino.

We are using digital pins because we are focusing on just digital signals.
Write the following Code into the Arduino (IDE). Ensure that the Arduino board is connected to your computer via USB and that the right COM port is selected.
 int trigPin = 6;
 int echoPin = 5;

void setup() {
  Serial.begin(9600);
  pinMode(trigPin, OUTPUT);
  pinMode(echoPin, INPUT);
}

void loop() {
  digitalWrite(trigPin, LOW);
  delayMicroseconds(2);

  digitalWrite(trigPin, HIGH);
  delayMicroseconds(10);
  digitalWrite(trigPin, LOW);

  long duration = pulseIn(echoPin, HIGH);
  float distance_cm = (duration * 0.0343) / 2; // Calculate distance in centimeters

  Serial.print("Distance: ");
  Serial.print(distance_cm);
  Serial.println(" cm");

  delay(1000); // Delay for readability
}
The first part of the code is to initialize and name both the trigger and the echo pin connected to the Arduino.
int trigPin = 6;
int echoPin = 5;
The void setup() identifies the pin that is for input and the pin that is for output. It also initializes the serial monitor, as we are using it in this example.
void setup() {
  Serial.begin(9600);
  pinMode(trigPin, OUTPUT);
  pinMode(echoPin, INPUT);
}
The code below clears the trigger pin of the ultrasonic sensor. This happens by setting the trigger pin low for two (2) microseconds.
void loop() {
  digitalWrite(trigPin, LOW);
  delayMicroseconds(2);
After resetting the trigger pin, we would set the trigger pin to high for ten (10) microseconds. After ten (10) microseconds, the trigger pin goes back low for the echo to be able to listen in.
digitalWrite(trigPin, HIGH);
  delayMicroseconds(10);
  digitalWrite(trigPin, LOW);
Use “long” to declare the variable for the time it takes the sound to reflect back to the ultrasonic sensor. At this point, you set the echo pin high and use the pulseIn function() to listen in on the sound reflection. You can use float to declare the variable for the total distance so as to live the answer in decimal.
the duration or time taken for the sound to reflect is multiplied by the speed. remember that the sound travel at 343m/s at room temperature. Converting 343m/s to centimeters per microsecond. You should get 0.0343cm/ms. After multiplying the duration and the speed the answer is divided by two (2).
 long duration = pulseIn(echoPin, HIGH);
 float distance_cm = (duration * 0.0343) / 2; // Calculate distance in centimeters
This code just displays the result in the serial monitor of the Arduino software IDE. The final delay is so that the result stays the same for one (1) second before the system tests again.
Serial.print("Distance: ");
  Serial.print(distance_cm);
  Serial.println(" cm");

  delay(1000); // Delay for readability
NOTE: SOMETHING TO NOTE IS THE FACT THAT NO SPECIAL LIBRARY IS IMPORTED FOR THE ULTRASONIC SENSORS.
In some cases people use #include <NewPing.h>. but generally, they are no special library for ultrasonic sensors.
How to use ultrasonic sensors with LCD
Using Liquid crystal display (LCD) provides a means through which information can be displayed virtually. In this example, we would display the distance that has been detected by the ultrasonic sensor on the LCD. The code will be very easy and straightforward such that it is understandable. The code will be similar to the first code with minor tweaks.


#include <LiquidCrystal.h>
int ECHO = 9;
int TRIGGER = 10;

int DURATION;
float DISTANCE;
float LED;
LiquidCrystal lcd(7, 6, 5, 4, 3, 2);

void setup() {
  // set up the LCD's number of columns and rows:

  pinMode(TRIGGER, OUTPUT);
  pinMode(ECHO, INPUT);
  Serial.begin(9600);
  lcd.begin(16, 2);
  lcd.setCursor(0,0);
  lcd.print("DISTANCE :");
}

void loop() {
  digitalWrite(TRIGGER, LOW);
   delayMicroseconds(2);
  digitalWrite(TRIGGER, HIGH);
  delayMicroseconds(10);
  digitalWrite(TRIGGER, LOW);
  DURATION= pulseIn(ECHO,HIGH);
  DISTANCE = 0.0343*DURATION;
  float distance_cm = DISTANCE/2;
  Serial.println(distance_cm);

  lcd.setCursor(10, 0);
  lcd.print(distance_cm);
  delay(1000);
  lcd.setCursor(13,0);
  lcd.print(" ");
}
Related post


I would like to express my admiration for your article, which is quite astonishing. The clarity of your post is remarkable, leading me to believe that you are an authority on this subject. If it’s okay with you, I would like to subscribe to your RSS feed in order to be notified of future posts. Your work is greatly appreciated.
Thanks Leonard