Introduction to MQ2 gas sensors
MQ2 gas sensors are compact and versatile electronic devices designed to detect various types of gases in the surrounding environment. These sensors belong to the MQ series, which is a line of gas sensors widely used for applications in safety, industrial processes, and environmental monitoring. MQ2 gas sensors, in particular, is adept at detecting a range of gases including LPG, propane, methane, alcohol, hydrogen, and smoke. Its sensitivity to multiple gases makes it a valuable tool for early gas leak detection, fire prevention, and air quality assessment.
MQ2 gas sensors operate based on the principle of the change in electrical conductivity of its sensing element when it comes into contact with the target gas. The sensor consists of a heated filament and a semiconductor gas-sensitive material. When the target gas interacts with the sensing material, it leads to a change in its resistance, which is then converted into an electrical signal. This signal can be processed and used to trigger alarms, activate ventilation systems, or provide data for analysis.
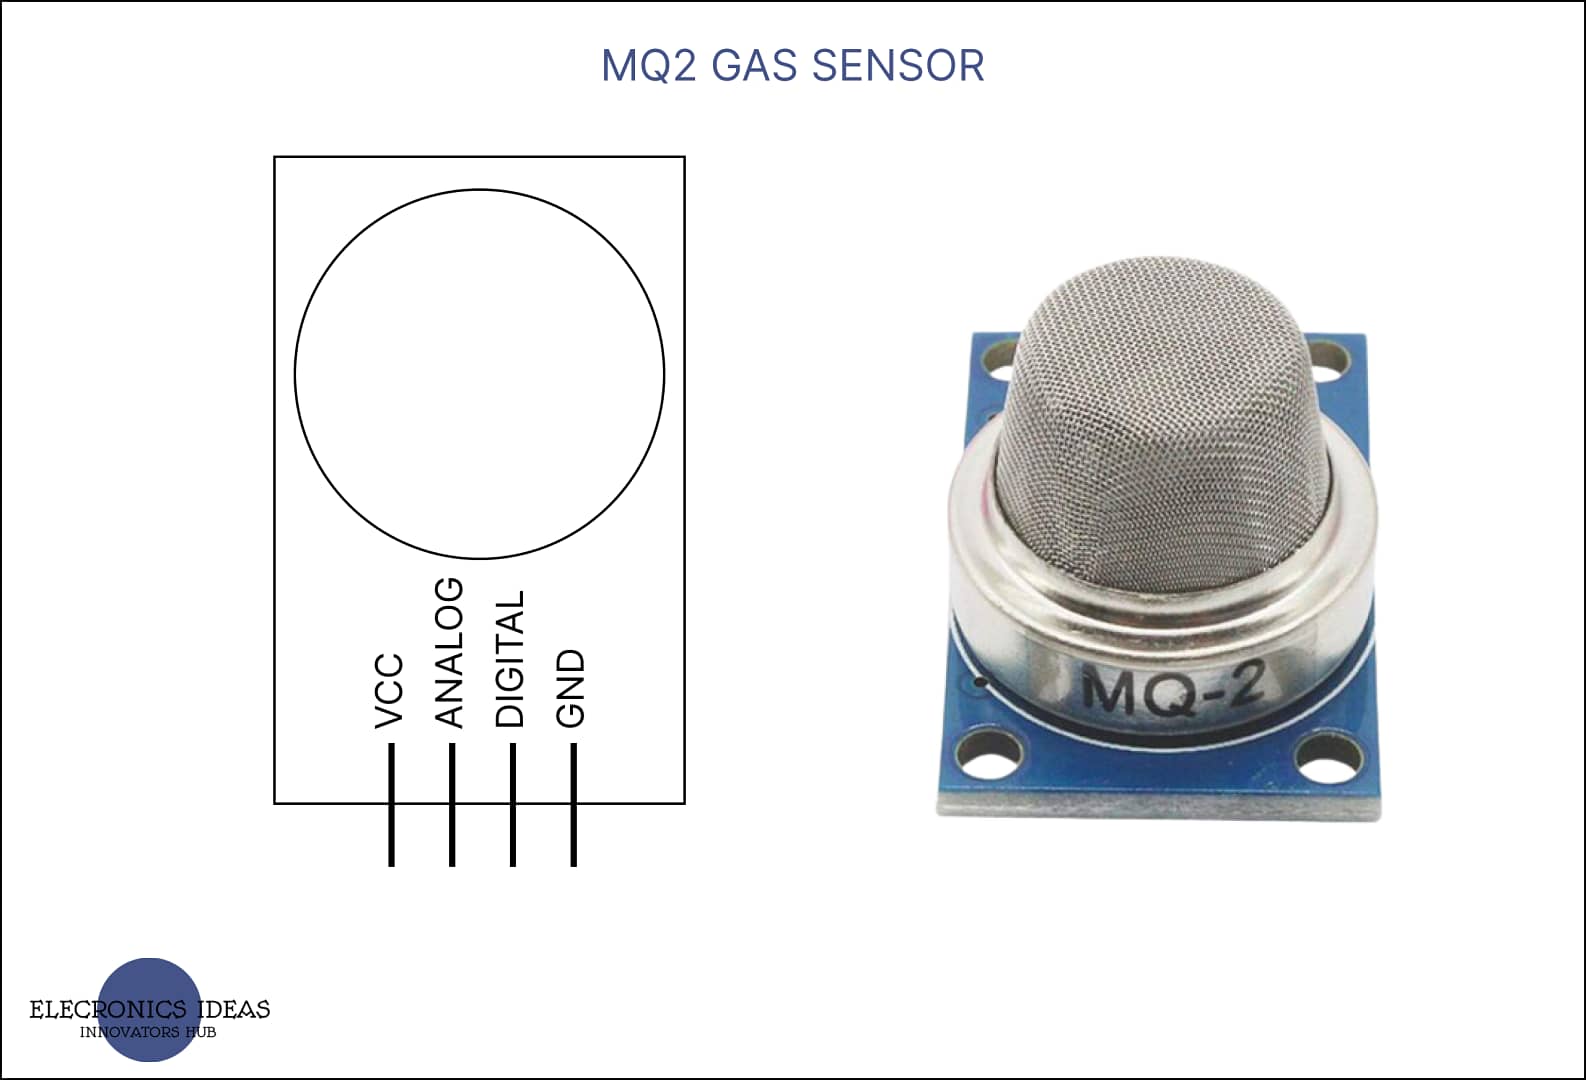
Schematic for MQ2 gas sensors

How MQ2 gas sensors work
MQ2 gas sensors operate based on the principle of gas detection through changes in electrical conductivity. The sensor contains a sensitive material that reacts when it comes into contact with specific gases. Here’s a step-by-step explanation of how MQ2 gas sensors work:
- Sensing Element: The core of the MQ2 sensor is its sensing element. This element is made up of a semiconductor material, often a metal oxide, which exhibits changes in its electrical resistance when exposed to certain gases.
- Heater: The sensing element is usually connected to a built-in heater. This heater raises the temperature of the sensing element to a specific level, which is typically around a couple of hundred degrees Celsius. The elevated temperature is crucial for the sensor’s functioning as it enhances the sensitivity of the sensing material to gas interactions.
- Contact with Gases: When the sensor is powered on and the heater heats up the sensing element, the device is ready to detect gases. When specific gases, such as LPG, propane, methane, alcohol, hydrogen, and smoke, come into contact with the sensing material, they undergo chemical reactions with its surface.
- Chemical Reactions: The gas molecules interact with the surface of the sensing material in a way that alters the electrical conductivity of the material. These reactions typically involve adsorption and desorption processes where gas molecules adhere to the surface of the material and then detach. These interactions cause a change in the number of charge carriers (ions or electrons) in the material, leading to a change in its electrical resistance.
- Resistance Change: The change in electrical resistance due to gas interactions is the key signal that the sensor detects. Different gases cause different levels of resistance changes, allowing the sensor to identify and differentiate between various gases to some extent.
- Signal Processing: The change in resistance is converted into an electrical signal that can be processed by the sensor’s circuitry. This signal is then sent to the output pins of the sensor, where it can be further analyzed or utilized.
- Calibration and Interpretation: It’s important to note that MQ2 sensors might require calibration to ensure accurate readings, as their sensitivity can vary over time and due to environmental conditions. Additionally, the sensor’s response is not always linear, and cross-sensitivity to multiple gases might affect its accuracy. Calibration involves exposing the sensor to a known concentration of the target gas and adjusting its output accordingly.
How to use MQ2 gas sensors in Arduino projects
Using an MQ2 gas sensor in Arduino projects is a popular choice due to the Arduino’s ease of use and extensive community support. Download the arduino software. Here’s a step-by-step guide to help you use an MQ2 gas sensor with an Arduino:
Materials Needed:
- Arduino board (Arduino Uno R3)
- MQ2 Gas Sensor
- Breadboard and jumper wires
- A power source (USB cable or external power supply)
- Breadboard
- 1k ohms resistor
- LED
Step-by-step process on how to connect MQ2 gas sensor with Arduino to receive both analog and digital signals. The digital signal will turn on an LED while the analog signal will be displayed on the serial monitor
- Connect the VCC pin of the MQ2 sensor to the 5V pin on the Arduino.
- Connect the GND pin of the MQ2 sensor to any GND pin on the Arduino.
- Connect the AOUT (analog output) pin of the MQ2 sensor to an analog input pin on the Arduino (A0).
- Connect the DOUT (digital output) pin of the MQ2 sensor to a digital input pin on the Arduino (D5).
- Connect the resistor to pin 9 of the Arduino and the other end to the positive terminal(anode) of the LED and the negative terminal(cathode) of the LED to ground.


// MQ2 Gas Sensor Pin Definitions
int analogPin = A0;
int digitalPin = 5;
int light =9;

void setup() {
  Serial.begin(9600);
  pinMode(digitalPin, INPUT);
pinMode(light,OUTPUT);
}

void loop() {
  int analogValue = analogRead(analogPin);
  int digitalValue = digitalRead(digitalPin);
  Serial.print("Analog Value: ");
  Serial.println(analogValue);
  Serial.print("Digital Value: ");
  Serial.println(digitalValue);

if(digitalValue==1){
digitalWrite(light,HIGH);
}
  else{
    digitalWrite(light,LOW);
  }
delay(1000);  // Wait for a second
}
MQ2 gas sensors can also be used in analog circuits.
Related post


1 thought on “Clear breakdown on MQ2 gas sensors”