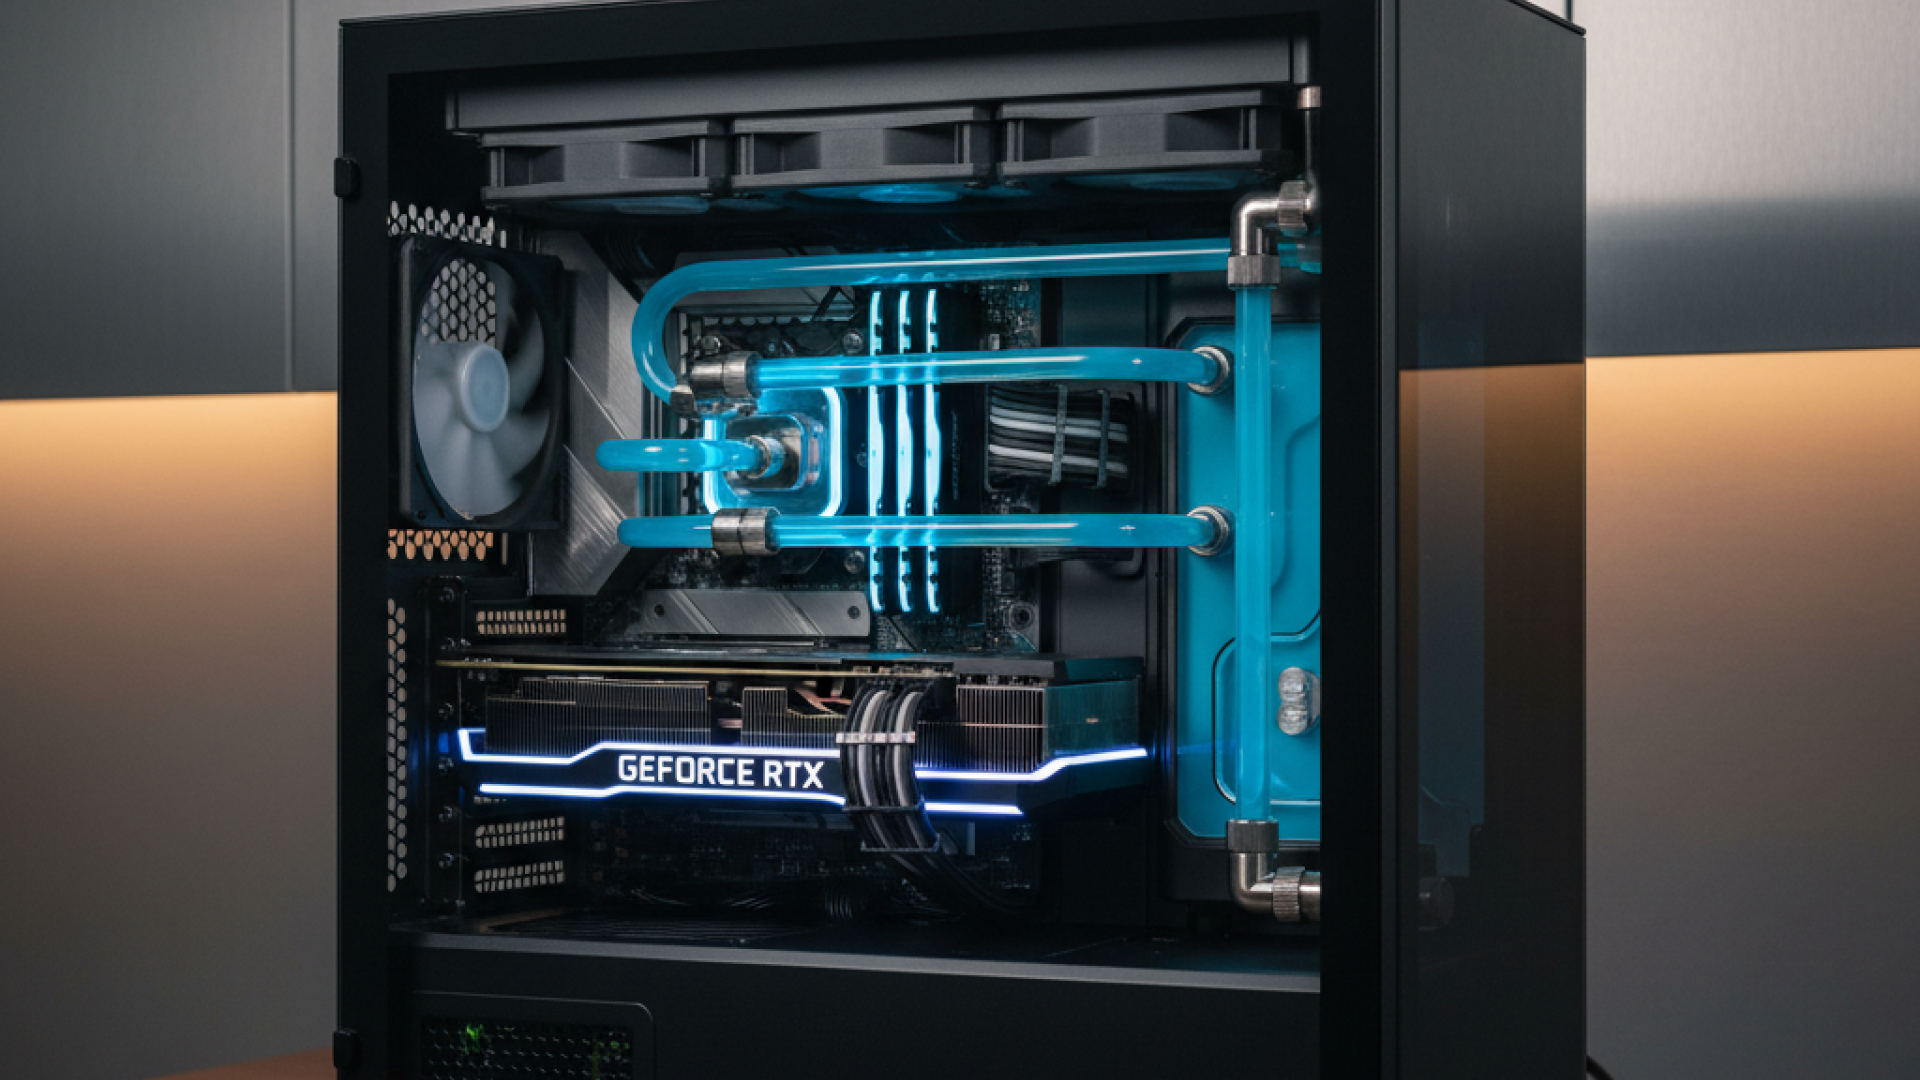
Building a homelab has evolved from a niche hobby into a strategic pursuit for technology professionals and enthusiasts. Imagine deploying your own private data centre, a system that operates at a lower monthly cost than a Netflix subscription while delivering unparalleled value and control. This vision is the core promise of the modern homelab 2025, a platform offering liberation from the constraints of commercial cloud services and subscription models.
The modern digital economy is characterised by escalating subscription fees, opaque cloud pricing, and legitimate data privacy concerns. As organisations and individuals alike grapple with rising cloud costs and the fatigue of managing countless subscriptions, the need for a more autonomous and financially predictable alternative becomes clear. A home server represents a definitive solution to this cycle of dependency, offering a path toward true digital sovereignty.
A contemporary homelab server directly addresses these challenges by providing a controlled, self-hosted environment. But what is a homelab in practice? It is a dedicated personal lab environment, a consolidated home data centre designed for experimentation and production use. This setup serves as an ideal platform to learn DevOps at home and undertake a serious IT skills project, providing hands-on experience that is directly transferable to professional scenarios. It is the ultimate expression of privacy-focused computing.
The Three Pillars of the Modern Homelab
The efficacy of a contemporary homelab rests on three foundational pillars:
- Power Efficiency: Modern hardware, particularly ARM-based systems and low-TDP Intel/AMD processors, enables a powerful home data centre that minimises operational overhead. The strategic consolidation of services onto such energy-efficient hardware can lead to a net reduction in power consumption compared to running multiple distributed devices and services.
- Comprehensive Automation: The goal of a mature homelab is a “set-and-forget” architecture. Through orchestration tools and scripts, the system manages its own duties, including backups, updates, media management, and network security, requiring minimal daily intervention. This automation ensures your personal cloud server operates with relentless reliability.
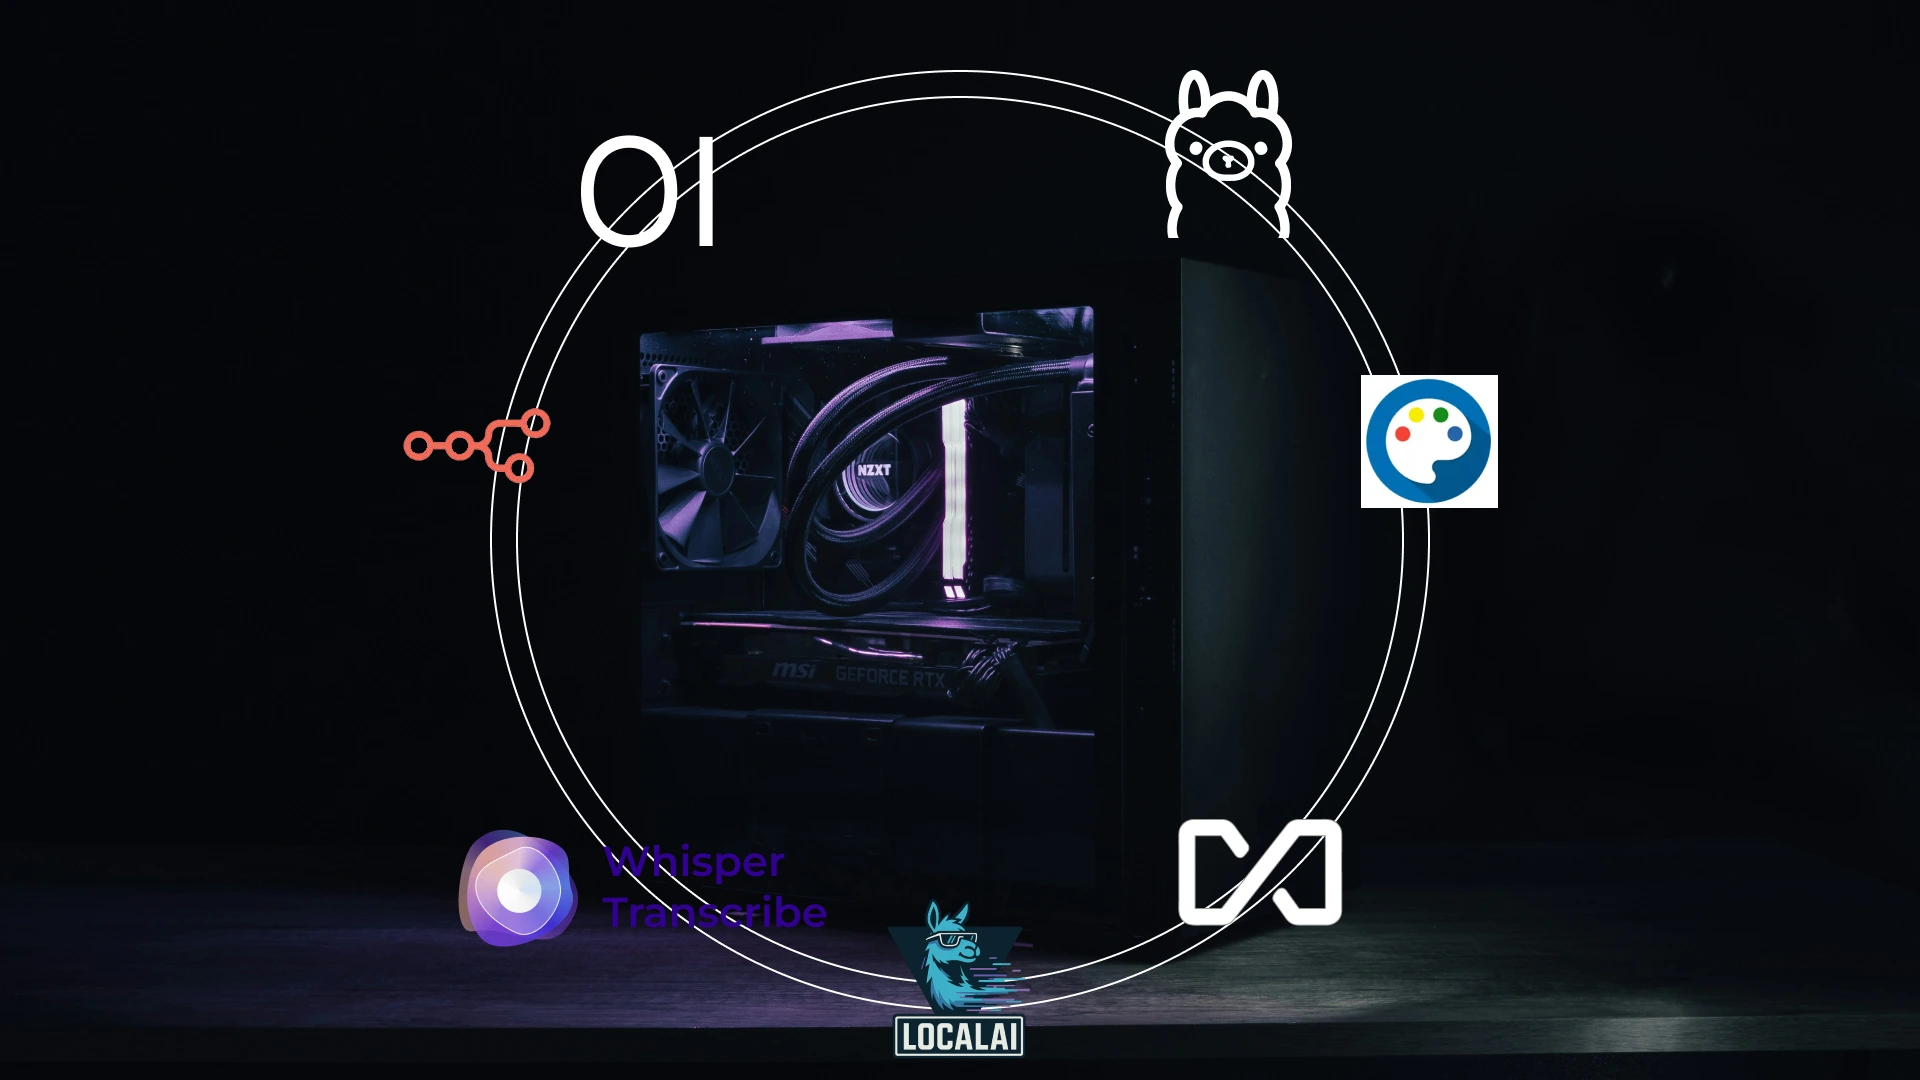
- Integrated Artificial Intelligence: The democratisation of AI models now allows for local execution. A modern homelab can host private large language models (LLMs), such as a localised ChatGPT equivalent, and computer vision services entirely on-premises. This capability eliminates data egress to third parties and avoids recurring AI API costs, keeping sensitive data and processing within your secure environment.
The Professional Outcomes: What You Will Master
Engaging with a homelab is a direct investment in your professional capital. This journey will provide you with practical, high-value skills, including containerisation with Docker and Kubernetes, infrastructure automation with Ansible or Terraform, secure network configuration, and system administration. You will develop a critical understanding of the homelab vs cloud services trade-off, enabling you to make architecturally sound decisions based on cost, performance, and security requirements for any project.
This guide will provide the foundation for constructing a system that is not merely a project but a professional-grade asset, one that delivers enduring value, enhances your technical capabilities, and redefines your relationship with technology.
Phase 1: Homelab Philosophy And Strategic Planning
The “Start Small, Think Big” Philosophy
Every successful homelab begins with a fundamental principle: you do not need a full server rack to embark on this journey. The most effective homelab planning guide for 2025 champions gradual, iterative growth over costly, comprehensive purchases. Begin with a single PC or repurpose an old laptop; expand your capabilities based on actual, evolving needs rather than hypothetical requirements. This disciplined approach prevents the common pitfall of over-engineering your initial setup and exhausting your budget before you have mastered the core concepts.
Strategic homelab builders adopt an architectural mindset from the outset. Even when starting a homelab on a $500 budget, you should design your network topology, service organisation, and expansion path with enterprise-scale principles in mind. This forward-thinking methodology ensures your initial investments remain valuable and relevant as your expertise and ambitions grow.
Goal Definition Framework
These homelab project ideas for beginners are strategically organised into four complementary categories:
- Self-Hosting Services: Initiate your journey with high-value services that directly replace recurring subscriptions. Deploy Plex or Jellyfin for media streaming, configure a TrueNAS or OpenMediaVault instance for centralised storage, and implement a self-hosted password manager like Vaultwarden. These best homelab use cases deliver immediate, tangible benefits while providing a practical foundation in core server administration.
- Skill Development: Transform your lab into a professional upskilling platform. Gain hands-on experience with VMware or Proxmox virtualisation, container orchestration using Kubernetes, and building automated DevOps pipelines. Each project serves as a concrete, resume-enhancing demonstration of your capabilities.
- Development & Testing Environment: Construct isolated, sandboxed environments for continuous integration and delivery (CI/CD), application development, and infrastructure testing. Your homelab becomes a zero-risk playground for experimentation, where breaking systems is a valuable part of the learning process.
- AI Experimentation: Engage with the forefront of technology by deploying local large language models (LLMs), automating tasks with machine learning, and building privacy-focused AI assistants. This advanced category positions your homelab as a powerful platform for innovation and cutting-edge exploration.
Budget Planning Matrix
A strategic homelab budget follows a tiered approach designed to maximise the return on investment for your learning and capabilities:
- The $200 Entry Tier: Focus on a single PC (e.g., Beelink, HP EliteDesk, or Lenovo ThinkCentre) running a hypervisor like Proxmox. This tier supports 2-3 lightweight services and is ideal for proving the concept, learning fundamentals, and establishing network storage and basic automation.
- The $500 Sweet Spot: This optimal beginner budget allows for a dedicated Network-Attached Storage (NAS) solution (e.g., Synology DS220+) or a more powerful PC with upgraded RAM (32GB). It can comfortably run 8-10 services, including development environments, and is where serious professional skill acquisition begins.
- The $1000+ Professional Grade: This tier unlocks multi-node clusters for high-availability testing, enterprise-grade networking gear, GPU acceleration for AI workloads, and redundant storage configurations. It is designed for complex lab scenarios, advanced automation, and mimicking true production environments.
Success Metrics: Measuring Homelab Value
An effective homelab ROI calculator extends beyond mere financials. To truly measure success, track these key metrics:
- Financial ROI: Calculate the monthly subscription costs you eliminate (typically $50-$150/month).
- Skill Acquisition: Quantify learning through certifications earned (e.g., CompTIA, Kubernetes), technologies mastered, and complex projects completed.
- Operational Efficiency: Measure the hours of manual work saved weekly through automation of backups, media management, and other routine tasks.
Document your progression through complexity milestones: from single-service deployment to multi-node orchestration and custom application development. The ultimate value is realised when your homelab evolves from a personal hobby into a career accelerator, transforming your home into a launchpad for professional growth in cloud computing, DevOps, and systems architecture.
Phase 2: Power-Efficient Homelab Hardware Guide
Selecting the optimal hardware is a critical decision that balances computational power, energy efficiency, and financial investment. The pursuit of the best budget homelab hardware 2025 is not about finding the most powerful machine, but the most suitable one for your specific goals. This guide analyses three distinct tiers of hardware, supported by real-world data and a clear framework, to help you build a cost-effective and powerful low-power homelab.
Tier 1: Ultra Low-Power (5-25W) – The Efficiency Champions
This tier is designed for minimal energy footprint and focused use cases, perfect for those starting or running always-on, lightweight services.
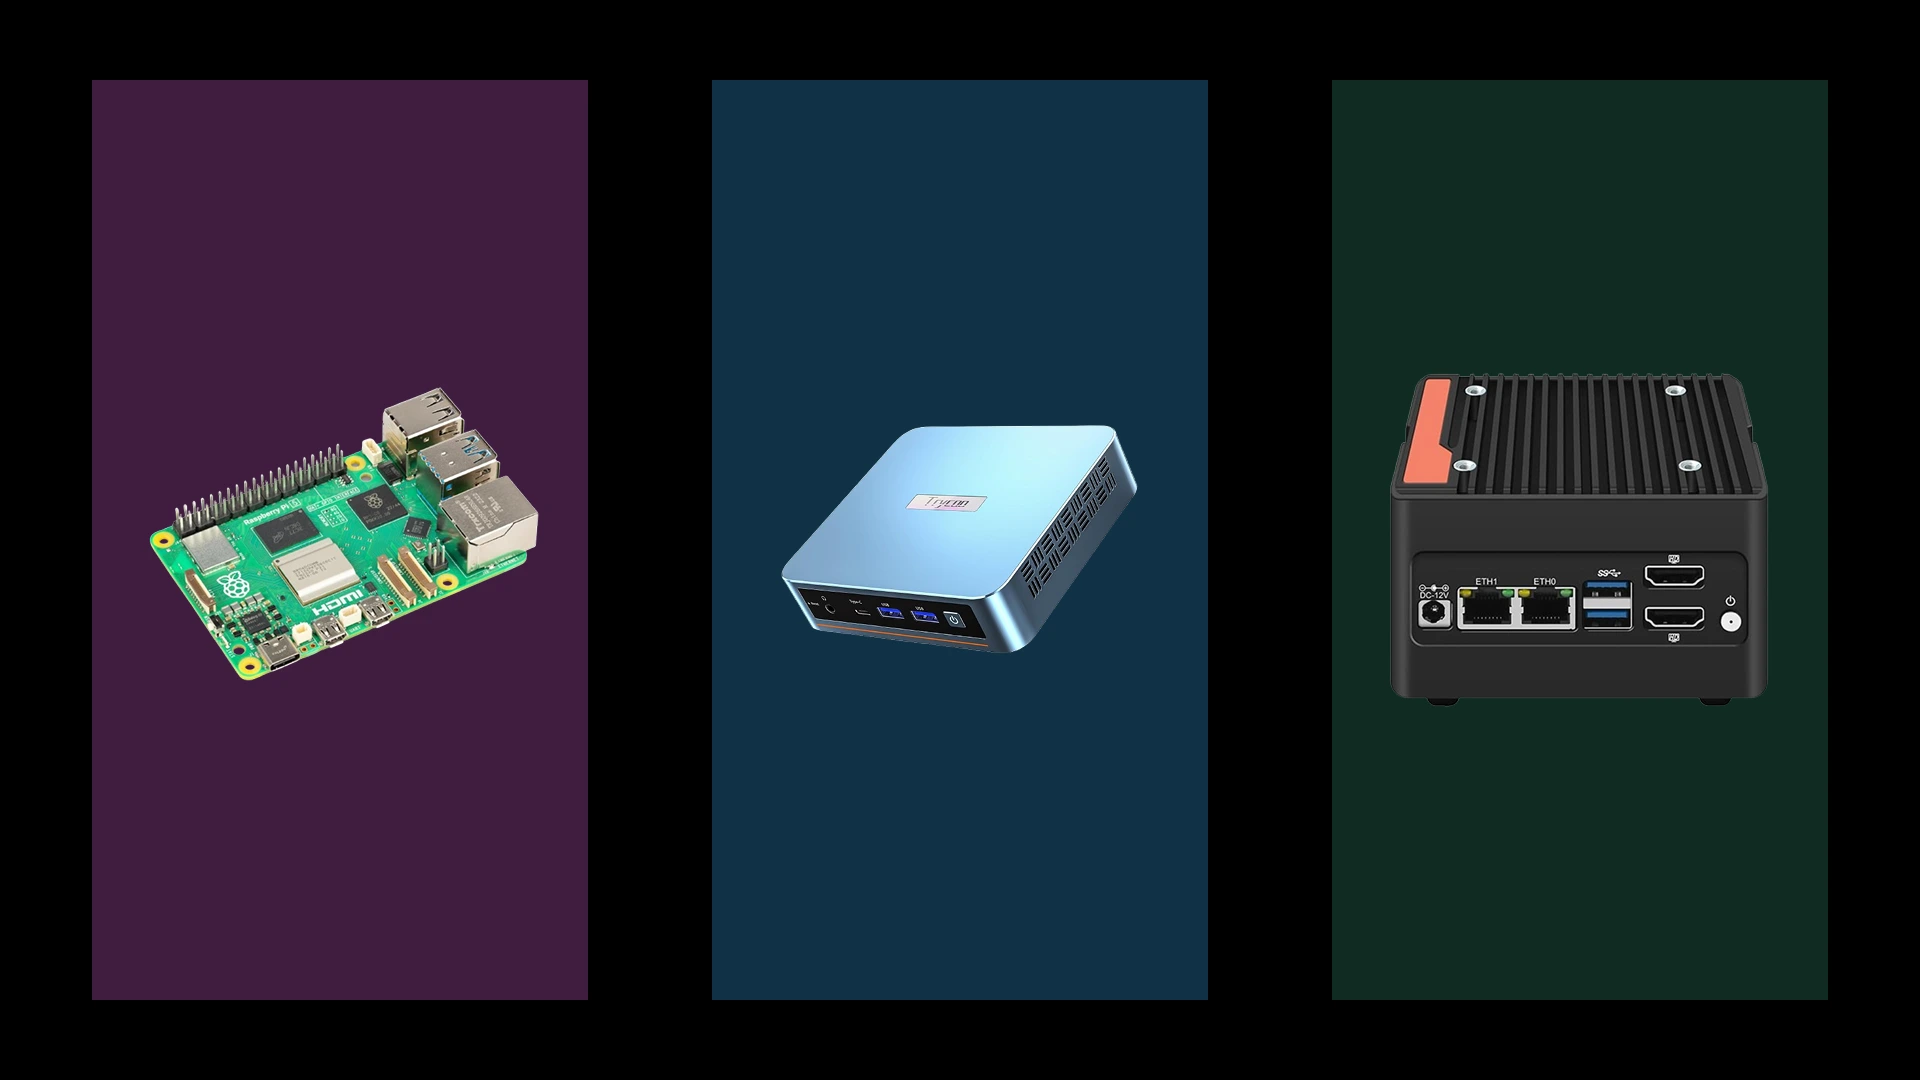
- Raspberry Pi 4/5 Cluster: Ideal for learning Kubernetes orchestration, acting as an IoT hub, or serving DNS with Pi-hole. A four-node cluster consumes a remarkably low 20- 30W total. However, it’s crucial to acknowledge their limitations; performance is hampered by SD card storage, and integrated NVMe support requires an additional HAT 9. For a reliable setup, industrial-grade microSD cards or an NVMe solution are recommended investments 5.
- Intel NUC Series & Modern Mini PCs: 11th and 12th Gen Intel NUCs, along with contenders like the GMKtec NucBox, offer a significant performance leap over Pis while remaining in a low-power envelope (idling as low as 4W for some older models and typically 10-25W under load for newer ones). Their x86 architecture ensures broad software compatibility, making them perfect for Docker hosts and development environments. The Intel NUC Vs Raspberry Pi homelab debate often concludes that for a desktop-like experience and easier software setup, a used or new mini PC provides better value and performance per dollar, despite a slightly higher initial cost 59.
- Power Cost Analysis: The financial advantage of this tier is undeniable. At a rate of $0.12/kWh, a system idling at 10W costs approximately $10.50 per year to run 24/7. A 25W system raises that to around $26 annually. This makes them ideal for long-term, always-on projects where operational cost is a primary concern.
Tier 2: The Sweet Spot (25-65W) – Best Value RECOMMENDED
This tier, dominated by refurbished business-class machines, offers the best balance of performance, expandability, and efficiency for most homelab enthusiasts, forming the core of a versatile homelab setup.
- Refurbished SFF Business PCs: These ex-corporate workhorses are the backbone of value-driven homelabs. Models like the Dell OptiPlex 7040/7050 Micro (6th/7th Gen Intel), HP EliteDesk 800 G3/G4, and Lenovo ThinkCentre M920q are widely available. They often include 16-32GB of RAM, SSDs, and a legitimate Windows license for under $150 41. Their key advantage is professional build quality, excellent Linux support, and a tiny form factor (1L) that fits anywhere.
- Performance and Efficiency: Don’t let their size fool you. An Intel i5-6500T in a Dell OptiPlex can idle around 3.5-7W when properly tuned with Linux and power management tools like powertop. Under typical homelab loads, they consume a very reasonable 25-50W. AMD-based models like the HP EliteDesk 705 G4 (with a Ryzen 3 PRO 2200GE) offer great multi-core performance but may idle slightly higher, around 10-12W.
- Upgrade Path: This is where these units shine. They typically support:
- RAM: Up to 32GB or 64GB (model dependent).
- Storage: Multiple internal bays for 2.5″ SSDs/HDDs and often an M.2 NVMe slot.
- Expansion: A PCIe slot (often low-profile) for adding a dual-port NIC for network segmentation or a SATA controller.
Tier 3: Performance Focused (65-150W) – For Power Users
When your ambitions include heavy virtualisation, AI model training, or large-scale media transcoding, this tier provides the necessary horsepower.
- Custom Workstation Builds: Building a system around a modern CPU like the AMD Ryzen 7 5700G or Intel i5-12400 offers incredible performance flexibility. These platforms support vast amounts of RAM (128GB+), multiple PCIe slots for HBAs and GPUs, and offer a powerful foundation for Proxmox or TrueNAS Scale. A key consideration for a low-power homelab server build in this tier is choosing a CPU with a balanced TDP and optimising the system for idle efficiency, as the difference between idle and full-load consumption can be significant.
- Entry Rackmount Servers: Options like the Dell PowerEdge T140 (tower) or HPE ProLiant MicroServer Gen10+ offer enterprise features like IPMI for remote management and official support for ECC memory, which can be crucial for protecting data integrity in a NAS setup 10. However, be mindful of the homelab power consumption comparison; older rackmount servers (e.g., Dell R720) are often power-hungry and loud, making them poor choices for a home office.
- GPU Considerations: Adding a GPU for AI (e.g., NVIDIA RTX 4060) or transcoding (NVIDIA P2000) dramatically increases power draw. A GPU can add 115W+ to your system’s baseline. The decision hinges on weighing this increased power cost against the performance benefits for your specific workloads.
Hardware Selection Flowchart
Use this decision tree to identify your ideal starting point based on primary constraints and goals:
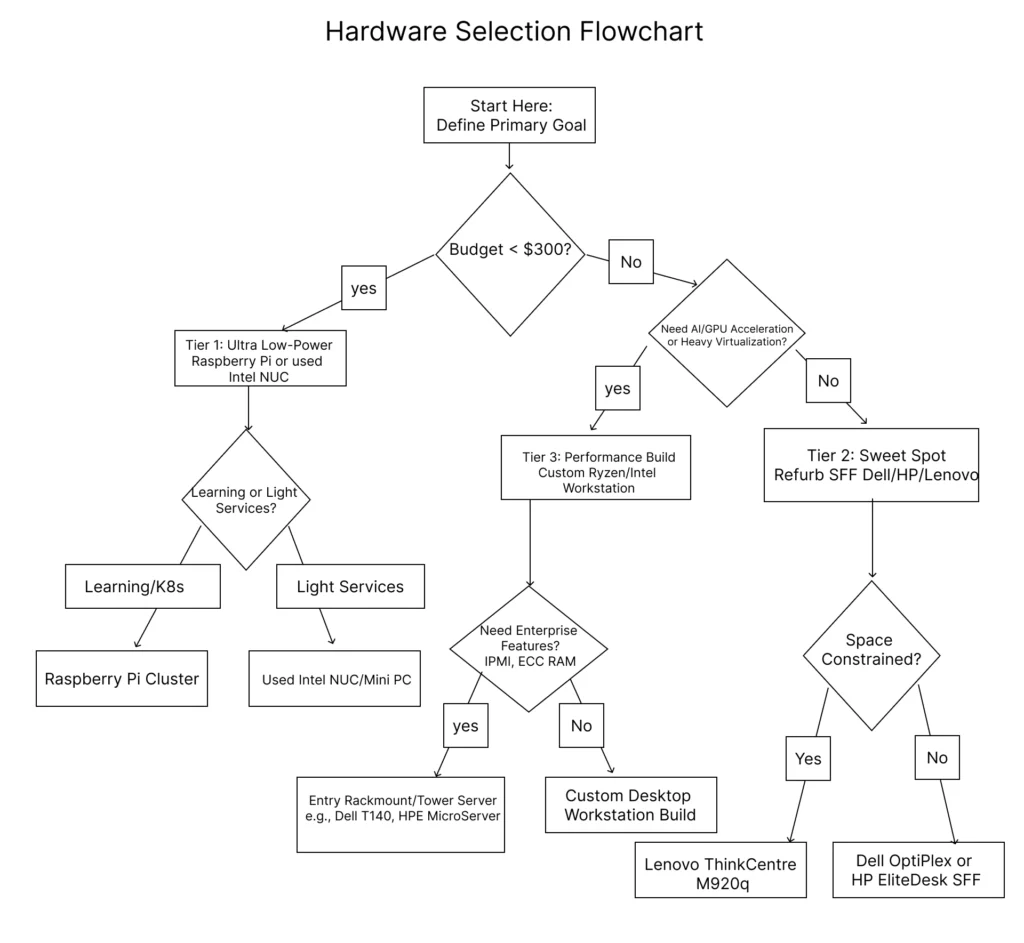
Where to Buy: Trusted sources for refurbished gear include specialised refurbishers with warranties, corporate liquidators on eBay, and local marketplaces. Always verify specifications and check for vendor testing logs when possible.
Final Recommendation: For most enthusiasts, a Tier 2 refurbished SFF PC from Dell, HP, or Lenovo represents the ideal entry point. It provides a potent, reliable, and upgradeable platform with a negligible power footprint, allowing you to explore the vast majority of homelab projects without fiscal or electrical guilt.
Phase 3: Homelab Software & Virtualisation Foundation
The software layer is the intelligence that transforms your carefully selected hardware into a dynamic, powerful, and scalable homelab platform. Your choice of virtualisation technology will define your lab’s capabilities, management complexity, and learning potential. This section provides a comprehensive analysis of the best hypervisor for homelab use in 2025 and delivers practical, step-by-step guidance for building a robust software foundation.
Hypervisor Selection Matrix
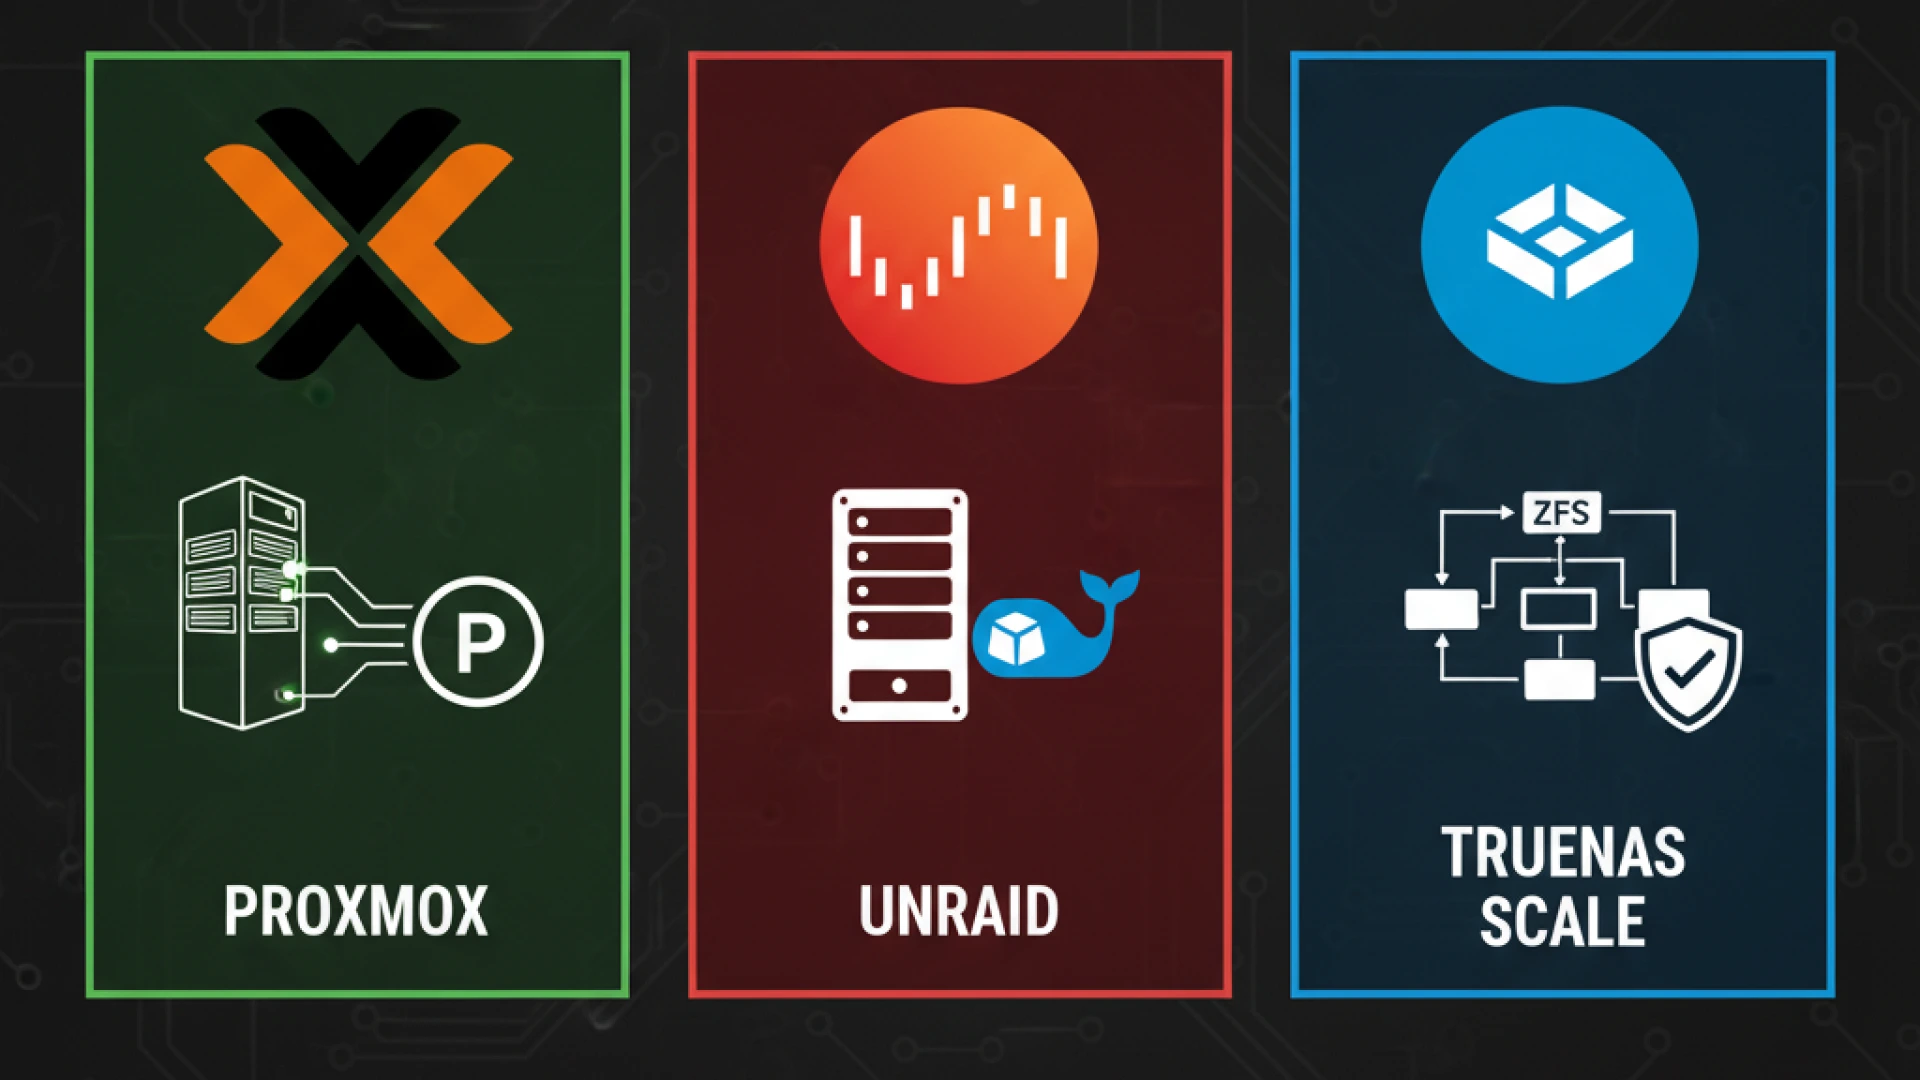
| Feature | Proxmox VE ( RECOMMENDED) | VMware ESXi | TrueNAS SCALE | Unraid |
|---|---|---|---|---|
| License | Open Source (Free) | Paid Subscription / Limited VMUG | Open Source (Free) | Paid ($59+) |
| Core Strength | Integrated KVM VMs + LXC containers | Enterprise Standard & Features | ZFS Storage + KVM VMs | User-Friendly + Flexible Storage |
| Best For | Cost-effective, all-in-one labs | Enterprise skills development | Storage-first homelabs | Media servers & beginners |
| Backup | Built-in (Proxmox Backup Server) | Requires 3rd party (e.g., Veeam) | Integrated Snapshots | Community Plugins |
- Proxmox VE ( RECOMMENDED): This Debian-based platform is the unequivocal top choice for modern homelabs. As an open-source solution, it provides enterprise-grade features like high-availability clustering, live migration, and a unified web interface for both KVM-based virtual machines and lightweight LXC containers without any licensing cost. Its integrated backup solution and support for powerful storage technologies like ZFS and Ceph make it exceptionally versatile for a wide range of homelab project ideas.
- VMware ESXi: The long-time industry standard, now under Broadcom, has undergone significant licensing changes. The free version has been discontinued, making it less accessible for hobbyists. The VMUG Advantage program (approx. $200/year) remains a viable path for those requiring dedicated experience with the vSphere ecosystem for professional development. The ongoing Proxmox vs VMware ESXi 2025 debate increasingly favours Proxmox for home users due to cost and openness, though ESXi retains an edge in certain enterprise feature sets.
- TrueNAS SCALE: This platform is ideal for builders who prioritise data integrity and storage management. It combines the legendary ZFS file system with gradually improving KVM virtualisation capabilities. It’s a perfect choice for a NAS-centric homelab that also requires the ability to run a handful of virtual machines or applications.
- Unraid: Known for its incredibly user-friendly interface and unique flexible storage array management (which allows for mixing drive sizes), Unraid requires a paid license. It excels in media server deployments and straightforward Docker container management but lacks the advanced networking and clustering features found in Proxmox or ESXi.
Proxmox Deep Dive
Installation Walkthrough:
To successfully install Proxmox step by step, begin by downloading the latest ISO image from the official website. Use a tool like Rufus or BalenaEtcher to create a bootable USB drive.
- Boot and Configure: Insert the USB drive and boot your server, entering the BIOS/UEFI to enable virtualisation extensions (Intel VT-x/AMD-V) and ensure booting from the USB is prioritised.
- Run Installer: Select “Install Proxmox VE” from the boot menu. The graphical installer will guide you through accepting the EULA, selecting the target disk (for best performance on a dedicated machine, choose to use the entire disk), and setting your locale and time zone.
- Critical Network Setup: Assign a static IP address, gateway, and DNS server for stable management access. Note the provided URL (
https://[IP]:8006). - Complete Installation: Set a strong password for the
rootuser, provide an email for system notifications, and review the summary before proceeding. The process typically completes within 20 minutes. After rebooting, remove the installation media.
First VM Creation:
Creating your first Ubuntu Server VM establishes foundational best practices.
- In the web interface, download an Ubuntu Server ISO under the
localstorage node. - Click “Create VM,” assign a unique ID and name.
- On the OS tab, select the downloaded ISO image.
- Allocate resources: Minimum 2 vCPUs, 2-4GB RAM, and a 20GB+ disk using the VirtIO SCSI controller for optimal performance.
- On the Network tab, keep the default VirtIO (paravirtualized) model for best throughput.
- Before starting the VM, under
Hardware, add aCloud-Initdevice to automate initial guest OS configuration if desired.
LXC Containers:
Understanding the LXC vs Docker containers distinction is key. LXC containers provide system-level virtualisation, offering a full, minimal Linux OS environment with negligible overhead. They are perfect for hosting services that expect a standard Linux filesystem layout or require systemd. Proxmox provides a vast library of pre-made templates for various distributions, downloadable directly from the web interface.
Backup Strategy:
Proxmox’s built-in backup system is a major advantage. You can schedule automated backups for VMs and containers to run during off-hours, storing them on local storage, an NFS share, or a dedicated Proxmox Backup Server (PBS) instance for enterprise-grade deduplication, encryption, and efficient pruning of backup cycles.
Container Revolution
Docker Installation:
The choice of where to run Docker inside a Proxmox VM or an LXC container impacts stability and performance.
- Virtual Machine (Recommended for Beginners): Offers complete isolation, stability, and avoids the security complexities of privileged LXC containers. The overhead is minimal on modern hardware.
- LXC Container: Offers superior density and performance, but requires running a privileged container, which elevates security considerations.
To install Docker inside an Ubuntu VM, SSH into it and run:
bash
sudo apt update && sudo apt install -y docker.io
sudo systemctl enable --now docker
sudo usermod -aG docker $USER  # Log out and back in for this to take effect
Portainer Deployment:
A Portainer setup guide is essential for managing Docker through a web GUI instead of the CLI. Deploy it as a container itself with a single command:
bash
newgrp docker
docker run -d -p 8000:8000 -p 9443:9443 --name portainer --restart=always -v /var/run/docker.sock:/var/run/docker.sock -v portainer_data:/data portainer/portainer-ce:latest
Access the web UI at https://your-vm-ip:9443, create an admin user, and connect to the local Docker environment. Portainer simplifies managing images, containers, networks, and volumes.
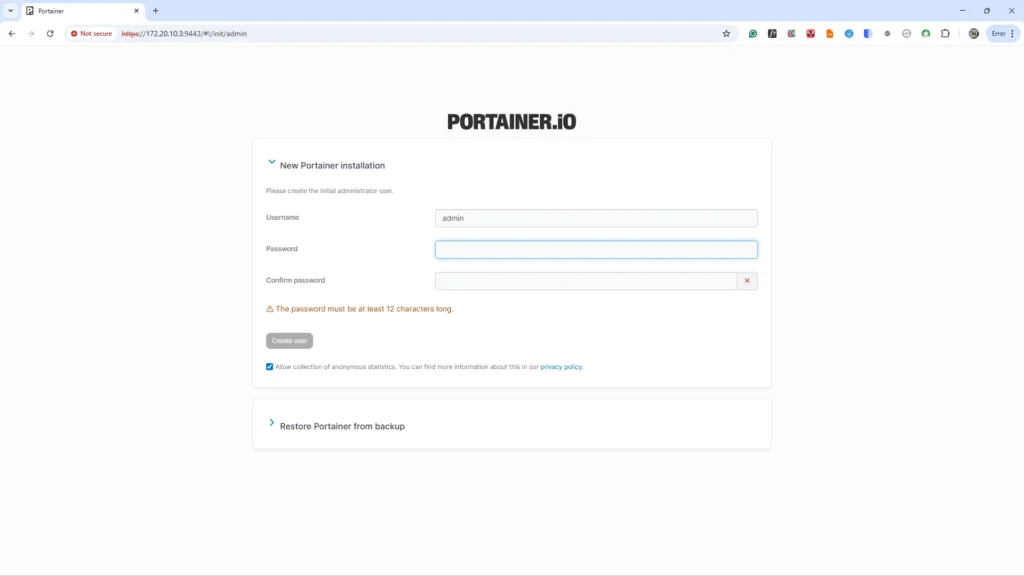
Portainer admin account creation.
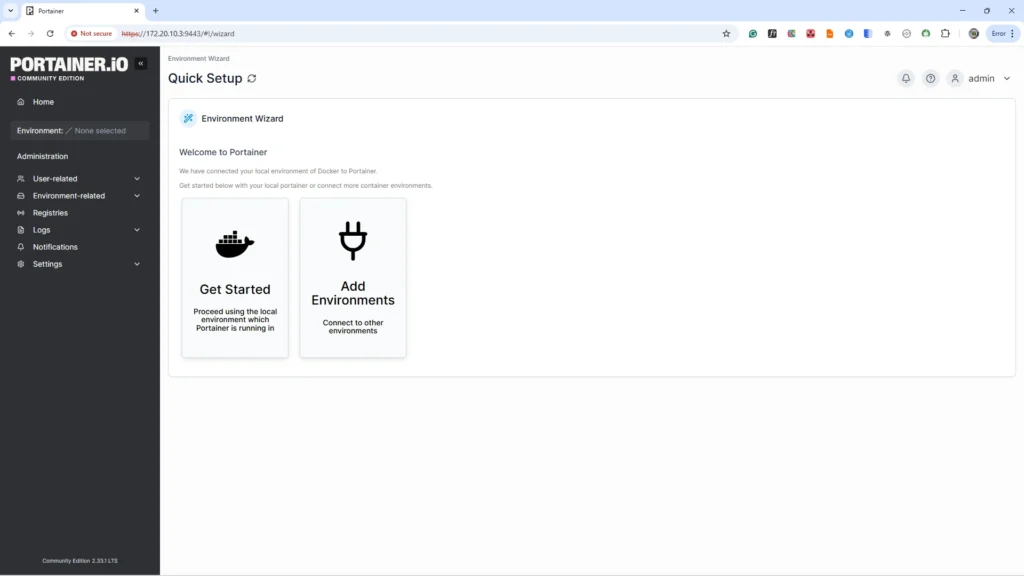
Container Revolution: Mastering Multi-Service Deployments
While individual containers are powerful, the true potential of your homelab is unlocked by orchestrating multiple services to work together. This is where Docker Compose transforms complexity into simplicity.
Docker Compose Basics
This Docker homelab tutorial would be incomplete without Docker Compose. It allows you to define a complete multi-container application stack, including web servers, databases, and caches, in a single, declarative YAML file (docker-compose.yml). This file acts as a blueprint, making your deployments perfectly reproducible, easily version-controlled in Git, and simple to manage.
Getting Started with a Compose File:
- Project Structure: Create a dedicated directory for your application (e.g.,
~/homelab/myapp). This becomes your project root. Place yourdocker-compose.ymlfile here, along with any configuration subdirectories (e.g.,./config).
Example Structure for a Web App:
my_homelab_app/          # <-- This is your project root. Navigate here to run `docker compose up`
├── docker-compose.yml   # <-- The Compose file is placed here
├── web/                 # Directory for your web app code
│   ├── app.py
│   ├── requirements.txt
│   └── Dockerfile       # Dockerfile for building the web service
├── config/              # Directory for configuration files (e.g., nginx)
│   └── nginx.conf
└── db/                  # Directory for database initialisation scripts
    └── init.sql
- Basic Web Stack Example: The following YAML defines a simple web stack with your choice of database. Note the use of a named volume (
db_data) to ensure your database persists.
version: '3.8'

services:
  web:
    image: nginx:alpine
    ports:
      - "80:80"
    volumes:
      - ./config/nginx:/etc/nginx/conf.d # Bind mount for configs
    depends_on:
      - db # Ensures the database starts first

  db:
    # Option 1: Use PostgreSQL
    image: postgres:15
    environment:
      POSTGRES_DB: myapp
      POSTGRES_USER: user
      POSTGRES_PASSWORD: password
    volumes:
      - db_data:/var/lib/postgresql/data

    # Option 2: Use MariaDB (comment out the PostgreSQL section above)
    # image: mariadb:latest
    # environment:
    #   MYSQL_ROOT_PASSWORD: a_strong_root_password
    #   MYSQL_DATABASE: myapp
    #   MYSQL_USER: user
    #   MYSQL_PASSWORD: password
    # volumes:
    #   - db_data:/var/lib/mysql

volumes:
  db_data: # Named volume for database persistence
Note: It’s often better to pin a specific version for stability (e.g., mariadb:10.11).
- Deployment: Navigate to your project root directory in a terminal and deploy the entire stack with one command:
docker compose up -dThe -d flag runs the containers detached in the background. Docker Compose will pull the necessary images, create a dedicated network for these services, and start everything in the correct order.
Volume Management: The Key to Data Persistence
A fundamental Docker principle is that containers are ephemeral. Any data written inside a container’s writable layer is lost when the container is removed or recreated. For any homelab service where data is critical (databases, user uploads, application configs), you must use volumes.
There are two primary methods for managing persistent data:
- Docker Named Volumes (Recommended for Databases):
As shown in the Compose file, thedb_datavolume is declared at the bottom and mounted to the database container’s data directory (/var/lib/postgresql/dataor/var/lib/mysql).- Advantage: Fully managed by Docker. Easy to back up, migrate, and completely separate from the host filesystem’s structure.
- Ideal For: Database data files, internal application data.
- Bind Mounts (Recommended for Configuration):
The./config/nginx:/etc/nginx/conf.dline in the web service is a bind mount. It maps a directory on your host machine to a path inside the container.- Advantage: Easy to edit configuration files directly on the host system using your preferred text editor. Changes are reflected immediately in the container.
- Ideal For: Configuration files, live code development, and static website files.
Your Backup Strategy Must Include Volumes. The data stored in named volumes is not contained within your Compose file or container images. You must integrate these volumes into your broader homelab backup plan (e.g., using Proxmox Backup Server or a script to archive the volume data).
Homelab Security & Network Configuration
A robust security posture is non-negotiable for any modern homelab. A truly secure homelab setup 2025 implements a defence-in-depth strategy, creating multiple layers of protection that safeguard your infrastructure without sacrificing the accessibility that makes it useful. This approach ensures your lab remains a safe platform for experimentation and service hosting.
Network Segmentation: Building Defence in Depth
The cornerstone of modern network security is isolation. A proper VLAN setup for beginners involves logically separating your network into segments based on device function and trust level.
- Core VLAN Strategy: Create at least three distinct VLANs: a Management VLAN (VLAN 10) for hypervisors and switches, a Services VLAN (VLAN 20) for your self-hosted applications, and an IoT VLAN (VLAN 30) for smart devices and guests.
- Implementation: Configure a managed switch to tag traffic appropriately. Assign your Proxmox host’s management interface to the Management VLAN, while virtual machine network interfaces can be assigned to the Services or IoT VLANs based on their purpose.
- Benefit: This segmentation contains potential threats. A compromised IoT device is isolated from accessing your server management interfaces, significantly reducing your attack surface.
Firewall Essentials: Gateway Protection and Visibility
A dedicated firewall appliance is your network’s gatekeeper. A pfSense homelab configuration (or its open-source alternative, OPNsense) provides enterprise-grade filtering and monitoring capabilities.
- Policy Configuration: Establish default-deny rules between VLANs. Create explicit “allow” rules only for necessary communication (e.g., permitting your Management VLAN to access the Services VLAN, but blocking the IoT VLAN from initiating connections to anything else).
- Monitoring and Logging: Utilise the firewall’s built-in tools to monitor bandwidth usage, active connections, and blocked traffic. Enable detailed logging for all firewall rules to maintain an audit trail for diagnosing connectivity issues or identifying suspicious activity.
Remote Access: Secure Connectivity Without Exposure
Exposing management interfaces directly to the internet is a significant risk. A homelab VPN access tutorial must prioritise secure remote access.
- WireGuard VPN: Implement WireGuard for its high performance and modern cryptography. It can be run as a package directly on your pfSense/OPNsense firewall, providing seamless and secure access to your entire lab network from anywhere.
- Best Practices: Use key-based authentication and assign static IP addresses to VPN peers. Configure split tunnelling to only route traffic destined for your homelab through the VPN tunnel, preserving performance for general internet browsing on your remote device.
SSL/TLS: Encryption for All Services
Every web interface in your lab, whether accessed internally or externally, must use encrypted connections.
- Reverse Proxy & SSL Certificates: Implement a reverse proxy like Traefik or Nginx Proxy Manager. Its primary role is to terminate TLS encryption, handing off unencrypted traffic to the appropriate backend service.
- Automated Certificate Management: Use Let’s Encrypt to automatically obtain and renew reverse proxy SSL certificates. Configure the DNS challenge method to validate domain ownership, allowing you to generate valid certificates for internal server names without exposing them to the public internet. This provides a seamless, browser-trusted SSL experience for all your services.
Monitoring: Proactive Threat Detection and Response
Security requires vigilance. Proactive monitoring helps you identify and respond to threats before they cause damage.
- Intrusion Prevention with Fail2ban: Deploy fail2ban homelab security measures to protect exposed services like SSH. Fail2ban scans log files for repeated authentication failures and automatically modifies firewall rules to temporarily ban the offending IP address, thwarting brute-force attacks.
- Centralised Logging: Aggregate logs from your firewall, servers, and critical applications into a central system like Graylog. This enables you to correlate events across your entire infrastructure, making it far easier to spot sophisticated attacks or diagnose complex issues.
- Basic Intrusion Detection: For advanced users, integrate an Intrusion Detection System (IDS) like Suricata into your pfSense/OPNsense firewall. It performs deep packet inspection to identify known attack patterns and malware signatures within your network traffic.
By implementing this multi-layered security framework, you transform your homelab from a vulnerable hobby into a resilient, professional-grade environment. Regular reviews of firewall rules, vigilant updates, and consistent monitoring complete a security posture that protects your data and your peace of mind.
Homelab Automation Mastery – Set It and Forget It
Automation is the force multiplier that transforms your homelab from a time-consuming hobby into a self-managing, resilient infrastructure.
The true power of a modern homelab is realised when systems autonomously handle maintenance, updates, and recovery, freeing you to focus on innovation and learning rather than repetitive administrative tasks. This mastery of automation is the pinnacle of efficient homelab management.
Application Automation: Intelligent Container Management
Docker Compose Stacks elevate single-container deployments into sophisticated, multi-service applications with managed dependencies. Effective Docker Compose automation examples include complete media stacks (Plex, Sonarr, Radarr) or development environments (GitLab, CI/CD runners, a database), all defined with shared volumes, network isolation, and coordinated startup sequences.
- Modular Design: Create separate docker-compose.yml files for different application categories (e.g., media-stack/, monitoring/). This enables targeted updates and maintenance without impacting unrelated services.
- Configuration Management: Use
.envfiles to centralise configuration variables, making your deployments portable and version-control friendly across different environments.
Watchtower provides automatic updates for Docker containers by monitoring image registries and deploying new versions based on configurable schedules. Implement notification hooks to receive alerts on successful updates or failures requiring intervention. For critical services, configure Watchtower to only monitor for new images but require manual approval for deployment, ensuring stability without sacrificing security.
Health Checks & Self-Healing: Define robust health checks within your docker-compose.yml files. Coupled with Docker’s restart: unless-stopped policy, this creates a self-healing system where failed services are automatically restarted, often resolving transient issues without any manual intervention.
Infrastructure Automation: Configuration as Code
Ansible introduces agentless, idempotent configuration management, treating your infrastructure as code homelab. Ansible homelab playbooks eliminate manual, error-prone server configuration, ensuring absolute consistency across all your systems.
- Foundation Playbooks: Begin with playbooks for universal tasks: automating OS updates, managing user accounts, deploying SSH keys, and configuring baseline security settings.
- Service Deployment: Develop reusable playbooks for installing and configuring common dependencies like Docker, Nginx, or monitoring agents. This ensures every deployment is identical and documented within code.
- Proxmox Integration: Use Ansible’s dynamic inventory and Proxmox modules to automate the creation, configuration, and templating of virtual machines and containers, further extending the infrastructure as code paradigm to your entire lab.
Backup Automation: Protecting Your Investment
A robust 3-2-1 backup strategy (3 copies, 2 media types, 1 off-site) is only reliable if fully automated. Manual backup procedures are inevitably forgotten.
- Proxmox Backup Server (PBS): Leverage the built-in system to automate homelab backups of VMs and containers. Schedule daily incremental backups with weekly fulls, targeting a dedicated storage location, with automatic pruning of old backups.
- Application Data Backup: VM-level backups are not enough. Automate database dumps (using pg_dump or mysqldump), configuration exports, and Docker volume backups. Scripts should be scheduled via cron and their output verified.
- Testing & Verification: The most critical yet overlooked step. Periodically run automated restore procedures in an isolated environment to validate backup integrity and ensure your recovery process actually works.
Advanced Automation: Enterprise-Grade Practices
Terraform brings declarative infrastructure provisioning to the homelab. While Ansible configures systems, Terraform defines and creates them. Use it to codify the provisioning of cloud resources, VMs, and network configurations, providing a complete audit trail of your infrastructure’s state.
GitOps Workflow implements a homelab CI/CD pipeline tutorial concept. In this model, your Git repository becomes the single source of truth for both application and infrastructure code.
- Store your Ansible playbooks, Terraform configs, and Docker Compose files in a Git repository (e.g., on a self-hosted Gitea instance).
- Connect this repo to a CI/CD tool like Jenkins or Drone.
- Any push to the
mainbranch can automatically trigger a playbook run or deployment, applying changes to your lab. - This enables rollbacks, versioning, and a clear history of who changed what and when, the hallmark of professional infrastructure as code management.
By implementing these layers of automation, you achieve the ultimate homelab goal: a powerful, resilient platform that manages itself, allowing you to focus on leveraging it rather than merely maintaining it.
Self-Hosted AI & LLMs – Your Private ChatGPT
The AI revolution has arrived at your homelab’s doorstep, offering unprecedented opportunities to run sophisticated language models entirely within your private infrastructure. Building a private AI server transforms your homelab from a simple service platform into an intelligent assistant that rivals commercial offerings like ChatGPT, while maintaining complete privacy, control, and customisation over your data and experience.
Why Self-Host AI? The Compelling Case for Digital Sovereignty
The decision to self-host AI is driven by several powerful advantages that commercial cloud services cannot offer.
- Privacy Benefits: This is the paramount motivation. In a private AI server, every prompt, conversation, and generated response never leaves your local network. This ensures sensitive queries about personal finances, proprietary business code, or private documents are never processed, logged, or stored on corporate servers, providing true data sovereignty.
- Cost Analysis: While commercial services like ChatGPT Plus require a recurring $20/month subscription, a self-hosted ChatGPT alternative offers unlimited usage for a fixed hardware investment. For individuals or families using AI extensively, the initial cost of a capable GPU often pays for itself within 12-18 months, eliminating ongoing subscription fees.
- Customisation: Self-hosting unlocks the ability to fine-tune models on your specific data. You can train an assistant on your company’s internal documentation, your unique coding style, or a personal knowledge base, creating a truly personalised AI that understands your context far better than any generic service.
- Offline Capability: Your AI assistant remains fully functional during internet outages, in remote locations, or while travelling. This reliability is crucial for integrating AI into critical workflows where constant connectivity cannot be guaranteed.
Ollama Platform Deep Dive: The Foundation of Local AI
Ollama has emerged as the definitive platform for simplifying local AI deployment and management, making an Ollama homelab setup tutorial essential for beginners and experts alike.
- Installation Methods: Ollama can be deployed natively or via Docker. The Docker method is recommended for isolation and ease of management
docker run -d -v ollama:/root/.ollama -p 11434:11434 --name ollama ollama/ollamaThis containerised approach simplifies backups and integrates seamlessly with existing homelab infrastructure.
- Model Management: Ollama’s CLI is incredibly straightforward. To run Llama 3 locally, you simply use
ollama pull llama3:8bfor the 8-billion parameter version orollama pull llama3:70bfor the larger model if your hardware permits. Ollama handles downloading, verification, and storage automatically. - Performance Optimisation: For CPU-only systems, ensure you have ample RAM (16GB for 7B/8B models, 32GB+ for larger models). For GPU acceleration, Ollama supports NVIDIA cards out of the box. The key is having sufficient VRAM; an RTX 3060 (12GB) can comfortably run 7B/8B models, while an RTX 3090/4090 (24GB) is needed for 70B parameter models.
- Popular Models Comparison: The choice of model is a balance of size, speed, and capability.
- Llama 3 (8B & 70B): Meta’s latest offering, excellent at general reasoning and coding.
- Mistral (7B): Noted for its efficiency and strong performance despite its smaller size.
- CodeLlama: Specialised for programming tasks and code generation.
- Phi-3: Microsoft’s small but highly capable model, perfect for running on limited hardware.
User Interfaces: The Gateway to Your AI
A powerful model needs a friendly face. A good web interface is what transforms a command-line tool into a daily driver.
- Open WebUI: This is the most polished and feature-complete self-hosted ChatGPT alternative. Its Open WebUI installation guide is simple, typically involving a single Docker command:
docker run -d -p 3000:8080 -v open-webui:/app/backend/data --name open-webui ghcr.io/open-webui/open-webui:mainIt offers a beautiful, intuitive chat interface, multi-user support with admin controls, conversation history, document upload for context-aware chatting, and a robust plugin system.
- Alternative Interfaces: For different use cases, LibreChat offers support for multiple AI providers simultaneously, while Chatbot UI provides a more minimalist, focused experience. Purists can always interact directly via the terminal with
ollama run <model_name>. - API Integration: Ollama provides an OpenAI-compatible API endpoint, making it a drop-in replacement for hundreds of applications that already support ChatGPT. This allows you to integrate your private AI into existing tools, scripts, and workflows seamlessly.
Hardware Requirements Matrix: Right-Sizing Your AI Workstation
Choosing the right hardware is critical for a smooth experience. The following table provides a clear guideline for different performance tiers and model sizes.
| Model Size (Parameters) | Minimum RAM (CPU) | Recommended RAM/VRAM (GPU) | Example GPU | Storage per Model | Experience |
|---|---|---|---|---|---|
| 7B-8B (e.g., Llama 3 8B) | 16 GB | 8-12 GB VRAM | RTX 3060, RTX 4060 Ti | ~4-5 GB | Good speed and quality for most tasks |
| 13B-20B | 32 GB | 16-20 GB VRAM | RTX 4090 (24GB) | ~8-12 GB | High-quality output, better for complex tasks |
| 34B-70B | 64 GB+ | 2x GPU (e.g., 2×3090) | NVIDIA RTX 3090 (24GB) in tandem | ~20-40 GB | Near-state-of-the-art quality, slower inference |
Storage Needs: Fast NVMe storage is highly recommended. A model library can quickly grow to 200GB+ as you experiment with different models. Allocate at least 50GB for your initial setup with room to expand.
Practical AI Projects: Beyond Basic Chat
The true power of a local AI is unlocked when you integrate it into your daily digital life.
- Personal Knowledge Base (RAG): Implement Retrieval Augmented Generation (RAG) by ingesting your PDFs, notes, and documentation into a local vector database (like ChromaDB). This allows you to ask questions in natural language and get answers based solely on your private documents, a revolutionary way to interact with your own information.
- Home Automation Integration: Process data from smart home sensors, calendars, and weather APIs through your local AI to make intelligent, automated decisions like adjusting the thermostat based on predicted activity or optimising energy usage, all without sending data to the cloud.
- Code Assistant: Use specialised coding models like CodeLlama as a fully local alternative to GitHub Copilot. Integrated into VS Code via extensions, it provides real-time code suggestions, documentation, and debugging help while ensuring your proprietary code never leaves your machine.
By building your self-hosted AI ecosystem, you gain more than just a tool; you gain a powerful, private, and personalised digital partner that operates entirely under your control.
Power Optimisation & Cost Reduction Strategies
Electricity consumption can quickly transform an exciting homelab project into a significant monthly expense. Implementing intelligent power optimisation strategies is therefore essential, capable of reducing homelab electricity costs by 30-60% while maintaining full functionality. These techniques not only pay for themselves but also provide invaluable experience in enterprise-grade efficiency management.
Power Measurement & Monitoring: Establishing a Baseline
Effective optimisation begins with precise measurement. You cannot manage what you do not measure.
- Hardware Tools: Employ a Kill-a-Watt meter homelab setup to get precise, real-time power readings for individual devices. These inexpensive devices instantly identify the biggest energy drains. For continuous monitoring, use smart plugs with energy monitoring (e.g., TP-Link Kasa, Shelly Plug) that provide historical data and can often be integrated into automated dashboards.
- Software Monitoring: Utilise tools like PowerTOP and htop to analyse software-level inefficiencies. PowerTOP, in particular, reveals detailed CPU power state (C-state/P-state) residency and identifies processes that prevent efficient CPU power scaling in Linux. Running
sudo apt update sudo apt install powertop sudo powertop --calibrateestablishes an accurate baseline for your specific hardware. - Cost Calculation: Use your measurements to run a real-world cost analysis. A 100W system costs approximately $105 annually at $0.12/kWh. This exercise quantifies the problem and helps justify investments in more efficient hardware.
Hardware Optimization: Maximizing Efficiency per Component
The most effective savings come from selecting and configuring efficient hardware.
- CPU Power Management: The CPU is often the largest consumer. Force maximum efficiency by configuring the Linux kernel’s powersave governor, which minimises clock speeds during idle periods. This can be managed via cpufrequtils or automatically by tools like TLP. Proper CPU power scaling Linux configuration is the single most impactful software tweak.
- Storage Optimisation: Solid-State Drives (SSDs) consume a fraction of the power of traditional Hard Disk Drives (HDDs). Migrate your OS and frequently accessed services to SSDs. For large, cold-storage HDDs, implement a hard drive spin-down setup using hdparm -S to put drives to sleep after short periods of inactivity (e.g., 5-10 minutes), drastically cutting their power draw.
- Network Equipment: Modern, managed switches with Energy-Efficient Ethernet (EEE) support can significantly reduce power during low-traffic periods. An older, unmanaged gigabit switch might draw 15-20W, while a new, efficient model may use only 5-8W.
- Cooling Considerations: Optimise fan curves in the BIOS or with utilities like
fancontrol(part of the lm-sensors package). Aggressive cooling wastes electricity; a properly configured curve balances thermals and acoustics with minimal energy use.
Software Power Management: OS-Level Efficiency Gains
The operating system provides numerous levers to pull for greater efficiency.
- Linux Power Utilities: Install and enable TLP for excellent out-of-the-box power savings on Linux hosts (
sudo apt install tlp && sudo systemctl enable tlp). It automatically manages CPU scaling, PCIe Active State Power Management (ASPM), and USB autosuspend. For fine-tuning, PowerTOP’s –auto-tune feature can temporarily enable every available power-saving setting. - VM/Container Efficiency: Right-size your virtual machines and containers. Allocating excessive vCPUs and RAM prevents the host from entering low-power states. Use Docker
--cpusand--memoryflags to constrain container resources based on actual needs. - Service Scheduling: Schedule intensive tasks like backups, batch processing, and updates for off-peak hours (e.g., overnight). This allows the system to work hard in a condensed period and remain in low-power idle states for longer.
Automation for Efficiency: Intelligent Power Management
Automation transforms static configurations into dynamic, smart systems.
- Wake-on-LAN (WOL): Implement Wake-on-LAN automation for non-critical, high-power devices. A server can remain powered off until a scheduled task or a user request triggers a magic packet to wake it. Configure it with ethtool -s eth0 wol g and ensure your BIOS supports it.
- Scheduled Shutdown/Startup: Use simple cron jobs or systemd timers to automatically shut down entire machines or specific services during predictable periods of inactivity (e.g., weekdays 9 AM-5 PM if you’re at work).
- Load Balancing: Consolidate services onto your most efficient hardware (e.g., a modern Intel NUC). Reserve powerful, energy-hungry machines only for tasks that genuinely require their performance.
Real-World Case Studies: Proof of Concept
- Before/After Analysis: A documented case study replaced an old Intel Xeon server (idling at 120W) with a modern Intel NUC (idling at 8W). For a homelab running 10 lightweight services, this change resulted in annual savings of over $120, paying for the new hardware in under two years.
- ROI Calculations: The return on investment for efficiency upgrades is often compelling. Spending $500 on a new, efficient mini-PC to replace an old server that draws 100W more power will have a payback period of roughly
$500 / ($0.12/kWh * 0.1kW * 24hr * 365days) ≈ 1.9 years. After that, the savings are pure profit.
By methodically applying these strategies, measuring consumption, optimising hardware and software, and implementing automation, you can build a powerful homelab that is both capable and cost-effective to operate.
Backup Strategy & Disaster Recovery
A robust backup strategy is the most critical insurance policy for your homelab. It transforms potential catastrophic data loss from hardware failure, human error, or ransomware into a minor, recoverable incident. Implementing a comprehensive homelab backup strategy guide ensures that your investment of time and resources is protected, providing peace of mind and enabling rapid recovery.
The 3-2-1 Rule: The Foundation of Data Resilience
The cornerstone of any reliable strategy is the 3-2-1 backup rule homelab principle. This time-tested framework mandates:
- 3 Copies of Data: Your primary live data plus at least two backup copies.
- 2 Different Media Types: Protect against media-specific failures by storing backups on different media (e.g., SSD for performance, HDD for capacity, and cloud or tape for offsite).
- 1 Copy Off-Site: Safeguard against local disasters like fire, flood, or theft by keeping one copy geographically separate.
Implement this rule systematically. Classify your data and systems into tiers based on their criticality and required Recovery Time Objective (RTO). This ensures the most important services are prioritised for the most frequent and robust backups.
Proxmox Backup Server: Enterprise-Grade Protection
For homelabs running Proxmox VE, a Proxmox Backup Server (PBS) setup is the optimal solution for protecting virtual machines and containers. PBS offers deduplication, encryption, and efficient incremental backups, drastically reducing storage needs and bandwidth.
- Setup & Configuration: Deploy PBS as a dedicated VM or on a separate physical machine with ample storage, preferably configured with ZFS for data integrity. Connect your Proxmox VE host to the PBS server for centralised management.
- Automation is Key: The true power of PBS is its ability to automate VM backups. Create backup jobs with defined schedules (e.g., nightly incrementals, weekly fulls) and sensible retention policies (e.g., keep 30 daily, 12 weekly, and 12 monthly backups). Always schedule these jobs during low-usage periods to minimise performance impact.
Application Data Backup: Beyond System Images
While PBS excels at full-system recovery, application-level backups are crucial for granularity and data consistency.
- Database Backups: Use dedicated tools like
pg_dumpfor PostgreSQL ormysqldumpfor MySQL within your VMs or containers. Automate these dumps via cron jobs and integrate the resulting files into your main backup stream to PBS or another destination. - Container Persistent Data: For Docker, ensure all critical application data (e.g., configs, databases) is stored in named volumes or bind mounts that are explicitly included in your backup routines.
- Configuration as Code: The most effective backup is a redeployable system. Store all your configurations, Docker Compose files, Ansible playbooks, and service settings in a version-controlled Git repository. This is as important as backing up your data.
Testing & Verification: The Only Way to Be Sure
A backup is useless if it cannot be restored. The most critical yet often skipped step is to regularly test homelab backup restore procedures.
- Schedule Restore Tests: Quarterly, perform a recovery drill. Restore a VM or a critical application to an isolated network to verify the process works and the data is intact.
- Document the Process: Maintain clear, step-by-step runbooks for recovering each major service. This documentation is invaluable during the stress of a real disaster.
- Automate Verification: Leverage PBS’s built-in verification features to automatically check the integrity of backup files, ensuring they are not corrupted.
Off-site Solutions: Completing the 3-2-1 Rule
A local backup is not enough. You must implement offsite backup solutions to guard against physical disasters.
- Cloud Storage: Services like Backblaze B2 or AWS S3 Glacier are cost-effective destinations for your most critical backups. PBS can sync backups directly to these services.
- Physical Media Rotation: For ultimate control and cost, use encrypted external hard drives. Automate the backup to the drive and then physically rotate it to a remote location (e.g., office, family member’s house) on a regular schedule.
- Remote Server: If you have access to another location with internet access (a “friend’s lab”), you can set up a second PBS instance for a fully private, off-site backup solution.
By methodically implementing this layered approach, adhering to the 3-2-1 rule, leveraging powerful tools like Proxmox Backup Server, and rigorously testing your recovery process, you build a homelab that is not just powerful but also resilient and trustworthy.
Complete Project Walkthrough: Automated Media & AI Hub
This complete homelab project build integrates all the concepts from previous sections into a single, cohesive, and intelligent entertainment platform. By combining a robust media server with a private AI, you will create a self-hosted entertainment server that provides immense value and showcases the full potential of a modern homelab.
Project Architecture Overview: An Integrated Ecosystem
The architecture for this media server with AI integration is built on four pillars that work in concert:
- The Services Stack: The core of the project is a curated set of services. Jellyfin serves as the media streaming engine, while Ollama provides the local AI brain for content recommendations and smart interactions. This core is supported by the arr stack (Sonarr, Radarr, Prowlarr) for automation and a monitoring suite (Prometheus/Grafana) for observability.
- The Network Design: Security and accessibility are handled by a reverse proxy (Traefik or Nginx Proxy Manager). This manages SSL certificates automatically via Let’s Encrypt, providing secure access via easy-to-remember URLs like
jellyfin.yourdomain.comandai.yourdomain.com. - The Storage Strategy: A clear separation of data is crucial for performance and backups. High-capacity, possibly slower, drives store the media library. Faster SSDs host application data, databases, and the AI models. All configurations are stored in version control as part of an Infrastructure-as-Code approach.
Step-by-Step Implementation: A Production-Ready Deployment
The entire system is defined and deployed using Docker Compose, ensuring reproducibility and ease of management.
The Complete Docker Compose File:
This Jellyfin Docker Compose setup is a foundation for a production-ready media server. The following docker-compose.yml demonstrates key principles: defined networks, persistent volumes, and service dependencies.
version: '3.8'

services:
  jellyfin:
    image: jellyfin/jellyfin:latest
    container_name: jellyfin
    networks:
      - homelab_net
    environment:
      - PUID=1000
      - PGID=1000
      - TZ=America/New_York
    volumes:
      - jellyfin_config:/config
      - jellyfin_cache:/cache
      - /path/to/your/media:/media:ro # Read-only mount for media
    restart: unless-stopped
    labels:
      - "traefik.enable=true"
      - "traefik.http.routers.jellyfin.rule=Host(`jellyfin.yourdomain.com`)"
      # ... More Traefik labels for SSL

  ollama:
    image: ollama/ollama:latest
    container_name: ollama
    networks:
      - homelab_net
    volumes:
      - ollama_data:/root/.ollama
    restart: unless-stopped
    deploy: # Use resources to constrain the AI
      resources:
        limits:
          memory: 16G

  open-webui:
    image: ghcr.io/open-webui/open-webui:main
    container_name: open-webui
    networks:
      - homelab_net
    environment:
      - OLLAMA_BASE_URL=http://ollama:11434
    volumes:
      - openwebui_data:/app/backend/data
    restart: unless-stopped
    depends_on:
      - ollama
    labels:
      - "traefik.enable=true"
      - "traefik.http.routers.openwebui.rule=Host(`ai.yourdomain.com`)"

  sonarr:
    image: lscr.io/linuxserver/sonarr:latest
    # ... Configuration for the *arr stack follows similar patterns

volumes:
  jellyfin_config:
  jellyfin_cache:
  ollama_data:
  openwebui_data:

networks:
  homelab_net:
    name: homelab_net
Initial Setup:
- With the Compose file in place, run
docker compose up -dto launch the stack. - Access Jellyfin at its URL, complete the initial wizard, and configure your media libraries.
- Follow an Ollama Open WebUI tutorial to pull your first model. SSH into your server and run:
docker exec -it ollama ollama pull llama3.2:1b # Start with a small, efficient model- Access Open WebUI, create a user, and confirm it can communicate with the Ollama backend.
Automation Integration:
The magic of a hands-off media server comes from the Arr Stack Docker automation. Deploy Sonarr (for TV), Radarr (for movies), and Prowlarr (as a central indexer). Configure them with your desired quality profiles and connect them to a download client (like qBittorrent). Once integrated, these tools will automatically search, download, rename, and organise content based on your specifications.
Advanced Features: Making the Hub Intelligent
- AI Enhancement: The true AI integration begins here. With Ollama and Open WebUI running, you can develop custom scripts that use the API to analyse your media library. Imagine a script that asks the local AI to “suggest a dark comedy from the 2010s based on my high-rated movies” and automatically generates a smart playlist in Jellyfin.
- Home Assistant Integration: Elevate your experience by connecting your hub to Home Assistant. Create automations that dim the lights, lower the projector screen, and sound a chime when you press “play” on a movie. This turns viewing into an event.
- Monitoring Stack: Maintain visibility with Grafana dashboards. Monitor key metrics: Jellyfin’s stream count and transcoding load, Ollama’s memory usage and response latency, and the overall health of your Docker host. Set up alerts to notify you of any service failures.
- Mobile & Secure External Access: Configure your reverse proxy and firewall rules to allow secure external access. Use a VPN (recommended for full security) or carefully configured reverse proxy rules to access your Jellyfin and AI interfaces from your phone anywhere in the world, knowing your data and interactions remain entirely private.
This project is the culmination of the homelab journey: a powerful, automated, and intelligent platform that you fully control, providing entertainment and utility back to your daily life.
Troubleshooting & Maintenance Guide
Even the most meticulously built homelab will eventually encounter issues. A systematic approach to diagnosing problems and performing preventive care transforms potential crises into manageable routines. This guide provides a structured methodology for identifying and resolving common homelab problems, ensuring your lab remains stable and performant.
Common Hardware Issues: Diagnosing Physical Problems
Hardware failures are often the root cause of instability. Methodical diagnosis is key.
- Boot Problems: Systems that fail to POST or hang during initialisation require a physical check. Reseat RAM modules, check all power supply connections, and verify storage cables. After a power outage, check the BIOS settings to ensure virtualisation extensions (VT-x/AMD-V) are still enabled and the correct drive is set as the primary boot device.
- Network Connectivity: When services become unreachable, start with the physical layer. Swap Ethernet cables and try different switch ports. Use diagnostic commands:
pingto check basic reachability,tracerouteto find where the path fails, andnmapto discover devices on the network and identify IP conflicts. - Storage Failures: Impending drive failure is a common cause of a VM backup failure fix scenario. Proactively monitor drive health using smartctl -a /dev/sdX SMART data to review. For ZFS pools, regularly run
zpool statusto check for errors or degraded states.
Software Troubleshooting: Service and Application Issues
Software problems are frequent but often have straightforward solutions if you know where to look.
- Proxmox Troubleshooting Guide: Begin with the basics. Use
systemctl status pveproxy pvedaemon pve-clusterto check the status of core Proxmox services. For deeper insight, usejournalctl -u service-name -fto examine logs in real-time. Common issues include certificate expiration, cluster communication failures, and storage becoming unavailable to the host. - Docker Container Won’t Start: This common frustration requires a step-by-step approach. First, always check the logs using
docker logs <container_name>. This often reveals the exact error, such as a missing environment variable, a permission error on a mounted volume, or a port conflict with another running container. Thedocker inspect <container_name>command can provide a full overview of the container’s configuration. - VM Problems: If a virtual machine fails to start, check the Proxmox task log for a specific error message. Common culprits include the VM’s storage path being unavailable, a lack of available RAM or CPU on the host, or a corrupted virtual disk image.
Performance Issues: Identifying and Fixing Bottlenecks
Server performance issues often manifest as sluggish response times and can be diagnosed with the right tools.
- Resource Bottlenecks: Use a combination of
htop(for CPU/RAM),iotop(for disk I/O), andnethogs(for network bandwidth) to identify which resource is saturated. A common cause is over-allocating resources to VMs, leading to contention on the host. - Storage Performance: Slow disk I/O can cripple an entire lab. Use
iostat -dx 2to monitor disk utilisation, wait times, and queue lengths. Consider separating workloads: place IO-intensive services (like databases) on SSDs and use HDDs for bulk storage. - Network Performance: For slow file transfers or streaming, check the interface statistics with
ip -s link show. Virtualised network interfaces (virtio) are efficient but can become a bottleneck under heavy load; ensure the host’s physical NIC is not overwhelmed.
Maintenance Schedule: Proactive System Care
Prevention is the best medicine. A consistent homelab maintenance checklist prevents most issues before they occur.
- Regular Tasks:
- Weekly: Check disk space usage (
df -h), verify the status of last night’s backups, and scan system logs for new errors. - Monthly: Apply security updates, review and prune old Docker images and stopped containers, and validate that SSL certificates are renewing correctly.
- Quarterly: Test your backup restoration procedure in an isolated environment. This is the only way to be sure your backups are viable.
- Weekly: Check disk space usage (
- Update Procedures: Plan updates during low-usage periods. When possible, test major Proxmox or Docker updates on a non-critical machine first. Always ensure you have a recent, verified backup before proceeding with significant system changes.
Recovery Procedures: Restoring from Failure
When failure strikes, having a clear plan is essential.
- Service Restoration: For a failed application, your first steps should be to check its logs, restart its container or service (
docker restart <name>orsystemctl restart <service>), and verify its configuration. - Full System Recovery: In the event of a major hardware failure, your recovery depends on your backups. Use your Proxmox Backup Server to restore VMs and containers to a new host. For bare-metal recovery, have a plan to reinstall the host OS and then restore your critical configurations and data from backup.
- Emergency Protocols: Keep an offline copy of your recovery plan, including all critical passwords, IP addresses, and step-by-step instructions. This ensures you can access the information needed for recovery even if your primary lab is completely down.
By adopting this structured approach to troubleshooting and maintenance, you shift from reactive firefighting to proactive management, ensuring your homelab remains a reliable and powerful platform.
Conclusion: Your Homelab Journey Starts Now
Your transformation from a curious beginner to a confident homelab operator begins the moment you power on your first server. This guide has provided a complete homelab learning path, walking you from strategic planning and hardware selection through advanced automation, AI integration, and professional troubleshooting. Each section is built upon the last, creating a scalable roadmap for your growing expertise.
You’ve seen how a modern homelab evolves from a simple server into an intelligent, automated platform that mirrors enterprise infrastructure. You’ve laid the groundwork for a private AI assistant, an automated media hub, and a resilient system, all achievements that mark just the beginning of what’s possible.
Every misconfigured container, every troubleshooting session, and every solved problem has contributed to your expertise. Your homelab is a safe space for experimentation. Embrace these moments; they are not failures, but opportunities to build invaluable, real-world skills that are highly valued in professional IT roles.
As you look to expand your homelab over time, do so with purpose. Add services that solve real problems or align with your learning goals, be it cloud architecture, cybersecurity, or AI. The key is to scale your homelab infrastructure intentionally, based on actual needs rather than impulse.
You don’t have to learn alone. Join the homelab community in 2025 on platforms like Reddit’s r/homelab, Discord, and specialised forums. These communities are invaluable for getting help, sharing ideas, and finding inspiration. Contributing not only solidifies your own knowledge but also helps others on their journey.
Your homelab next steps guide is simple: keep learning, keep building, and stay curious. The foundation is set. Your journey toward technical mastery and digital independence starts now. Welcome to the community.


