Many beginners encounter the frustrating “it works on my machine” problem when deploying services. Dependency conflicts and leftover files plague traditional setups. This Docker for beginners guide solves these issues through containerization, a technology that packages applications into isolated, portable units. Instead of direct installation, Docker for beginners uses containers that run independently while sharing the host’s kernel, ensuring perfect isolation and consistent behavior.
Homelab users who’ve adopted Docker for beginners strategies report transformative results. Deployments that took hours now take minutes. Conflicting services now run peacefully side-by-side. This Docker for beginners approach enables entire server migrations through simple file copying.
Platform Note: This homelab guide focuses on Linux. Windows/Mac users can follow using Docker Desktop commands remain identical.
What You’ll Gain: The ability to deploy and scale self-hosted applications confidently by understanding containerization benefits core concepts every Docker for beginners student needs.
Roadmap: This Docker for beginners guide covers fundamentals, installation, commands, projects, and best practices everything needed to master containerization.
What is Docker? Understanding Containerization
Docker is a platform that packages applications and their dependencies, libraries, system tools, code, and runtime into standardized units called containers. These containers represent completely self-sufficient packages containing everything an application needs to run, isolated from other system components.
The Docker architecture operates on a client-server model. The Docker CLI (client) communicates with the Docker Daemon (server), which handles image building, container execution, and resource management. This architecture enables efficient management of multiple containers while maintaining minimal resource overhead.
Core Docker Components
Docker Daemon: The background service managing container lifecycle, networking, and storage.
Docker Images: Read-only templates defining container contents. When you download applications from Docker Hub, you’re pulling images constructed in efficient layers.
Docker Containers: Running instances created from images live in isolated environments where applications execute. Containers are ephemeral by design, allowing creation, stopping, and destruction without affecting underlying images.
Docker vs VM: Understanding the Difference
This distinction explains Docker’s efficiency advantages for homelabs:
| Aspect | Docker Containers | Virtual Machines |
|---|---|---|
| Architecture | Share host OS kernel | Separate guest OS on each VM |
| Resource Usage | Lightweight, efficient | Heavy, dedicated resources per VM |
| Startup Time | Seconds | Minutes |
| Isolation Level | Process level | OS level |
| Disk Space | MBs | GBs |
| Performance | Near-native | Hypervisor overhead |
Virtual machines virtualize hardware stacks, running complete operating systems via hypervisors. Each VM includes a full OS copy, consuming significant disk space and RAM. Containers, conversely, share the host’s kernel and isolate only the application layer.
Visual Analogy: Virtual machines resemble separate houses, each with independent infrastructure. Containers are like apartments in a building, sharing foundation and utilities while maintaining private living spaces. Both provide separation, but apartments use shared resources more efficiently.
For homelab enthusiasts, this efficiency matters enormously. You can run media servers, cloud storage, network tools, and monitoring services simultaneously on modest hardware. A server with 8GB RAM that struggled with two VMs can comfortably run a dozen containerized services, each perfectly isolated and independently manageable.
Common Docker Misconceptions
Addressing common Docker myths helps set realistic expectations for your learning journey.
Myth 1: “Docker containers are just lightweight VMs”
Reality: While both provide isolation, the underlying Docker vs virtualization architecture differs fundamentally. VMs virtualize hardware; containers share the host kernel and virtualize only the OS layer.
Myth 2: “Containers aren’t secure”
Reality: Properly configured Docker provides robust security through namespace isolation, control groups, and capability restrictions. Container security depends on proper configuration, not inherent technology limitations.
Myth 3: “Docker is only for developers”
Reality: Docker has become the standard for homelab enthusiasts because it simplifies deployment for non-developers. You use pre-built images experts maintain without understanding application internals.
Myth 4: “You need to know programming to use Docker”
Reality: Basic command-line skills suffice. Docker Compose uses simple YAML syntax more akin to configuration files than programming code.
Myth 5: “Docker is complicated”
Reality: Docker has a steeper initial learning curve but dramatically simplifies long-term management. The investment in understanding images, containers, volumes, and networks pays continuous dividends through easier deployments.
These Docker misconceptions often discourage beginners unnecessarily. Expect temporary overwhelm within weeks of practice, Docker becomes intuitive and indispensable.
Why Docker Belongs in Your Homelab
Understanding Docker benefits for homelab environments reveals why it has become the preferred deployment method for self-hosted applications.
Resource Efficiency: Maximizing Hardware Utilization
Docker containers share the host OS kernel, eliminating VM overhead. A typical VM reserves 2-4GB RAM idle; containers use only what applications require. Practically, this enables running 10+ services on an 8GB RAM server impossible with traditional virtualization.
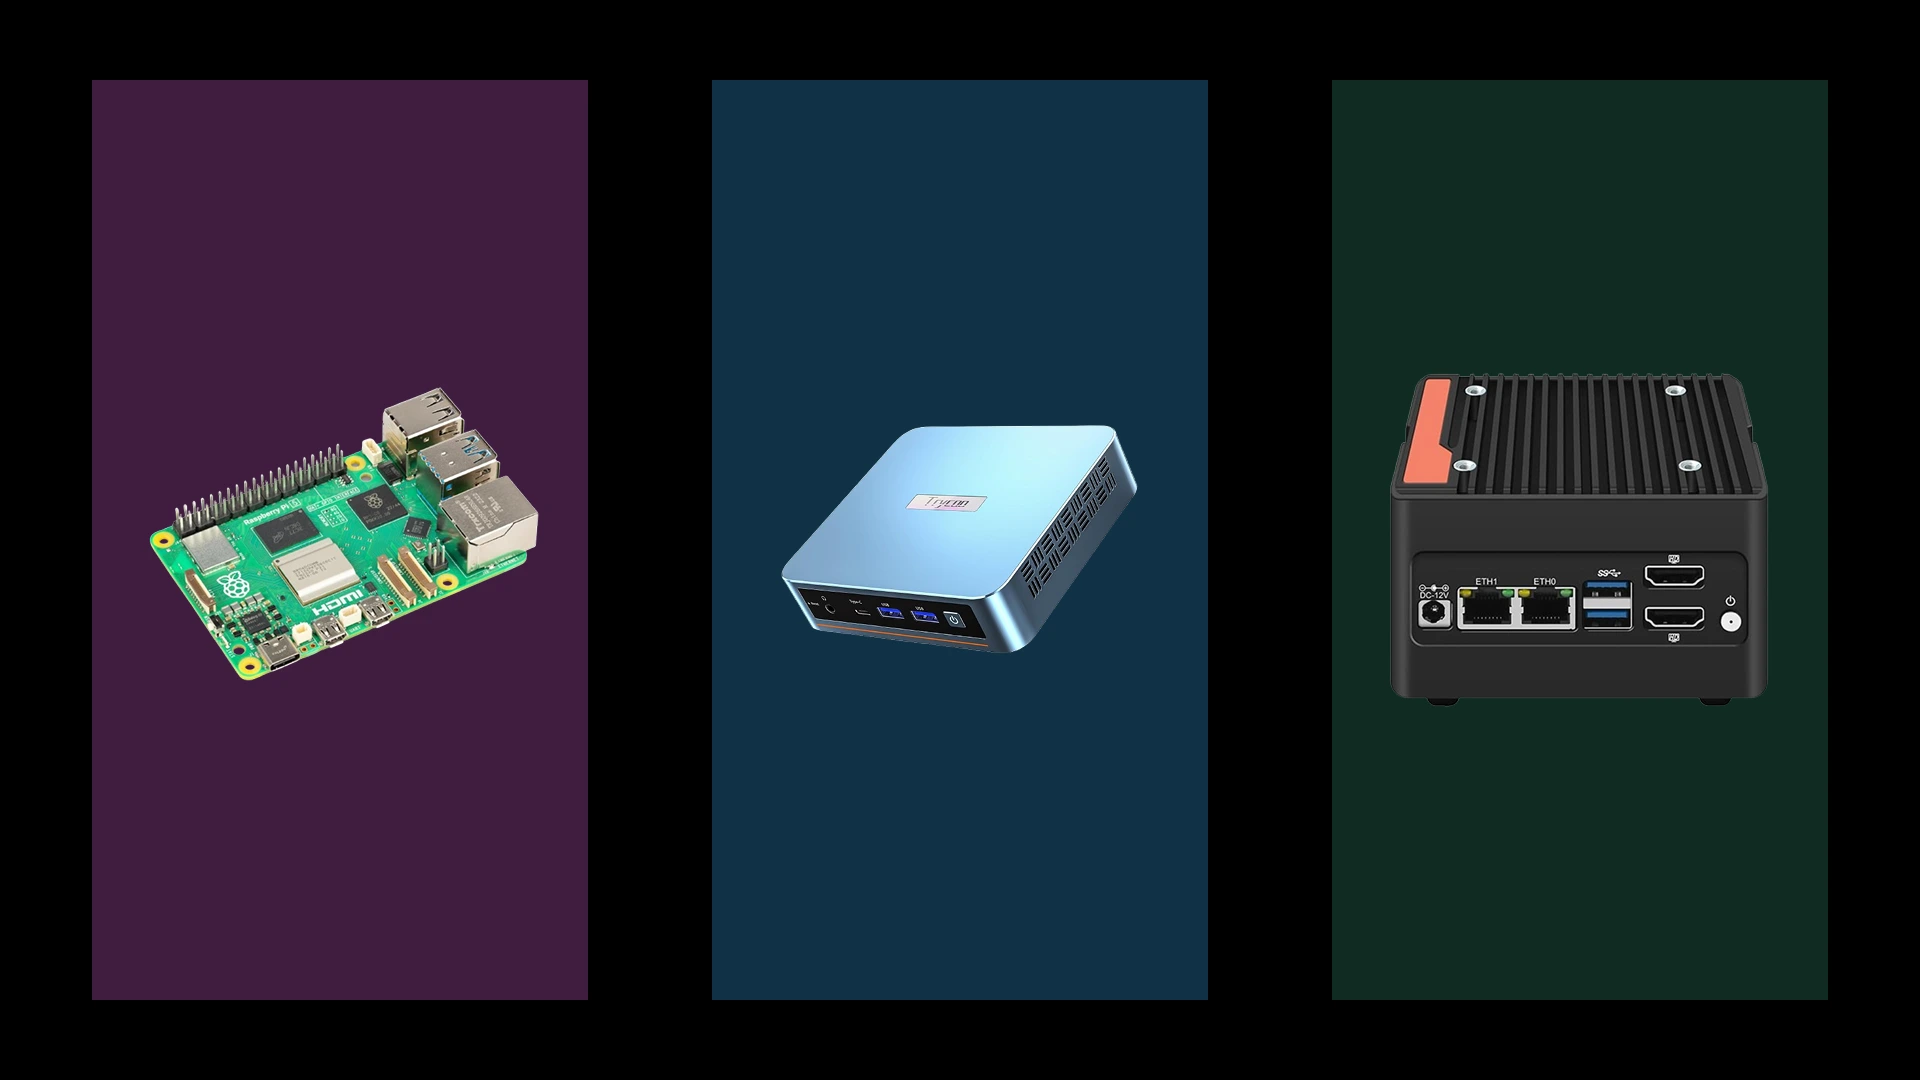
Containers start in seconds versus minutes, with negligible CPU overhead since no hypervisor layer translates instructions. For budget hardware like repurposed desktops or Raspberry Pis, this resource efficiency dramatically expands possible applications.
Simplified Management: From Complex to Simple
Traditional service installation involves downloading packages, resolving dependencies, configuring system services, managing library conflicts, and troubleshooting. With Docker, installation reduces to copying a docker-compose.yml file and running docker compose up -d.
Updates become equally straightforward. Instead of researching upgrade procedures, you pull the latest image and recreate the container. Data persists in volumes, configuration is preserved, and new versions deploy seamlessly. Rollbacks become instantaneous recreate containers from previous images.
Isolation and Portability: Safe Experimentation
Each container runs with isolated filesystems, network interfaces, and process spaces. Nextcloud’s PHP version won’t conflict with Jellyfin’s dependencies. Your media server cannot interfere with network monitoring tools. Testing experimental software risks only that container, not production services.
Portability extends this benefit. Your homelab configuration lives in docker-compose.yml files and persistent data directories. Moving to new hardware involves copying these files and running docker compose up -d transforming week-long rebuilds into one-hour migrations.
Version Control and Community Support
Pin specific application versions by specifying exact image tags in docker-compose.yml. Test development versions alongside stable installations by running both simultaneously on different ports.
The homelab community has standardized on Docker, ensuring exceptional documentation and support. Docker Hub hosts thousands of pre-built images, many maintained by dedicated teams like LinuxServer.io. Active communities on Reddit (r/selfhosted, r/homelab) provide knowledgeable assistance.
Real-World Success Story
Consider a homelab enthusiast who traditionally deployed services on Ubuntu Server. Media server setup required three hours: installing dependencies, configuring libraries, resolving permission errors, and troubleshooting port conflicts. Adding photo management software broke existing services through dependency conflicts.
After adopting Docker, the same media server was deployed in five minutes using a pre-configured docker-compose.yml file. Adding photo management involved copying another compose file and running one command, zero conflicts, zero broken services. Server hardware migration completed in one hour instead of an entire weekend.
This transformation exemplifies typical self-hosting benefits with Docker: deployment evolves from frustrating, time-consuming chores into quick, reliable, enjoyable processes.
Getting Started: Installing Docker and Docker Compose
Hardware Requirements
Minimum specifications for Docker in homelab environments:
- RAM: 2GB minimum (4GB+ recommended)
- CPU: 2 cores minimum (4 cores recommended)
- Storage: 20GB minimum (50GB+ recommended for multiple services)
Minimum specifications work for basic services, but media servers and databases benefit from additional resources.
Installation Method 1: Convenience Script
Docker’s automated script handles complete installation. While not production-recommended, it’s perfect for homelab use where convenience outweighs detailed control.
curl -fsSL https://get.docker.com -o get-docker.sh
sudo sh get-docker.sh
This script auto-detects your Linux distribution and installs the appropriate Docker version in 2-3 minutes without additional configuration.
Installation Method 2: Manual Repository Installation
For users preferring installation control, the manual method adds Docker’s official repository:
# Update package index
sudo apt update

# Install prerequisites
sudo apt install ca-certificates curl gnupg lsb-release

# Add Docker's official GPG key
sudo mkdir -p /etc/apt/keyrings
curl -fsSL https://download.docker.com/linux/ubuntu/gpg | sudo gpg --dearmor -o /etc/apt/keyrings/docker.gpg

# Set up repository
echo "deb [arch=$(dpkg --print-architecture) signed-by=/etc/apt/keyrings/docker.gpg] https://download.docker.com/linux/ubuntu $(lsb_release -cs) stable" | sudo tee /etc/apt/sources.list.d/docker.list > /dev/null

# Install Docker Engine
sudo apt update
sudo apt install docker-ce docker-ce-cli containerd.io docker-buildx-plugin docker-compose-plugin
Critical Post-Installation Setup
By default, Docker requires root privileges. Avoid sudo for every command by adding your user to the Docker group:
sudo usermod -aG docker $USERImportant: Log out and back in (or restart) for this change to take effect. Group membership updates only at login.
After logging back in, verify non-sudo Docker access:
docker run hello-worldEnable Docker start on boot:
sudo systemctl enable dockerVerification: Confirming Successful Installation
The hello-world container verifies Docker functions correctly:
docker run hello-worldSuccessful output shows Docker pulled the image, created a container, ran it, and displayed a confirmation message.
Installing Docker Compose
Docker Compose simplifies multi-container application management. Modern Docker installations include Compose as a plugin.
Verify installation:
docker compose versionIf this fails, install manually:
sudo apt update
sudo apt install docker-compose-plugin
Note: Docker Compose v2 uses
docker compose(two words) rather than legacydocker-compose(hyphenated).
Windows/Mac Users: Docker Desktop
Docker Desktop provides complete Docker environments with graphical interfaces for Windows and Mac. Download installers from docker.com and follow setup wizards.
Key considerations:
- Windows: Enable WSL2 backend in Docker Desktop settings for optimal performance
- File paths: Use Windows paths (C:\Users…) in bind mounts
- Performance: Bind mounts slower on Windows/Mac due to filesystem translation
- GUI benefits: Visual container management and resource monitoring
Commands in this guide work identically on Docker Desktop; only the file path syntax differs slightly.
Core Docker Concepts and Commands
Mastering Docker commands and concepts enables efficient container management. This section provides essential Docker CLI basics reference.
Essential Command Reference Table
| Command | Purpose | Example |
|---|---|---|
docker pull <image> | Download image from Docker Hub | docker pull nginx:latest |
docker images | List downloaded images | docker images |
docker run <image> | Create and start container | docker run -d -p 80:80 nginx |
docker ps | List running containers | docker ps -a (shows all) |
docker stop <container> | Stop running container | docker stop my_nginx |
docker start <container> | Start stopped container | docker start my_nginx |
docker rm <container> | Remove container | docker rm my_nginx |
docker logs <container> | View container logs | docker logs -f my_nginx |
docker exec -it <container> bash | Enter running container | docker exec -it my_nginx bash |
docker compose up -d | Start multi-container stack | docker compose up -d |
docker compose down | Stop and remove stack | docker compose down |
docker system prune | Clean unused resources | docker system prune -a |
Understanding Common Flags
-d (detached mode): Runs containers in background rather than occupying your terminal. Most homelab services should run detached.
-p (port mapping): Connects host ports to container ports. Syntax: -p host:container. Example: -p 8080:80 maps host port 8080 to container port 80.
-v (volume mounting): Connects host directories or Docker volumes to container paths for persistent storage. Example: -v /home/user/media:/media makes the host media directory accessible inside the container.
-e (environment variables): Passes configuration to containers. Many applications use environment variables for settings like timezone or API keys. Example: -e PUID=1000 -e PGID=1000.
--name: Assigns custom container names instead of Docker’s random names. Example: --name jellyfin creates container referenceable as “jellyfin”.
--restart: Controls automatic restart behavior. Use --restart unless-stopped for homelab services containers restart automatically after reboot unless explicitly stopped.
Dockerfile Basics
Dockerfile files contain instructions for building custom images. While initially unnecessary, understanding their structure helps comprehend image construction.
Basic Dockerfile structure:
- FROM: Specifies base image (e.g.,
FROM ubuntu:22.04) - COPY: Copies host files into image
- RUN: Executes commands during image build
- CMD: Specifies command to run when containers start
Most homelab users rely on pre-built Docker Hub images rather than creating custom Dockerfiles.
Docker Compose File Structure
Docker Compose uses YAML files to define multi-container applications. Understanding basic structure helps read and modify compose files confidently.
Basic docker-compose.yml structure:
version: "3.8"

services:
  service_name:
    image: image_name:tag
    container_name: custom_name
    ports:
      - "host_port:container_port"
    volumes:
      - /host/path:/container/path
    environment:
      - VARIABLE=value
    restart: unless-stopped

volumes:
  volume_name:

networks:
  network_name:
Key sections:
- services: Defines each container in your stack
- volumes: Declares named volumes for persistent data
- networks: Configures custom networks (usually optional for simple setups)
Docker Compose surpasses long docker run commands through a readable, version-controlled, reproducible configuration.
Your First Homelab Project: Media Server Stack
This hands-on Docker guide walks through deploying Jellyfin, an open-source media server, teaching Docker core concepts through practical application.
What You’ll Learn
This homelab project tutorial provides experience with:
- Volume Mounting: Connecting media libraries to containers
- Port Mapping: Making services accessible through browsers
- Environment Variables: Configuring timezone and user permissions
- Docker Compose Syntax: Understanding YAML application definition
- Container Management: Starting, stopping, and updating services
Project Setup
Organization prevents confusion as your homelab grows. Create dedicated Docker project directories:
mkdir -p ~/docker/jellyfin
cd ~/docker/jellyfin
This pattern separate directories per Docker project keeps configurations organized and backups straightforward.
The docker-compose.yml File
Create nano docker-compose.yml in ~/docker/jellyfin with this Docker Compose example:
version: "3.8"

services:
  jellyfin:
    image: linuxserver/jellyfin:latest
    container_name: jellyfin
    environment:
      - PUID=1000
      - PGID=1000
      - TZ=America/New_York
    volumes:
      - ./config:/config
      - /path/to/your/media:/media
    ports:
      - "8096:8096"
    restart: unless-stopped
Important: Replace
/path/to/your/mediawith your actual media directory path (e.g.,/home/username/Videos).
Line-by-Line Explanation
version: "3.8" specifies Docker Compose file format version.
services: begins container definitions.
jellyfin: is the service name.
image: linuxserver/jellyfin:latest specifies the Docker image. LinuxServer.io maintains excellent, optimized images.
container_name: jellyfin assigns a friendly name for container management.
environment: passes configuration variables:
PUID=1000andPGID=1000: Sets user and group IDs (check withidcommand)TZ=America/New_York: Sets timezone for correct timestamps
volumes: mounts directories:
./config:/config: Stores Jellyfin configuration in local config subdirectory/path/to/your/media:/media: Makes media library accessible inside container
ports: exposes services:
"8096:8096": Maps host port 8096 to container port 8096
restart: unless-stopped: Automatically restarts container after reboots unless explicitly stopped.
Deploying the Stack
With docker-compose.yml saved, deploy your Jellyfin Docker stack:
docker compose up -dDocker performs these operations:
- Checks for local linuxserver/jellyfin:latest image
- Downloads image from Docker Hub (first run only)
- Creates config directory if nonexistent
- Creates and starts container with specified configuration
- Returns to command prompt while container runs background
Monitoring Deployment
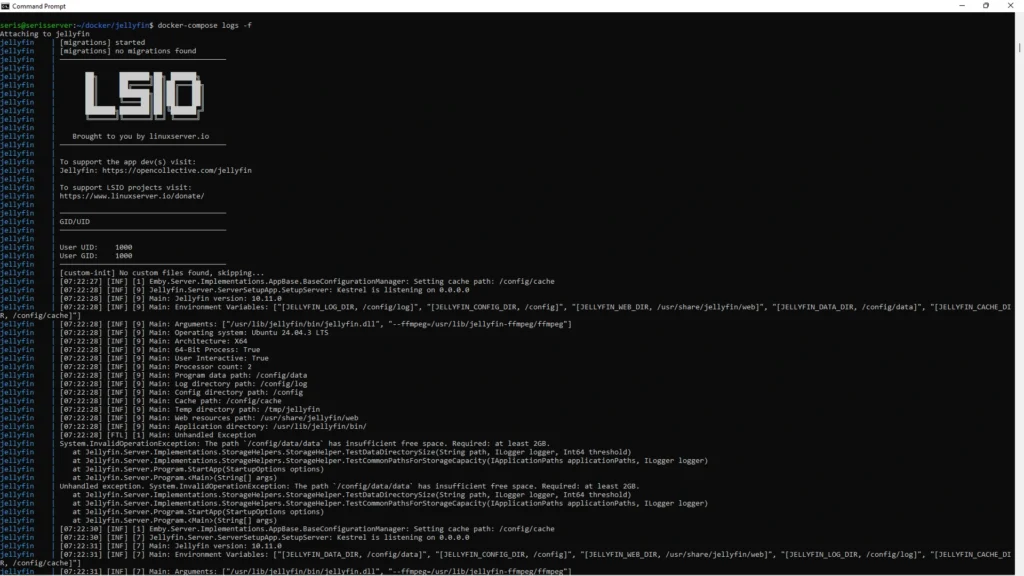
View real-time logs to confirm successful startup:
docker compose logs -fThe -f flag follows logs in real-time. Press Ctrl+C to exit log viewing without stopping the container.
Accessing Jellyfin
Open your browser and navigate to http://your-server-ip:8096. Replace your-server-ip with your server’s actual IP address (find with ip addr or hostname -I on Linux).
Jellyfin’s setup wizard guides through:
- Language selection
- Admin account creation
- Media library setup (point to
/media) - Metadata configuration
- Remote access setup (optional)
Bonus: Portainer Setup
Portainer provides web interface for Docker management perfect for beginners preferring visual tools. Deploy with:
docker run -d \
  -p 9000:9000 \
  --name portainer \
  --restart unless-stopped \
  -v /var/run/docker.sock:/var/run/docker.sock \
  -v portainer_data:/data \
  portainer/portainer-ce:latest
Access Portainer at http://your-server-ip:9000. After creating an admin account, view containers, images, volumes, and networks. Portainer enables starting, stopping, restarting containers, viewing logs, monitoring resources, and updating containers through a graphical interface.
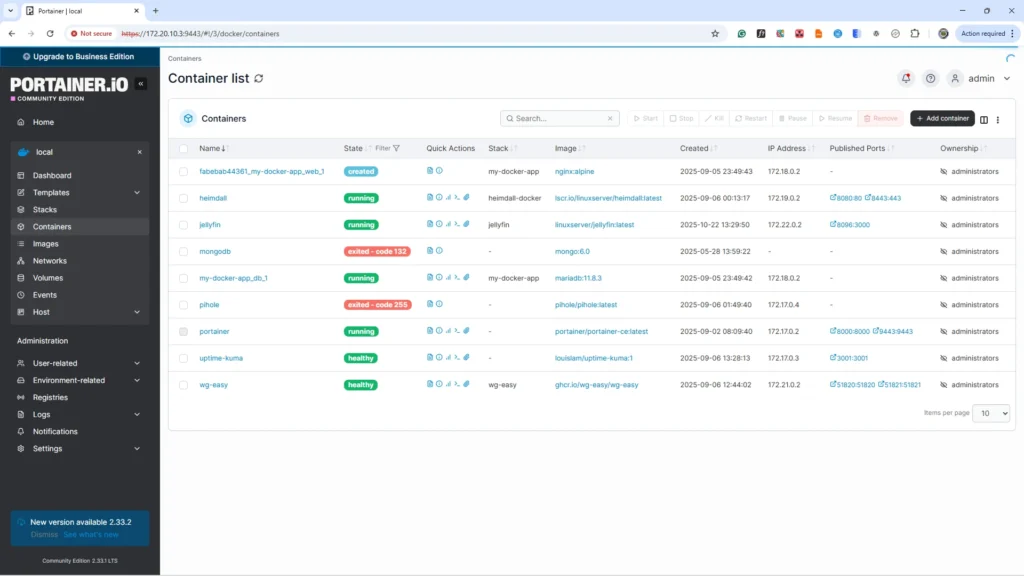
Follow our more detailed post on how to deploy portainer and other useful Docker containers.
Homelab Best Practices and Pro Tips
Data Persistence & Storage
Understanding Docker data persistence prevents data loss and organizes homelabs effectively. Docker offers two primary external storage mechanisms: volumes and bind mounts.
Volumes vs Bind Mounts Comparison
| Feature | Bind Mounts | Docker Volumes |
|---|---|---|
| Definition | Maps host directory to container | Docker-managed storage location |
| Example | ./media:/media | jellyfin-data:/config |
| When to Use | Files needing direct access | Application data not manually touched |
| Use Cases | Media libraries, editable config files | Database data, application cache |
| Risk Level | Host deletion immediately affects container | Protected from accidental deletion |
| Performance | Slower on Windows/Mac | Docker-optimized |
| Backup Strategy | Standard file backup tools | Requires docker cp or volume commands |
Backup Strategy
Protect three critical components:
- Docker Compose files: Store in Git repositories or cloud storage
- Bind mount directories: Use standard backup tools (rsync, rclone, Borg)
- Docker volumes: Backup with:
# Method 1: Backup volume to tar archive
docker run --rm -v jellyfin-data:/data -v $(pwd):/backup ubuntu tar czf /backup/jellyfin-backup.tar.gz /data
Critical: Test backup restoration regularly. Untested backups might fail when needed most.
Docker Networking Essentials
Understanding Port Mapping
The -p host:container syntax makes containerized services network-accessible. Example: -p 8080:80 means “route host port 8080 traffic to container port 80.”
Different ports prevent conflicts when multiple services use standard ports (80, 443). Jellyfin on 8096, Portainer on 9000, and Nextcloud on 8080 coexist peacefully.
Container-to-Container Communication
Containers in the same Docker Compose file automatically share a network and communicate using service names as hostnames.
Example: Nextcloud container connecting to PostgreSQL database uses postgres hostname (service name in docker-compose.yml), not IP addresses. Docker’s DNS resolves service names automatically.
Network Modes
Bridge (default): Isolated network with own subnet. Requires port mapping for external access. Use for most services.
Host: Container uses host’s network directly. No port mapping needed, no network isolation. Use sparingly for services needing direct network access.
Common Networking Issues
“Cannot connect to container”: Verify port mapping with docker ps
“Port already in use”: Change host port or stop conflicting service
“Containers can’t communicate”: Ensure same Docker Compose project or explicit network connection
“Service works locally but not remotely”: Check server firewall rules
Security Best Practices
Running as Non-Root
Default container processes run as root. If compromised, attackers have root privileges within isolation. Running as non-root provides defense in depth.
Most LinuxServer.io images support PUID/PGID environment variables for non-root operation:
environment:
  - PUID=1000  # Your user ID (check with 'id')
  - PGID=1000  # Your group ID
Container Security
- Prefer official images: Docker Hub “Docker Official Image” badges indicate security-reviewed images
- Use verified publishers: LinuxServer.io, Bitnami, and major vendors maintain high-quality images
- Check popularity/maintenance: Active images with millions of pulls indicate community trust
- Avoid random images: Containers with few pulls and no descriptions pose risks
- Read-only root filesystem: Consider
read_only: truefor security-critical services
Network Security
Apply principle of least privilege to network access:
Internal services: Databases, monitoring backends, admin panels LAN access only
External services: Only publicly accessible services forward through firewalls
Use reverse proxy: Deploy Nginx Proxy Manager as single entry point with SSL/TLS encryption
Consider VPN access: Tailscale or WireGuard provide secure remote access without exposing individual services
Organization & Maintenance
Directory Structure
Adopt consistent directory structure:
~/docker/
├── jellyfin/
│   ├── docker-compose.yml
│   ├── config/
│   └── cache/
├── portainer/
│   ├── docker-compose.yml
│   └── data/
├── nextcloud/
│   ├── docker-compose.yml
│   ├── data/
│   └── db/
└── nginx-proxy-manager/
    ├── docker-compose.yml
    └── data/
Each service has its own directory containing docker-compose.yml and data directories, providing clear boundaries and straightforward backups.
Configuration Management with Git
Docker Compose files represent infrastructure as code. Version control tracks changes, enables rollbacks, and serves as documentation:
cd ~/docker
git init
git add */docker-compose.yml
git commit -m "Initial homelab configuration"
Commit before changes. If something breaks, revert with git checkout docker-compose.yml.
Resource Monitoring
Real-time monitoring:
docker statsDisplays live CPU, memory, network, and disk I/O for all running containers.
Disk usage analysis:
docker system dfShows space consumed by images, containers, and volumes.
Setting resource limits:
services:
  service_name:
    deploy:
      resources:
        limits:
          cpus: '2.0'
          memory: 2G
Prevents runaway containers from consuming all resources.
Container Updates
Manual Update Process
Standard container update workflow:
# 1. Navigate to service directory
cd ~/docker/jellyfin

# 2. Pull latest image
docker compose pull

# 3. Recreate container with new image
docker compose up -d

# 4. Clean up old image
docker image prune
Docker Compose detects new images and recreates containers automatically. Data persists in volumes with minimal service downtime.
Automated Updates with Watchtower
Watchtower monitors containers and automatically updates them when new images are available:
docker run -d \
  --name watchtower \
  --restart unless-stopped \
  -v /var/run/docker.sock:/var/run/docker.sock \
  containrrr/watchtower \
  --cleanup \
  --interval 86400
This configuration checks daily (86400 seconds) and automatically updates containers using :latest tags.
Important Considerations:
- Test updates first: Use
--monitor-onlyinitially for notifications without updates - Exclude critical services: Use labels to prevent specific container updates
- Backup before updates: Automatic updates increase risk maintain current backups
For most homelabs, manual updates provide the best balance of security, stability, and control.
Troubleshooting Common Docker Issues
Permission Denied Errors
Symptom: Got permission denied while trying to connect to the Docker daemon socket
Cause: User not in docker group
Solution:
sudo usermod -aG docker $USERLog out completely and log back in.
Port Already in Use
Symptom: Bind for 0.0.0.0:80 failed: port is already allocated
Cause: Another service uses the host port
Solution: Identify port usage:
sudo lsof -i :80Stop conflicting service or change container’s host port.
Container Exits Immediately
Symptom: Container status “Exited (1)” seconds after starting
Cause: Application crash during startup
Solution: Check logs for errors:
docker logs <container_name>Image Pull Failures
Symptom: Error response from daemon: Get https://registry-1.docker.io/v2/: net/http: request canceled
Cause: Network issues, Docker Hub rate limiting, or incorrect image names
Solutions:
- Verify image name spelling and tag
- Check internet connectivity
- Wait if rate limited (100 pulls per 6 hours per IP unauthenticated)
- Authenticate to Docker Hub for higher limits:
docker login
“No Space Left on Device”
Symptom: Operations fail with disk space errors despite free drive space
Cause: Docker storage directories consuming all space
Solution:
# Check Docker disk usage
docker system df

# Remove unused images, containers, networks
docker system prune -a

# Remove unused volumes (CAUTION: Only unattached volumes)
docker volume prune
Getting Help
When seeking assistance, include:
- Your docker-compose.yml (sensitive data removed)
- Complete error messages from
docker logs - Host system information (OS, Docker version)
- Troubleshooting steps already attempted
Pro Tip:
docker logs -f <container_name>reveals most issues read carefully before seeking help.
Must-Try Docker Applications for Your Homelab
Resource Requirements Overview
| Category | Example App | Min RAM | Min CPU | Storage | Difficulty | Setup Time |
|---|---|---|---|---|---|---|
| Management | Portainer | 128MB | 1 core | 1GB | Easy | 5 min |
| Management | Watchtower | 64MB | 1 core | 100MB | Easy | 5 min |
| Media | Jellyfin | 2GB | 2 cores | 500GB+ | Medium | 15 min |
| Media | Plex | 2GB | 2 cores | 500GB+ | Medium | 15 min |
| Media | *arr Stack | 4GB | 2 cores | 100GB+ | Advanced | 1 hour |
| Cloud | Nextcloud | 512MB | 1 core | 20GB+ | Advanced | 30 min |
| Network | Pi-hole | 256MB | 1 core | 2GB | Medium | 10 min |
| Network | Nginx Proxy Manager | 256MB | 1 core | 5GB | Medium | 15 min |
| Utilities | Immich | 4GB | 4 cores | 100GB+ | Advanced | 30 min |
| Utilities | Paperless-ngx | 1GB | 2 cores | 20GB | Medium | 20 min |
Recommended Applications by Category
Media Management
Jellyfin (Media Streaming) – Personal Netflix respecting privacy. Stream movies, TV shows, music, and photos to any device. Completely open source with hardware transcoding support.
Plex Media Server – Polished media server experience with excellent apps and easy remote access. Free core features with Plex Pass unlocking additional functionality.
*The arr Stack (Automated Media Management) – Sonarr (TV), Radarr (movies), Lidarr (music), Readarr (books), Prowlarr (indexers). Automates finding, downloading, organizing, and upgrading media libraries.
Cloud & Collaboration
Nextcloud (Private Cloud Storage) – Complete Google Workspace alternative under your control. File storage/sync, calendar, contacts, notes, tasks, video calls, and collaborative documents.
Utilities & Productivity
Immich (Photo Management) – Modern Google Photos alternative with machine learning face recognition, object detection, automatic mobile backup, and beautiful interface.
Paperless-ngx (Document Management) – Scan, organize, and search documents. Automatic OCR converts scans to searchable text with intelligent tagging and organization.
Gitea (Self-hosted Git) – Lightweight GitHub alternative for private code repositories. Ideal for homelab configuration files and project collaboration.
Infrastructure & Networking
Portainer (Docker Management UI) – Essential visual interface for managing containers, images, networks, and volumes. Perfect for beginners learning Docker.
Nginx Proxy Manager (Reverse Proxy) – Access services through clean URLs (jellyfin.yourhome.local) instead of IP:port combinations. Manages SSL certificates and simplifies network architecture.
Pi-hole (Network-wide Ad Blocking) – DNS-level advertisement, tracker, and malicious domain blocking for all network devices. Improves browsing speed and privacy automatically.
Tailscale/Headscale (VPN) – Secure remote homelab access through mesh VPN. Superior to port forwarding services remain unexposed while accessible from anywhere.
Monitoring & Alerts
Uptime Kuma (Service Monitoring) – Beautiful status page showing service availability. Monitors HTTP(S), TCP, ping, DNS with notifications through multiple channels.
Where to Find More Applications
Docker Hub (hub.docker.com) – Official repository with millions of container images
LinuxServer.io – 150+ high-quality homelab-optimized container images
r/selfhosted – Reddit community with weekly recommendations and discussions
Awesome-Selfhosted (GitHub) – Curated list of thousands of self-hosted applications
Frequently Asked Questions
What is Docker and why should I use it in my homelab?
Docker containerizes applications with dependencies into isolated units. For homelabs, this enables running multiple services without conflicts, simplified installation, and easy backup/migration. Deployments reduce from hours to minutes with guaranteed consistency.
How much RAM do I need for a Docker homelab?
Minimum 4GB RAM for basic services (Portainer, Pi-hole). Recommended 8GB for media servers like Jellyfin alongside other services. 16GB+ for many simultaneous services or resource-intensive applications like Nextcloud with multiple users.
Can I run Docker on a Raspberry Pi?
Absolutely! Docker fully supports ARM architecture. Raspberry Pi 4 with 4GB+ RAM handles many services beautifully. Avoid resource-intensive applications like 4K transcoding, but most popular homelab services run perfectly.
Is Docker free? Are there any costs?
Docker Engine is 100% free and open source. Docker Desktop for Windows/Mac is free for personal use. All applications recommended in this guide are free and open source. Only hardware and electricity costs apply.
What’s the difference between Docker and Docker Compose?
Docker runs individual containers. Docker Compose manages multi-container applications using YAML configuration files. Docker is the engine; Docker Compose simplifies multi-container management.
What’s the difference between Docker and Kubernetes?
Docker runs containers on single machines perfect for homelabs. Kubernetes orchestrates containers across machine clusters for enterprise-scale features. Kubernetes adds complexity unnecessary for 99% of homelabs.
Do I need to learn Linux first?
Basic command-line skills suffice. This guide provides all necessary commands with explanations. Many users learn Linux and Docker simultaneously through homelab practice.
What happens when my server reboots?
With restart: unless-stopped policy, containers automatically restart when your server boots. Services return online without manual intervention.
Can I run Windows applications in Docker?
Windows application support is limited. Windows containers require Windows Server hosts. Focus on Linux-native applications for homelab purposes the self-hosted ecosystem primarily uses Linux-based software.
Will Docker slow down my system?
No! Docker containers use fewer resources than virtual machines by sharing the host OS kernel. Container overhead is typically under 5% compared to native application execution.
How do I update Docker containers?
Pull latest images with docker compose pull, then recreate containers with docker compose up -d. Data persists in volumes throughout updates.
What if I delete a container? Will I lose my data?
No! With proper volume configuration, data stores separately from containers. You can delete and recreate containers freely without data loss. Only volume deletion removes persistent data.
Conclusion and Next Steps
Recap of Your Journey
You now understand Docker fundamentals and why it revolutionizes homelab application deployment. You’ve installed Docker and Docker Compose, deployed your first containerized application, learned essential commands and best practices, and discovered must-try applications for your environment.
The Power You Now Have
Your Docker skills enable deploying complex applications in minutes instead of hours, eliminating dependency conflicts and configuration issues. You can experiment fearlessly with disposable, isolated containers. You build production-quality homelabs using professional tools that power cloud infrastructure worldwide.
These skills extend beyond personal projects. Docker expertise is highly valued in DevOps and cloud computing careers. Understanding containerization fundamentals positions you perfectly for cloud platforms using container technology extensively.
Starting Simple
Looking at all possible applications and configurations can feel overwhelming. Start with 2-3 services solving real problems now. Master deployment, management, and troubleshooting before adding complexity.
Your homelab should serve you and improve your digital life not become a stress source or endless obligation. Deploy services providing value, not just technical interest. Successful homelabs grow organically based on actual needs.
Next Steps on Your Journey
Short-term (Next 2-4 weeks):
- Deploy 3-5 applications from Section 8 solving genuine problems
- Set up Nginx Proxy Manager for clean URLs instead of IP:port combinations
- Implement backup strategy for docker-compose files using Git or file backups
- Join homelab communities on Reddit or Discord for shared learning
Medium-term (Next 3-6 months):
- Create your first custom Dockerfile for unique applications or scripts
- Explore advanced Docker Compose features (depends_on, healthchecks, custom networks)
- Set up comprehensive monitoring with Prometheus and Grafana
- Actively participate in homelab communities, sharing experiences
Long-term (6+ months):
- Consider Docker Swarm for multi-host clustering with multiple servers
- Explore Kubernetes for enterprise-scale learning (overkill for most homelabs)
- Contribute to open-source projects through documentation or bug reporting
- Share knowledge by writing guides, creating videos, or mentoring newcomers
Your 24-Hour Challenge
Before closing this tab, take immediate action. Pick ONE application from Section 8 that genuinely excites you and solves real problems. Deploy it now using skills learned in this guide.
Start simple if hesitant. Portainer makes an excellent second deployment after Jellyfin, providing visual container management while continuing command-line learning.
Action creates momentum. One successful deployment builds confidence for the next. Soon you’ll have a powerful homelab running services that genuinely improve your digital life.
Share Your Experience
The homelab community thrives on shared experiences. Engagement accelerates learning and builds connections.
Share in comments or homelab communities:
- What application did you choose for your next deployment?
- What challenges did you face during setup?
- What are you planning to deploy next?
- What surprised you most about Docker?
Your homelab journey starts now. You possess the knowledge, skills, and resources to build something remarkable. Welcome to the community of self-hosters choosing privacy, control, and learning over convenience and subscriptions.
Your homelab’s future is limited only by imagination and hardware. Start simple, learn continuously, and enjoy the process. Your personal technology playground awaits.
