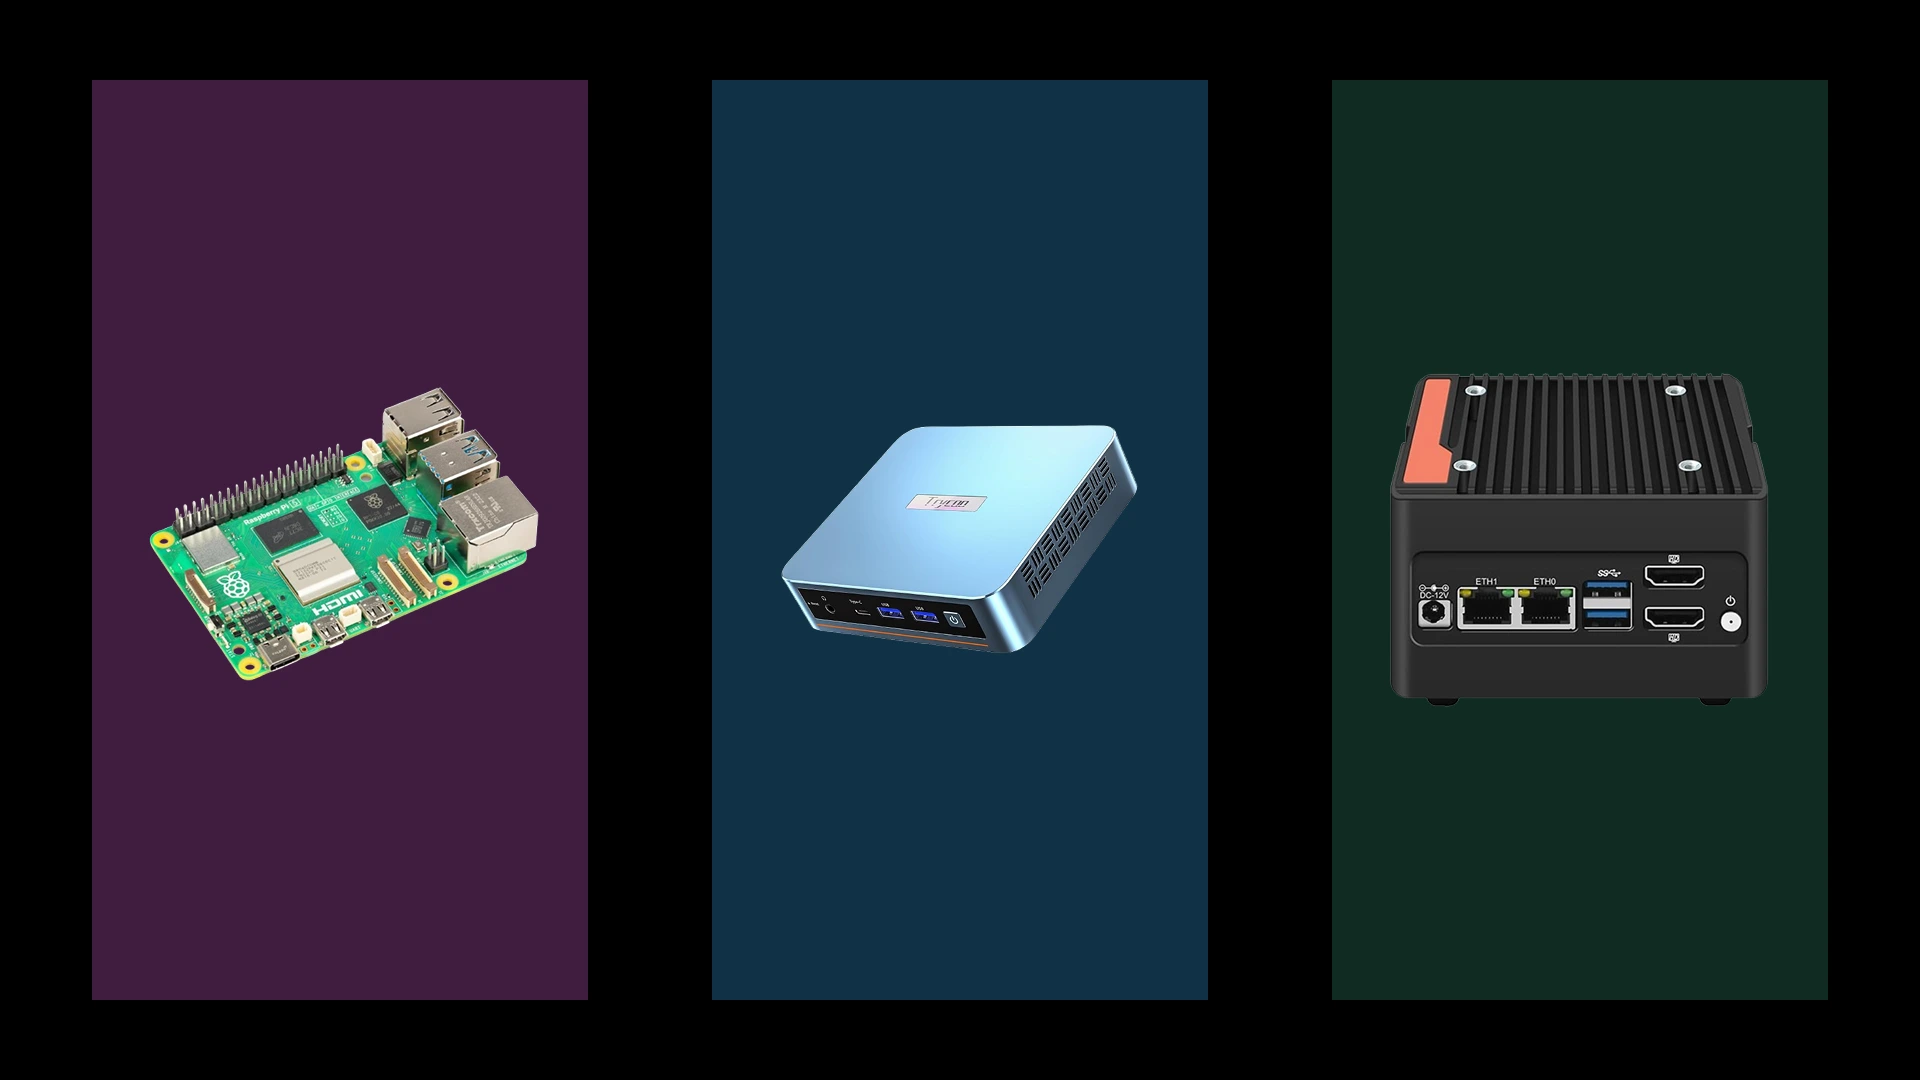
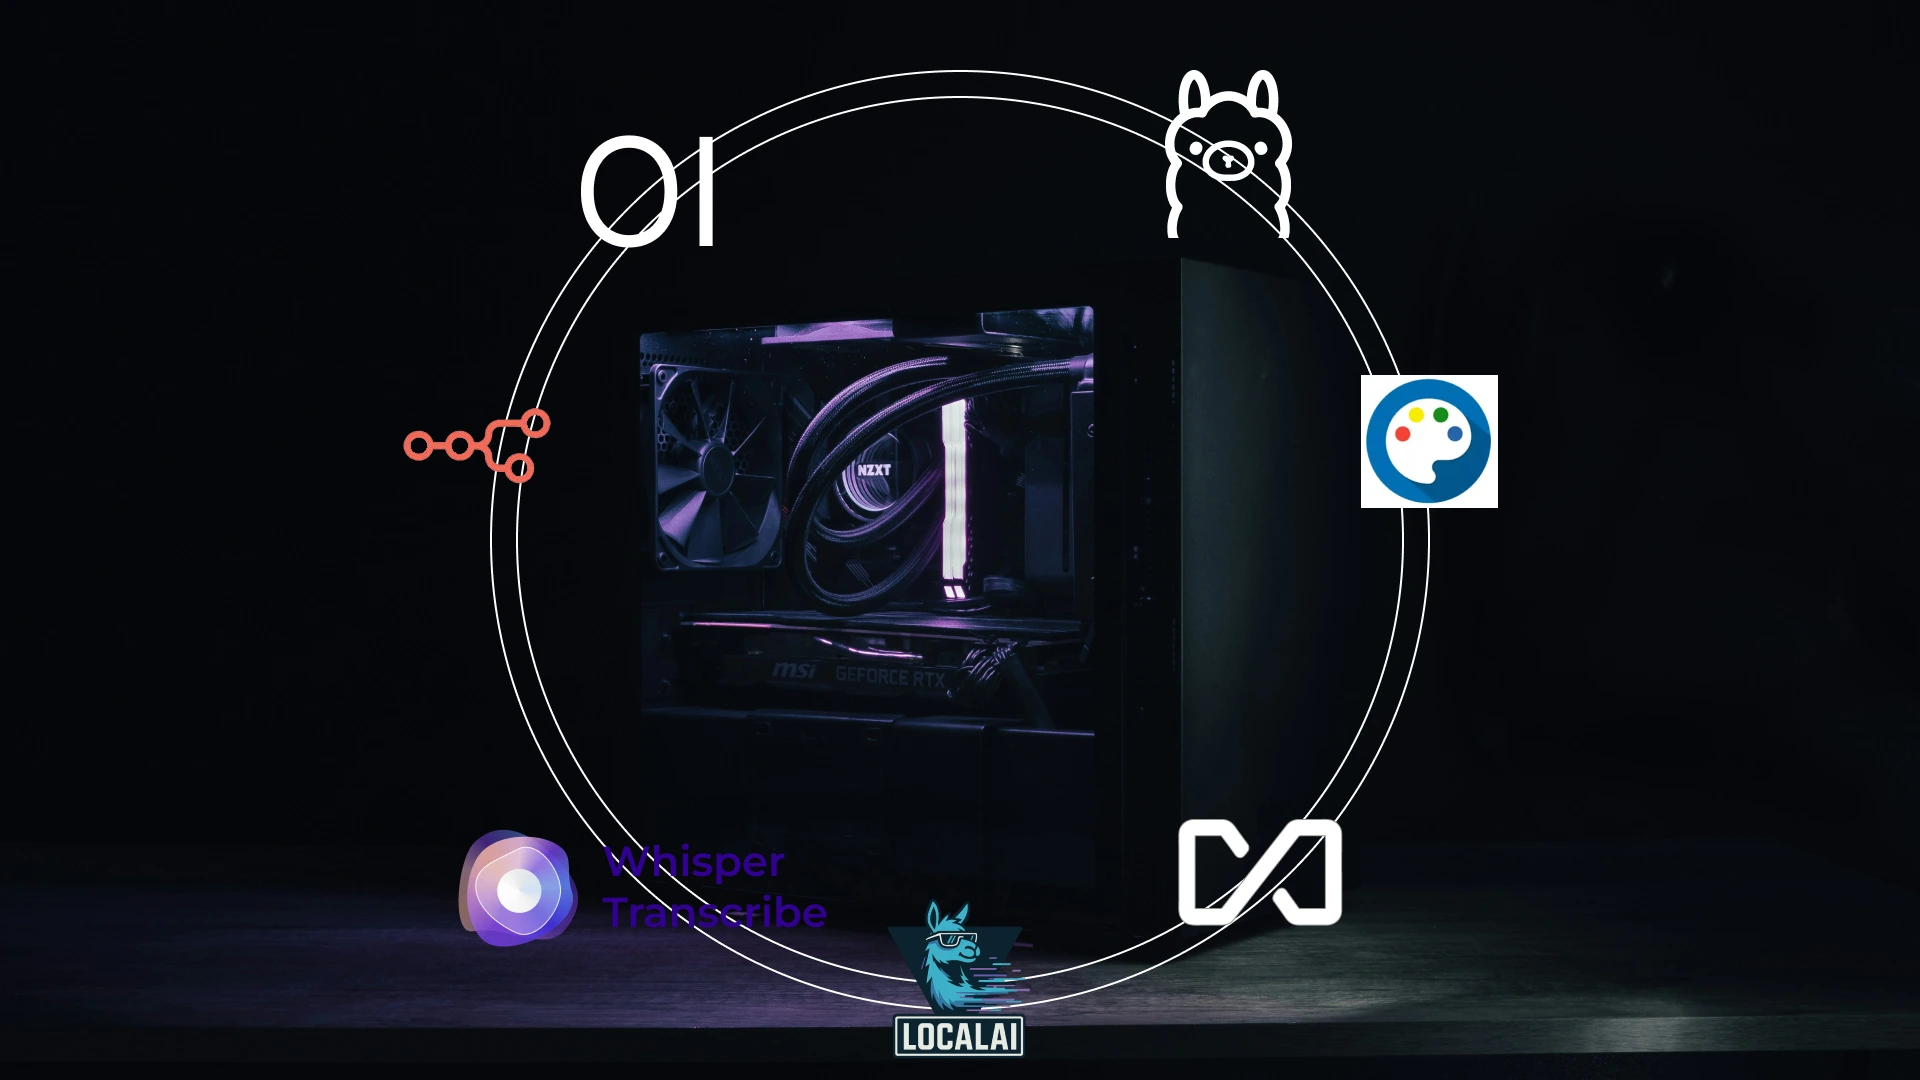
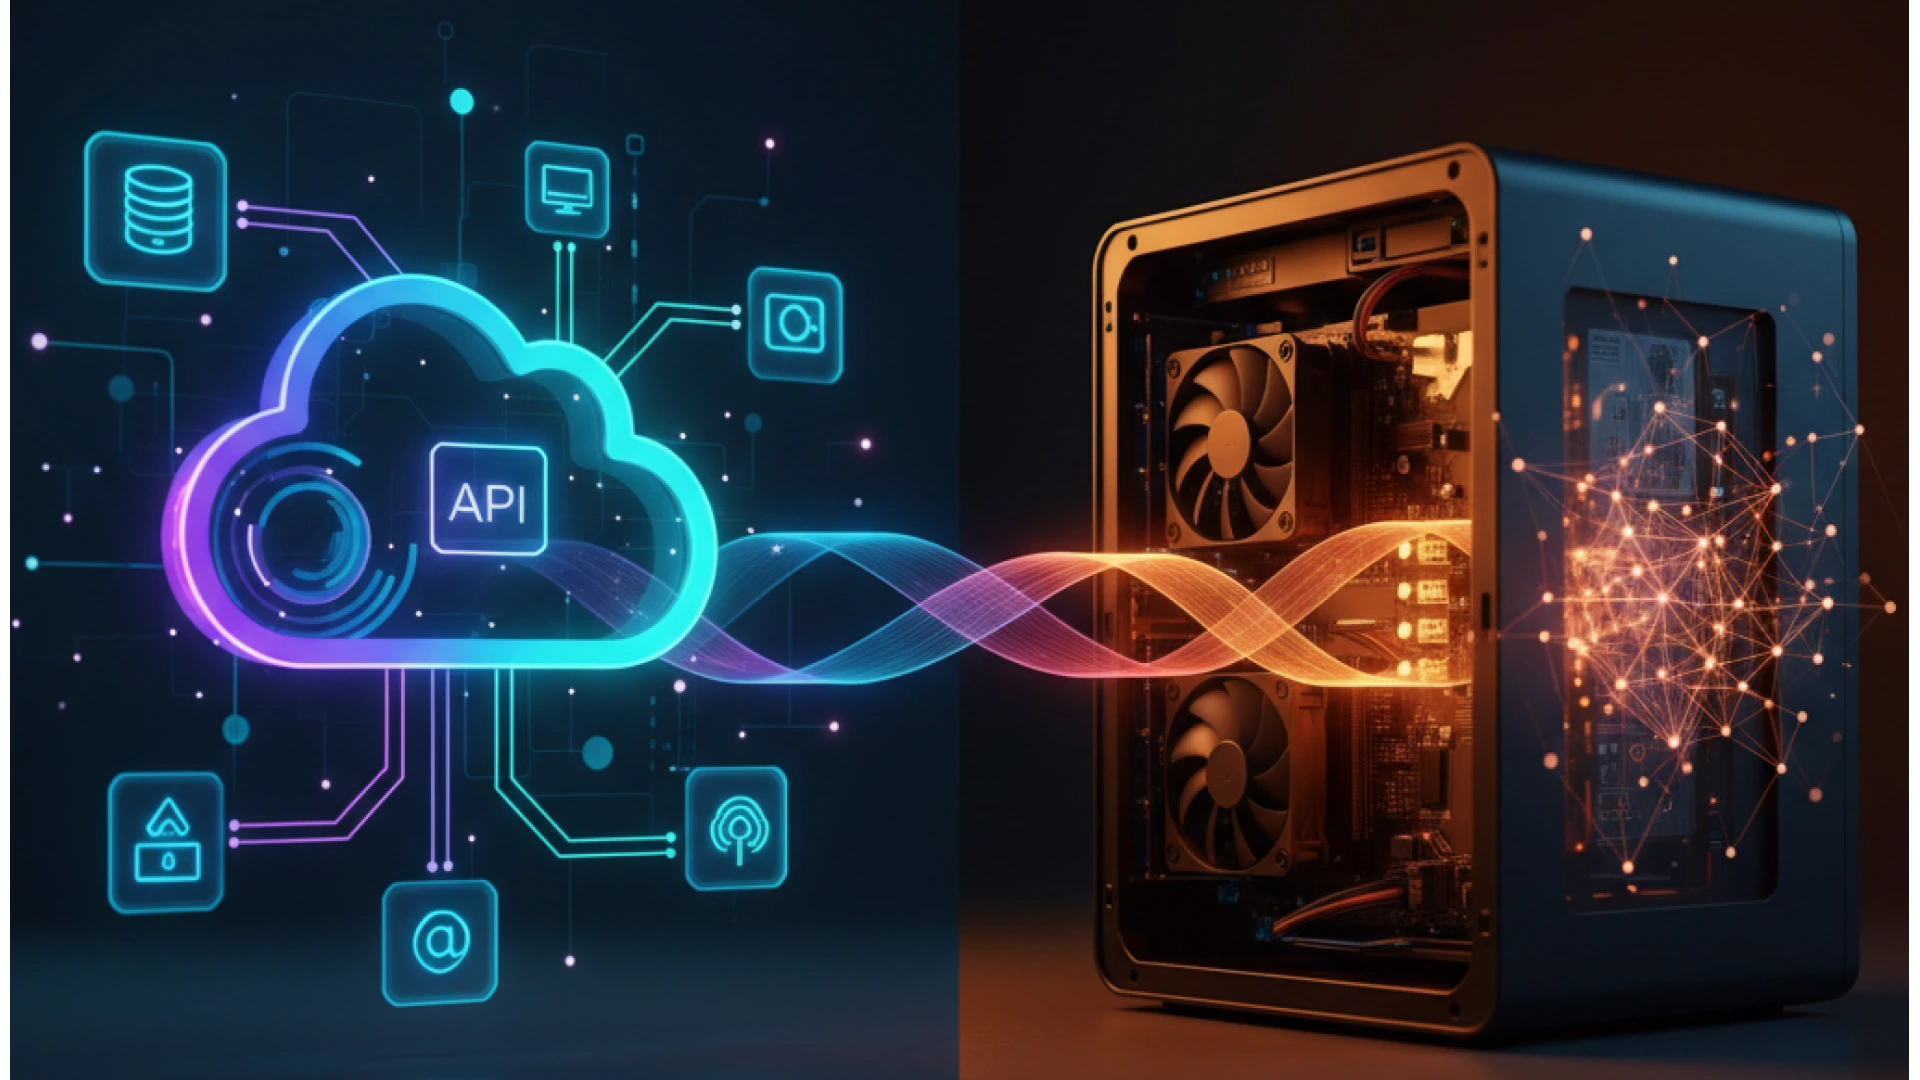
The landscape of artificial intelligence has undergone a seismic shift from 2024 into 2025. The era of being dependent on expensive cloud APIs and monthly subscriptions is over; powerful AI now runs on hardware you own and control. The democratization of local AI deployment is no longer a buzzword it’s a reality unfolding in home offices and basement server racks worldwide, enabling true privacy-focused AI.
While specific 2025 survey data is not yet available, the trend from 2024 has accelerated: you can now run GPT-4 class models locally with zero ongoing API costs, process 10,000+ pages of documents with instant Q&A retrieval, generate unlimited AI images without subscription fees, and build intelligent automation workflows that work offline.
The benefits of a self-hosted AI setup extend far beyond substantial cost savings. Running AI models locally guarantees complete data privacy your conversations, documents, and creations never leave your network. You will eliminate $50-200/month in API costs from services like OpenAI and Anthropic. Your AI assistant remains operational during internet outages. Most importantly, you gain unparalleled educational value, transforming from a passive AI consumer into someone who truly understands and commands these systems, building your own personal AI infrastructure.
Docker has emerged as the ideal platform for deploying AI workloads, making it simpler than ever to learn how to run AI models at home. It elegantly solves the dependency conflicts that plague traditional AI installations, ensures your setup is reproducible, and dramatically simplifies the deployment of complex AI stacks. With the integration of AI assistants directly into Docker Desktop, managing these Docker containers AI has never been easier.
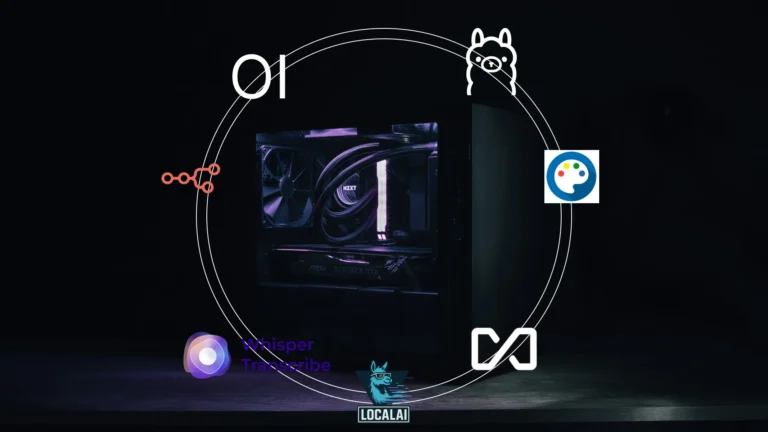
This guide walks you through deploying seven essential containers that form a complete AI homelab ecosystem. You’ll build a self-hosted ChatGPT alternative 2025 interface, implement document intelligence with retrieval-augmented generation, create AI-powered automation workflows, generate professional images, and transcribe audio all local AI without cloud on your own home AI server.
30-Minute Quick Win: Your First Local AI
Before we dive into the complete ecosystem, let’s get you talking to a local AI setup in under 30 minutes. This Ollama quick start proves the concept works and provides the motivational boost of immediate success, a perfect Docker AI quick start.
You need only three commands. First, install Docker if it’s not already present:
curl -fsSL https://get.docker.com -o get-docker.sh && sudo sh get-docker.shNext, pull and run Ollama, the engine that will power your AI models:
docker run -d --gpus=all -v ollama:/root/.ollama -p 11434:11434 --name ollama ollama/ollamaFinally, deploy OpenWebUI, your sleek, ChatGPT alternative setup interface:
docker run -d --network=host -v open-webui:/app/backend/data -e OLLAMA_BASE_URL=http://127.0.0.1:11434 --name open-webui --restart always ghcr.io/open-webui/open-webui:mainOpen your browser to http://localhost:3000, create an account, and test with this prompt: “Explain quantum computing in simple terms.” Within seconds, you’ll witness a local AI model generating a coherent response entirely on your hardware, with no cloud APIs involved. This is the fastest way to test local AI fast and get AI running in 30 minutes.
This is merely the foundation. The simple setup you just deployed can be supercharged with document intelligence, automation workflows, image generation, and audio transcription. Now, let’s build the complete ecosystem around this core.
New to Docker? We’ve got you covered! Get a gentle introduction with our guide on Docker for Beginners.
Prerequisites & Hardware Requirements
Understanding your AI homelab hardware is crucial for setting realistic expectations and avoiding frustration. AI workloads are demanding, but you don’t need a data center to run impressive models. Your AI server requirements will depend on your goals and budget.
We analyzed and made hardware selection from sources like Toms hardware, and GamersNexus.
Hardware Tiers
- Minimum (Budget: $0-300): A CPU-only setup works for smaller models (7B parameters like Mistral, Phi-3), answering “can I run AI without GPU” with a yes. Expect 8-15 tokens/second on a recent i7/Ryzen CPU. You’ll need minimum 16GB of system RAM (32GB preferred). This tier is for learning and light use.
- Recommended (Budget: $300-800): An NVIDIA GPU with 8-12GB VRAM unlocks 13B-34B parameter models, meeting typical GPU requirements Docker needs. Cards like the RTX 3060 12GB (~$300 used) or RTX 4060 Ti 16GB offer excellent performance (25-50 t/s on 7B models). This is the sweet spot for most users.
- Ideal (Budget: $800-2000): NVIDIA GPUs with 16-24GB+ VRAM enable 70B+ models and high-quality image generation. The RTX 4090 (24GB) is the consumer flagship, while used professional cards like the RTX A5000 (24GB) offer power efficiency. This tier handles the most demanding deep learning hardware tasks.
Budget Alert Box:
- Used server GPUs like the Tesla M40 for AI homelab (24GB for ~$85) or P40 (24GB for ~$200) provide high VRAM for large models at a low cost, making them a contender for the cheapest GPU for running AI models.
- Trade-offs: Older architectures mean slower performance per gigabyte of VRAM and higher AI homelab power consumption.
Cost Analysis Box:
- Budget Build: $300-500 total (using used hardware).
- Monthly Electricity: $10-40 (varies by usage and rates).
- API Cost Savings: Replaces $50-200/month in OpenAI/Anthropic costs.
- Break-even Timeline: 3-12 months, after which your AI is effectively free.
AI Homelab Compatibility Matrix
Version compatibility is critical in the fast-moving AI ecosystem. GPU requirements Docker, security, and model support depend on specific version combinations. Getting these relationships right saves hours of troubleshooting version conflicts Docker.
Why Compatibility Matters:
Mismatched versions of Docker version AI, the NVIDIA Docker setup, and CUDA requirements AI are the most common source of failures. This matrix provides tested, stable combinations for NVIDIA Docker compatibility.
| Component | Recommended Version | Critical Notes |
|---|---|---|
| Docker Engine | 24.0+ | Required for security features, BuildKit, and the Docker Desktop AI Agent. Essential for Docker version AI. |
| NVIDIA Container Toolkit | 1.14+ | Essential for GPU passthrough; check driver compatibility for NVIDIA Docker setup. |
| CUDA Driver | 12.4+ | 70B+ models and SDXL require the latest memory management; check CUDA version for Llama 3 and newer models. |
| Ollama | 0.1.40+ | Necessary for Llama 3.1+ model format support. |
| Stable Diffusion WebUI | v1.9.0+ | Ensures extension compatibility and SDXL optimizations. |
Container 1: Ollama – The Core LLM Engine
Ollama is the foundational heart of your AI homelab the inference engine that runs local LLM server models. Think of it as the heart of your setup everything else connects to and depends on Ollama working correctly.
Why Ollama? It simplifies local LLM management dramatically compared to alternatives, making it the best local AI model runner for many. It automatically handles Ollama GPU acceleration, provides a simple REST API, supports the efficient GGUF model format, and offers a curated library of models.
Complete Docker Setup:
# docker-compose.yml snippet
version: '3.8'
services:
  ollama:
    image: ollama/ollama:latest
    container_name: ollama
    ports:
      - "11434:11434"
    volumes:
      - ollama_data:/root/.ollama
    deploy:
      resources:
        reservations:
          devices:
            - driver: nvidia
              count: all
              capabilities: [gpu]
    restart: unless-stopped

volumes:
  ollama_data:
This Ollama Docker setup is your foundation for a self-hosted language model. Save this as part of your docker-compose.yml and deploy with docker-compose up -d. The GPU passthrough configuration automatically detects and uses all available NVIDIA GPUs in your system.
Model Selection Guide:
Choosing the right model size balances performance with capabilities. Smaller models respond faster but have reduced reasoning ability. Larger models provide superior quality but demand more resources.
- 7B Models (Llama 3, Mistral, Phi-3): 8GB RAM minimum and 4-6GB VRAM. These models deliver surprisingly capable performance for everyday tasks: writing emails, basic coding assistance, simple question answering. Response times feel instant at 40-80 tokens per second on modest GPUs. A Mistral Docker setup is a great start.
- 13B Models (Llama 2 13B, Vicuna 13B): 16GB system RAM and 8-10GB VRAM. The sweet spot for most users, offering ChatGPT 3.5-level quality. They handle complex reasoning, write better code, and maintain context more reliably. Expect 20-40 tokens per second.
- 34B Models (Yi 34B, Codellama 34B): 32GB system RAM and 20GB VRAM. These approach GPT-4 quality for specific tasks, particularly code generation and technical writing. Only viable with high-VRAM cards like the Tesla M40 or RTX 4090. Performance drops to 10-20 tokens per second.
- 70B Models (Llama 2 70B, Mixtral 8x7B): 64GB system RAM and 40GB+ VRAM minimum. True GPT-4 alternatives that handle complex reasoning, creative writing, and specialized knowledge. Practically limited to enthusiast builds with multiple GPUs or high-end workstation cards. Expect 8-15 tokens per second even on powerful hardware.
Start with a 7B model to validate your setup works, then scale up based on your hardware capabilities and quality requirements. Use quantized models for better performance on limited hardware.
Container 2: OpenWebUI – Your ChatGPT-Like Interface
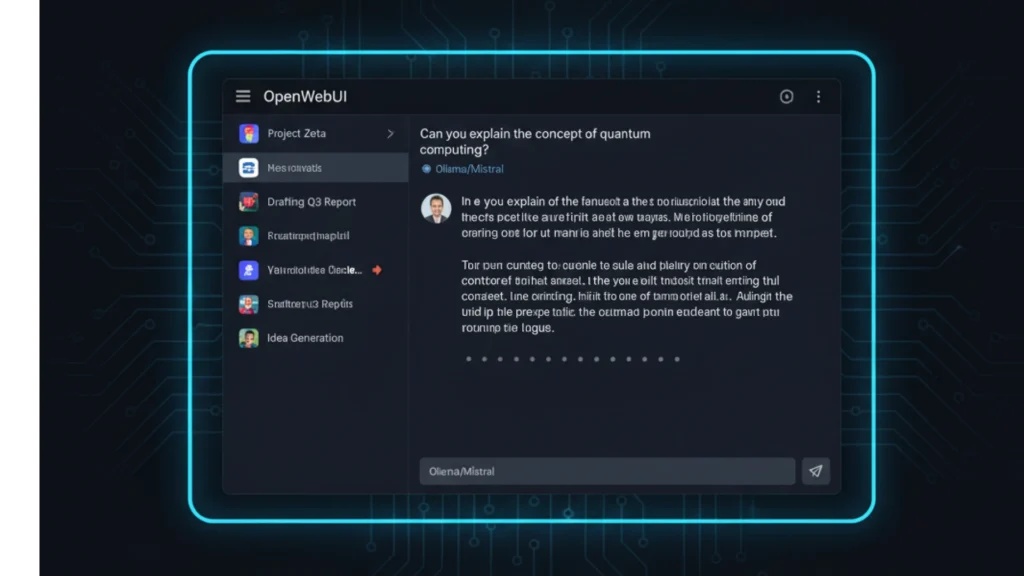
OpenWebUI transforms Ollama from a command-line tool into an elegant, feature-rich chat interface that rivals commercial services like ChatGPT. If you’ve used ChatGPT, Claude, or other AI chat interfaces, OpenWebUI will feel immediately familiar except everything runs on your hardware, providing a true local ChatGPT experience.
Key Advantages: It offers persistent chat history across sessions, multi-user AI chat support with authentication for family sharing, document upload capabilities that enable retrieval-augmented generation, model switching without restarting containers, and a mobile-responsive design that works beautifully on phones and tablets. Many consider it the best UI for Ollama available.
Visually, OpenWebUI looks and feels like ChatGPT Plus. The same clean aesthetic, familiar three-column layout, and intuitive controls. New users often assume they’re still using a cloud service until reminded everything is local, making it a family-friendly AI chat solution.
Complete Docker Setup:
services:
  open-webui:
    image: ghcr.io/open-webui/open-webui:main
    container_name: open-webui
    ports:
      - "3000:8080"
    volumes:
      - open-webui:/app/backend/data
    environment:
      - OLLAMA_BASE_URL=http://ollama:11434
    depends_on:
      - ollama
    restart: unless-stopped
    networks:
      - ai_network

volumes:
  open-webui:
    driver: local
The OLLAMA_BASE_URL environment variable tells OpenWebUI how to reach your Ollama container. Using the Docker network name (ollama) instead of localhost ensures containers can communicate even when networking gets complex.
After deployment, navigate to http://localhost:3000, create your first user account (which automatically becomes the admin), and start chatting. The interface includes a model selector dropdown; click it to choose from all models you’ve downloaded in Ollama.
Real-World Use Cases
OpenWebUI becomes your daily driver for AI interactions. Use it for quick questions while working, longer research sessions that require following up on responses, creative writing where you iterate with the AI, and family sharing where each person has their own conversation history.
The document upload feature deserves special attention. Drop in PDF files, text documents, or markdown files, and OpenWebUI automatically chunks them, creates embeddings, and makes the content available for the AI to reference. This simple feature turns your chat interface into a powerful research assistant that can answer questions about your own documents.
Container 3: LocalAI – The All-in-One Alternative
LocalAI takes a different architectural approach than the Ollama + OpenWebUI combination. It provides an all-in-one solution with OpenAI API compatibility, meaning applications designed for OpenAI’s API can work with LocalAI with minimal changes. This opens up an entire ecosystem of tools that expect OpenAI’s API format, creating a true drop-in API replacement.
What LocalAI Offers
LocalAI bundles multiple AI capabilities into a single container: chat completions matching OpenAI’s format, text embeddings for semantic search, audio transcription using Whisper, image generation with Stable Diffusion, and even text-to-speech synthesis. For developers building applications, this API compatibility is invaluable for creating a self-hosted OpenAI experience.
Decision Matrix: LocalAI vs Ollama+OpenWebUI
Choosing between these approaches depends on your specific needs and preferences, a common LocalAI vs Ollama comparison point.
- Choose LocalAI if:
- You need OpenAI API compatibility for existing applications
- You’re developing custom applications that consume AI services
- You want multi-modal AI Docker capabilities (text, image, audio) in one container
- You prefer fewer moving parts to manage
- You have experience with API-first architectures
- Choose Ollama+OpenWebUI if:
- You prioritize simplicity and ease of use
- Your primary use case is interactive chat
- You want the fastest, most streamlined model switching
- You prefer specialized tools that do one thing excellently
- You’re new to self-hosted AI
- Use both if:
- You’re running complex automation workflows with n8n
- You want maximum flexibility to experiment
- You have sufficient hardware resources (recommend 16GB+ VRAM)
- You need API compatibility for some apps but want the superior Ollama experience for others
Many advanced users run both, using OpenWebUI for daily interactive work and LocalAI as the backend for automated workflows and custom applications, achieving an OpenAI API without cloud dependency.
Complete Docker Setup:
services:
  localai:
    image: quay.io/go-skynet/local-ai:latest
    container_name: localai
    ports:
      - "8080:8080"
    volumes:
      - localai_models:/models
      - ./localai-config.yaml:/config.yaml
    environment:
      - MODELS_PATH=/models
      - CONFIG_FILE=/config.yaml
      - THREADS=4
      - CONTEXT_SIZE=2048
    deploy:
      resources:
        reservations:
          devices:
            - driver: nvidia
              count: all
              capabilities: [gpu]
    restart: unless-stopped
    networks:
      - ai_network

volumes:
  localai_models:
    driver: local
LocalAI requires a configuration file defining your models. Create localai-config.yaml in your project directory specifying which models to load and their parameters. The LocalAI documentation provides extensive examples for various model types.
Testing your LocalAI installation uses standard OpenAI API calls:
curl http://localhost:8080/v1/chat/completions \
  -H "Content-Type: application/json" \
  -d '{
    "model": "llama3",
    "messages": [{"role": "user", "content": "Hello!"}]
  }'
Container 4: n8n – AI Workflow Automation Powerhouse
If Ollama is the heart of your AI homelab, n8n is the nervous system. This visual AI workflow automation platform transforms your static AI models into active, automated assistants that monitor systems, process data, and take actions based on complex logic all without writing traditional code, serving as a powerful Zapier alternative.
The Transformation n8n Enables
Standalone AI models are reactive they wait for you to ask questions. n8n makes them proactive. Imagine RSS feeds automatically summarized and delivered each morning, new emails analyzed and categorized by priority with draft responses generated for important messages, documents automatically processed and indexed the moment they arrive in a watched folder, or social media content generated on a schedule with AI-created text and images.
n8n provides visual workflow editing where you connect nodes representing different services, over 400 pre-built integrations including all major cloud services, dedicated n8n AI nodes for Ollama, OpenAI, and other services, webhook triggers for event-driven automation, scheduled execution for time-based workflows, and conditional logic for sophisticated decision-making.
Complete Docker Setup (with PostgreSQL for persistence):
services:
  n8n:
    image: n8nio/n8n:latest
    container_name: n8n
    ports:
      - "5678:5678"
    environment:
      - DB_TYPE=postgresdb
      - DB_POSTGRESDB_HOST=postgres
      - DB_POSTGRESDB_DATABASE=n8n
      - DB_POSTGRESDB_USER=n8n
      - DB_POSTGRESDB_PASSWORD=your_secure_password
      - N8N_BASIC_AUTH_ACTIVE=true
      - N8N_BASIC_AUTH_USER=admin
      - N8N_BASIC_AUTH_PASSWORD=your_secure_password
      - N8N_HOST=0.0.0.0
      - WEBHOOK_URL=http://localhost:5678/
    volumes:
      - n8n_data:/home/node/.n8n
    depends_on:
      - postgres
    restart: unless-stopped
    networks:
      - ai_network

  postgres:
    image: postgres:15
    container_name: n8n_postgres
    environment:
      - POSTGRES_DB=n8n
      - POSTGRES_USER=n8n
      - POSTGRES_PASSWORD=your_secure_password
    volumes:
      - n8n_postgres_data:/var/lib/postgresql/data
    restart: unless-stopped
    networks:
      - ai_network

volumes:
  n8n_data:
  n8n_postgres_data:
The PostgreSQL database ensures workflow execution history persists across restarts. For production use, this reliability is essential you want logs of every workflow execution for troubleshooting and audit purposes.
Access n8n at http://localhost:5678 and log in with the credentials you specified. The visual editor immediately makes sense even if you’ve never seen workflow automation before.
4 Concrete Workflow Examples
- Automated Content Pipeline: RSS feeds trigger on new articles. An Ollama node summarizes the content. A Stable Diffusion node generates a featured image. The workflow posts to your blog via API or sends to your email. Total automation from news to publication, a perfect example of n8n with Ollama integration.
- Smart Email Assistant: New emails trigger the workflow. Ollama analyzes sentiment and priority. High-priority messages get drafted responses. Low-priority emails receive simple acknowledgments. Urgent items send you mobile notifications. Your inbox works for you even while you sleep.
- Homelab Monitoring Intelligence: System logs feed into the workflow at regular intervals. Ollama analyzes for anomalies and potential issues. Pattern recognition identifies problems before they become critical. Tickets auto-create in your issue tracker. Include context and suggested fixes from the AI analysis.
- Document Processing Pipeline: New PDF files dropped in a watched folder trigger processing. Whisper transcribes any audio content. Text extraction pulls out the written content. AnythingLLM automatically indexes everything. Within minutes of uploading a document, you can query its contents through your AI chat interface.
These AI workflow examples scratch the surface. The n8n community shares thousands of workflow templates you can import and customize. Start simple with a single workflow, then expand as you see the possibilities to automate AI tasks with n8n.
Container 5: AnythingLLM – Document Intelligence Specialist
AnythingLLM solves a critical limitation of standard AI models: they only know what they were trained on. Your personal documents, company knowledge bases, proprietary research none of that exists in a base model’s training data. AnythingLLM implements RAG implementation (Retrieval-Augmented Generation) to give AI models access to your documents, creating a private ChatGPT documents system.
Understanding RAG Simply
Think of RAG like the difference between a closed-book and open-book exam. A standard AI model takes a closed-book exam it can only use knowledge memorized during training. RAG provides the open-book version when you ask a question, the system first searches your documents for relevant information, then includes that context when generating the answer.
This matters enormously for practical applications. Ask about your company’s vacation policy, and AnythingLLM finds the relevant section of your employee handbook before answering. Query a technical specification, and it references the exact document section with the specifications. The AI cites its sources, so you can verify accuracy, showing you exactly how to chat with your documents AI.
Key Features
AnythingLLM provides dedicated workspaces isolating different document collections, multi-format support including PDF, DOCX, TXT, and markdown files, source citation showing exactly which document sections informed each answer, a built-in vector database AI eliminating the need for separate infrastructure, and support for multiple LLM backends including Ollama and LocalAI.
The workspace concept deserves emphasis. Create separate workspaces for different projects one for work documents, another for personal research, a third for hobby projects. Each workspace maintains its own document collection and chat history, preventing contamination between unrelated topics.
Complete Docker Setup:
services:
  anythingllm:
    image: mintplexlabs/anythingllm:latest
    container_name: anythingllm
    ports:
      - "3001:3001"
    environment:
      - STORAGE_DIR=/app/server/storage
      - LLM_PROVIDER=ollama
      - OLLAMA_BASE_URL=http://ollama:11434
      - EMBEDDING_MODEL_PREF=nomic-embed-text
    volumes:
      - anythingllm_storage:/app/server/storage
    depends_on:
      - ollama
    restart: unless-stopped
    networks:
      - ai_network

volumes:
  anythingllm_storage:
    driver: local
The embedding model handles converting your documents into vectors for semantic search. The nomic-embed-text model provides excellent quality while running efficiently on modest hardware.
Creating Your First Knowledge Base
Navigate to http://localhost:3001 after deployment. Click “New Workspace” and give it a descriptive name like “Technical Documentation” or “Research Papers.” Upload documents using the interface AnythingLLM handles chunking, embedding, and indexing automatically.
Select your preferred LLM from Ollama (larger models like 13B provide better synthesis) and embedding model. Start asking questions. Notice how responses include citations showing which document sections informed the answer. This transparency builds trust in the AI’s responses.
Performance scales with document count. Indexing 100 pages takes minutes, but 10,000+ page libraries might take hours initially. Once indexed, queries return in seconds regardless of corpus size thanks to efficient vector search, making it a powerful tool for document Q&A local AI.
Container 6: Stable Diffusion WebUI – AI Image Generation
Stable Diffusion WebUI represents the gold standard for self-hosted image AI. Based on AUTOMATIC1111’s widely-adopted interface, it provides comprehensive control over the image generation process from simple text-to-image creation to sophisticated workflows involving ControlNet and LoRA training.
Core Capabilities
The WebUI handles text-to-image generation from written descriptions, image-to-image transformation that modifies existing images while preserving structure, inpainting that intelligently fills selected regions, outpainting that extends images beyond their original boundaries, and upscaling that enhances resolution while maintaining quality.
Beyond basics, advanced features include ControlNet for precise compositional control using edge detection, depth maps, and pose estimation, LoRA training that fine-tunes models with just 50-100 example images, an extensions ecosystem with hundreds of community-developed add-ons, batch processing for generating hundreds of variations, and script support for custom workflows.
Complete Docker Setup:
services:
  stable-diffusion:
    image: halcyonlabs/sd-webui:latest
    container_name: stable-diffusion
    ports:
      - "7860:7860"
    environment:
      - CLI_ARGS=--api --listen --port 7860 --xformers --enable-insecure-extension-access
    volumes:
      - sd_models:/app/stable-diffusion-webui/models
      - sd_outputs:/app/stable-diffusion-webui/outputs
      - sd_extensions:/app/stable-diffusion-webui/extensions
    deploy:
      resources:
        reservations:
          devices:
            - driver: nvidia
              count: 1
              capabilities: [gpu]
    restart: unless-stopped
    networks:
      - ai_network

volumes:
  sd_models:
  sd_outputs:
  sd_extensions:
The --xformers flag enables memory-efficient attention mechanisms crucial for working with limited VRAM. The --api flag exposes REST endpoints that n8n and other tools can call programmatically.
VRAM Requirements & Optimization
Understanding VRAM limitations prevents frustration and helps you set realistic expectations for image quality and generation speed when you run Stable Diffusion locally.
- 4-6GB VRAM: Run Stable Diffusion 1.5 at 512×512 resolution. Generation takes 15-30 seconds per image. SDXL models won’t fit in memory. ControlNet requires careful configuration with optimized models. This tier works for learning and experimentation.
- 8-10GB VRAM: Handle SDXL Docker at 512×512 with acceptable generation times around 30-45 seconds. ControlNet becomes practical for basic use cases. You can run SD 1.5 at higher resolutions or with multiple ControlNets. This represents the minimum for serious work.
- 12-16GB VRAM: Comfortable SDXL operation at 1024×1024, the model’s native resolution, with generation times of 20-40 seconds. Multiple ControlNets work smoothly. LoRA training becomes practical. This tier handles most professional workflows.
- 24GB+ VRAM: Maximum flexibility with SDXL at 2048×2048, support for experimental video generation, simultaneous ControlNets with no compromises, and fast LoRA training. True enthusiast and professional tier.
Optimization techniques extend capability on limited hardware. Enable xformers attention, use the --medvram flag for 6-8GB cards, generate at lower resolutions and upscale, choose SD 1.5 over SDXL when VRAM-constrained, and close other GPU-using applications during generation.
Navigate to http://localhost:7860 to access the interface. The learning curve is steep initially Stable Diffusion offers immense flexibility at the cost of complexity. Start with simple text-to-image prompts, then gradually explore advanced features as you build confidence.
Container 7: Whisper/WhisperX – Speech-to-Text Excellence
OpenAI’s Whisper model brought production-quality self-hosted speech recognition to the open-source world. WhisperX extends this with faster inference and speaker diarization that identifies who is speaking when. Together, they provide AI transcription capabilities rivaling commercial services entirely offline and private.
Why Self-Host Speech Recognition
Privacy matters intensely for audio transcription. Medical consultations, business meetings, personal voice notes, legal proceedings all contain sensitive information you might not want uploaded to cloud services. Self-hosting ensures audio never leaves your network, providing true private speech recognition.
Cost and usage limits also drive adoption. Cloud transcription services charge per minute, making heavy usage expensive. Unlimited local transcription means you can process hours of audio daily without budget concerns. Offline capability ensures functionality during internet outages or while traveling.
Complete Docker Setup:
services:
  whisper:
    image: onerahmet/openai-whisper-asr-webservice:latest
    container_name: whisper
    ports:
      - "9000:9000"
    environment:
      - ASR_MODEL=base
      - ASR_ENGINE=openai_whisper
    volumes:
      - whisper_cache:/root/.cache/whisper
    deploy:
      resources:
        reservations:
          devices:
            - driver: nvidia
              count: 1
              capabilities: [gpu]
    restart: unless-stopped
    networks:
      - ai_network

volumes:
  whisper_cache:
    driver: local
OpenAI’s Whisper model brought production-quality self-hosted speech recognition to the open-source world. WhisperX extends this with faster inference and speaker diarization that identifies who is speaking when. Together, they provide AI transcription capabilities rivaling commercial services entirely offline and private.
Why Self-Host Speech Recognition
Privacy matters intensely for audio transcription. Medical consultations, business meetings, personal voice notes, legal proceedings all contain sensitive information you might not want uploaded to cloud services. Self-hosting ensures audio never leaves your network, providing true private speech recognition.
Cost and usage limits also drive adoption. Cloud transcription services charge per minute, making heavy usage expensive. Unlimited local transcription means you can process hours of audio daily without budget concerns. Offline capability ensures functionality during internet outages or while traveling.
Complete Docker Setup:
services:
  whisper:
    image: onerahmet/openai-whisper-asr-webservice:latest
    container_name: whisper
    ports:
      - "9000:9000"
    environment:
      - ASR_MODEL=base
      - ASR_ENGINE=openai_whisper
    volumes:
      - whisper_cache:/root/.cache/whisper
    deploy:
      resources:
        reservations:
          devices:
            - driver: nvidia
              count: 1
              capabilities: [gpu]
    restart: unless-stopped
    networks:
      - ai_network

volumes:
  whisper_cache:
    driver: local
The service exposes a REST API accepting audio files and returning transcribed text. Integration with n8n and other tools becomes straightforward through simple HTTP POST requests.
Model Selection Guide
Whisper provides five model sizes balancing speed against accuracy. Choosing the right model depends on your quality requirements and available hardware when you want to transcribe audio files locally.
- tiny: Processes audio approximately 32 times faster than realtime on a modest GPU. Requires only 1GB VRAM. English-only with acceptable but not production quality. Perfect for quick transcription of clear audio.
- base: Runs about 16 times faster than realtime. Still requires just 1GB VRAM. Supports multilingual ASR transcription with substantially better accuracy than tiny. Good default for most casual use.
- small: Operates roughly 6 times faster than realtime. Needs 2GB VRAM. Quality improves noticeably, especially for accented speech and technical terminology. Recommended minimum for serious use.
- medium: Processes around 2 times realtime speed. Requires 5GB VRAM. Production-quality transcription handling difficult audio with background noise, multiple speakers, and domain-specific vocabulary. Sweet spot for most users.
- large-v3: Approaches realtime processing speed (1x). Demands 10GB VRAM. Best possible quality with near-human transcription accuracy. Necessary only for challenging audio or mission-critical applications.
Start with the base model to validate your setup works, then upgrade to medium for daily use if VRAM allows. Large models rarely justify their resource cost for typical homelab applications.
Testing your deployment:
curl -F "audio_file=@test.mp3" http://localhost:9000/asrTranscription quality depends heavily on audio quality. Clean, clear recordings with single speakers produce excellent results even with smaller models. Noisy environments with multiple speakers and background sounds challenge even large models.
Integration Paths for Existing Setups
Many readers already run Docker containers or have experimented with Ollama. You don’t need to start from scratch this section shows how to integrate existing Ollama and other services with your existing infrastructure, making it easy to add AI to existing homelab.
For Existing Ollama Users: “Already Running Ollama? Here’s How to Integrate the Rest”
If you’ve already deployed Ollama and tested local models, adding the remaining components requires minimal changes. First, verify your Ollama instance is API-accessible:
curl http://localhost:11434/api/tagsThis should return a JSON list of installed models. If it works, your Ollama instance is ready for integration, allowing you to integrate Ollama with other services.
Deploy OpenWebUI pointing to your existing Ollama instance by setting the OLLAMA_BASE_URL environment variable to match your setup. If Ollama runs on a different machine, use its IP address instead of localhost.
Connect AnythingLLM to your current setup using the same base URL. The web interface includes configuration options under Settings → LLM Provider where you specify the Ollama endpoint.
Add n8n to orchestrate workflows across all services. The Ollama node in n8n accepts custom API endpoints, allowing connection to any accessible Ollama instance regardless of how it’s deployed.
For Docker Veterans: Docker-Compose Integration Tips
Experienced Docker users can copy the service definitions from individual sections into existing docker-compose.yml files. Several considerations ensure smooth integration for Docker compose migration.
Network configuration matters when services need cross-stack communication. If your existing stack uses custom networks, add the AI containers to those networks rather than creating isolated ones. Alternatively, use Docker’s default bridge network and reference containers by name Docker’s DNS handles resolution automatically.
Resource allocation requires adjustment when mixing AI and traditional services. AI workloads consume significant memory and GPU resources. Use Docker resource limits to prevent AI containers from starving other services:
deploy:
  resources:
    limits:
      memory: 8G
    reservations:
      memory: 4G
Port conflicts arise when existing services already bind to common ports. Change the host port mapping rather than the container’s internal port: "3002:8080" instead of "3000:8080" if port 3000 is taken.
Volume management becomes critical with multiple compose files. Named volumes should use consistent naming schemes to avoid confusion. Consider a prefix system: ai_ollama_data, ai_openwebui_data, etc.
Phased Integration Strategy
Rather than deploying all seven containers simultaneously, use the 4-week plan from Section 13 as an optimization checklist for incremental AI deployment. Each week focuses on validating one layer before adding the next.
Week one establishes the foundation with Ollama and OpenWebUI. Get comfortable with basic operations before adding complexity. Week two introduces intelligence capabilities with AnythingLLM and workflow automation with n8n. Week three adds creative and audio processing. Week four handles integration and optimization.
This phased approach prevents overwhelming complexity and makes troubleshooting manageable. Each layer builds on proven functionality from the previous week, making it easier to upgrade to full AI stack.
Orchestrating Your Complete AI Docker Stack
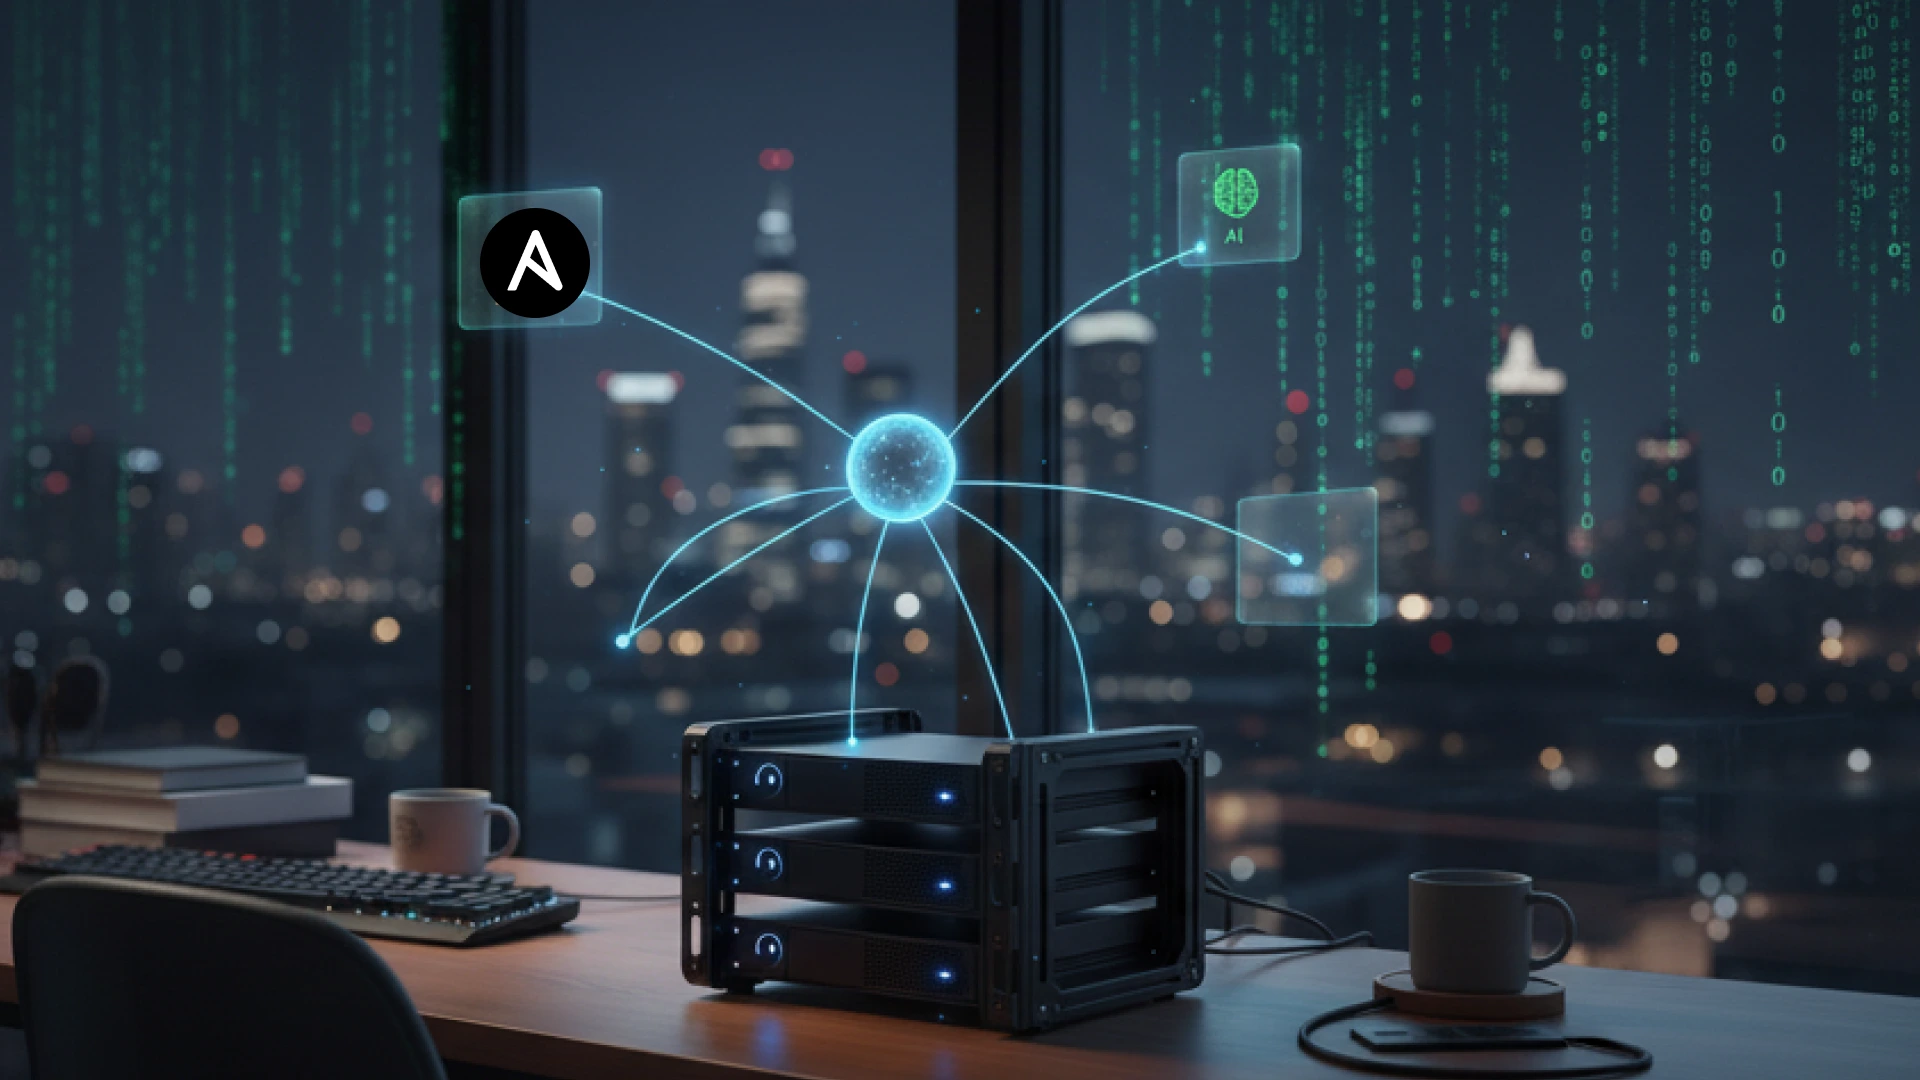
All seven containers working together create something greater than the sum of their parts. Individual services provide capabilities, but true power emerges from orchestration connecting containers so data flows automatically between them, creating a sophisticated AI homelab architecture.
Complete Ecosystem Integration
Imagine this workflow: A new podcast episode uploads to your server. Whisper automatically transcribes the audio. The transcript feeds into AnythingLLM for indexing. Ollama generates a summary and key points. Stable Diffusion creates social media graphics using descriptions from the summary. n8n orchestrates this entire pipeline, posting the final package to your blog and social media all without manual intervention.
This isn’t theoretical. The architecture supports exactly this kind of intelligent automation. Each container exposes APIs. n8n connects those APIs with visual workflows. Data flows automatically from one service to the next.
Complete Docker Compose File
Here’s the full stack integrated into a single docker-compose.yml for a complete AI
homelab setup:
version: '3.8'

services:
  # Core LLM Engine
  ollama:
    image: ollama/ollama:latest
    container_name: ollama
    ports:
      - "11434:11434"
    volumes:
      - ollama_data:/root/.ollama
    deploy:
      resources:
        reservations:
          devices:
            - driver: nvidia
              count: all
              capabilities: [gpu]
    restart: unless-stopped
    networks:
      - ai_network

  # Chat Interface
  open-webui:
    image: ghcr.io/open-webui/open-webui:main
    container_name: open-webui
    ports:
      - "3000:8080"
    volumes:
      - open-webui:/app/backend/data
    environment:
      - OLLAMA_BASE_URL=http://ollama:11434
    depends_on:
      - ollama
    restart: unless-stopped
    networks:
      - ai_network

  # Alternative API-Compatible Backend
  localai:
    image: quay.io/go-skynet/local-ai:latest
    container_name: localai
    ports:
      - "8080:8080"
    volumes:
      - localai_models:/models
      - ./localai-config.yaml:/config.yaml
    environment:
      - MODELS_PATH=/models
      - CONFIG_FILE=/config.yaml
    deploy:
      resources:
        reservations:
          devices:
            - driver: nvidia
              count: all
              capabilities: [gpu]
    restart: unless-stopped
    networks:
      - ai_network

  # Workflow Automation
  n8n:
    image: n8nio/n8n:latest
    container_name: n8n
    ports:
      - "5678:5678"
    environment:
      - DB_TYPE=postgresdb
      - DB_POSTGRESDB_HOST=postgres
      - DB_POSTGRESDB_DATABASE=n8n
      - DB_POSTGRESDB_USER=n8n
      - DB_POSTGRESDB_PASSWORD=your_secure_password
      - N8N_BASIC_AUTH_ACTIVE=true
      - N8N_BASIC_AUTH_USER=admin
      - N8N_BASIC_AUTH_PASSWORD=your_secure_password
    volumes:
      - n8n_data:/home/node/.n8n
    depends_on:
      - postgres
    restart: unless-stopped
    networks:
      - ai_network

  postgres:
    image: postgres:15
    container_name: n8n_postgres
    environment:
      - POSTGRES_DB=n8n
      - POSTGRES_USER=n8n
      - POSTGRES_PASSWORD=your_secure_password
    volumes:
      - n8n_postgres_data:/var/lib/postgresql/data
    restart: unless-stopped
    networks:
      - ai_network

  # Document Intelligence
  anythingllm:
    image: mintplexlabs/anythingllm:latest
    container_name: anythingllm
    ports:
      - "3001:3001"
    environment:
      - STORAGE_DIR=/app/server/storage
      - LLM_PROVIDER=ollama
      - OLLAMA_BASE_URL=http://ollama:11434
    volumes:
      - anythingllm_storage:/app/server/storage
    depends_on:
      - ollama
    restart: unless-stopped
    networks:
      - ai_network

  # Image Generation
  stable-diffusion:
    image: halcyonlabs/sd-webui:latest
    container_name: stable-diffusion
    ports:
      - "7860:7860"
    environment:
      - CLI_ARGS=--api --listen --port 7860 --xformers
    volumes:
      - sd_models:/app/stable-diffusion-webui/models
      - sd_outputs:/app/stable-diffusion-webui/outputs
      - sd_extensions:/app/stable-diffusion-webui/extensions
    deploy:
      resources:
        reservations:
          devices:
            - driver: nvidia
              count: 1
              capabilities: [gpu]
    restart: unless-stopped
    networks:
      - ai_network

  # Speech Recognition
  whisper:
    image: onerahmet/openai-whisper-asr-webservice:latest
    container_name: whisper
    ports:
      - "9000:9000"
    environment:
      - ASR_MODEL=medium
      - ASR_ENGINE=openai_whisper
    volumes:
      - whisper_cache:/root/.cache/whisper
    deploy:
      resources:
        reservations:
          devices:
            - driver: nvidia
              count: 1
              capabilities: [gpu]
    restart: unless-stopped
    networks:
      - ai_network

networks:
  ai_network:
    driver: bridge

volumes:
  ollama_data:
  open-webui:
  localai_models:
  n8n_data:
  n8n_postgres_data:
  anythingllm_storage:
  sd_models:
  sd_outputs:
  sd_extensions:
  whisper_cache:
Save this as docker-compose.yml and deploy everything with docker-compose up -d. Docker handles dependency ordering, network creation, and volume management automatically, solving the challenge of how to connect Docker AI containers.
4-Week Deployment Checklist
Deploying all seven containers simultaneously invites chaos. This phased approach builds complexity gradually while validating each layer.
- Week 1: Foundation & Validation
- Deploy Ollama and OpenWebUI using
docker-compose up -d ollama open-webui - Download your first model:
docker exec ollama ollama pull llama3 - Test basic chat functionality through the web interface
- Verify GPU acceleration:
docker exec ollama nvidia-smishould show GPU activity during inference - Benchmark performance using a standard prompt
- Success criteria: Chat responses feel responsive, GPU shows utilization, no error messages
- Deploy Ollama and OpenWebUI using
- Week 2: Intelligence Layer
- Add AnythingLLM:
docker-compose up -d anythingllm - Add n8n and its PostgreSQL database:
docker-compose up -d n8n postgres - Create your first knowledge base with 10-20 test documents
- Build a simple n8n workflow that calls Ollama (try the “summarize RSS feeds” example)
- Test document Q&A in AnythingLLM
- Success criteria: Documents answer questions accurately, basic n8n workflow executes successfully
- Add AnythingLLM:
- Week 3: Creative & Audio
- Deploy Stable Diffusion:
docker-compose up -d stable-diffusion - Deploy Whisper:
docker-compose up -d whisper - Download SD models (this takes time several GB downloads)
- Generate your first image with a simple prompt
- Test audio transcription with a clear voice recording
- Success criteria: Images generate without errors, transcription accuracy is acceptable
- Deploy Stable Diffusion:
- Week 4: Integration & Optimization
- Connect all containers through n8n workflows
- Create one complex workflow using multiple services
- Set up reverse proxy AI for clean URLs (optional but recommended)
- Configure monitoring and automated backups
- Document your setup and save all configurations
- Success criteria: End-to-end workflow executes successfully, system feels stable
Network Architecture
Docker networking enables service discovery without hardcoding IP addresses. When containers share a network (like ai_network in our compose file), they can reference each other by container name. OpenWebUI connects to Ollama using http://ollama:11434 instead of http://192.168.1.100:11434.
This DNS-based discovery survives container restarts and IP address changes. If you redeploy Ollama and it gets a new IP, other containers automatically resolve the new address using the unchanged container name.
Reverse Proxy Setup
Accessing services through ports (:3000, :5678, :7860) works but feels unprofessional. A reverse proxy provides clean subdomain URLs: ai.home.lab, n8n.home.lab, sd.home.lab.
Two popular options serve the homelab community:
- Nginx Proxy Manager: GUI-based configuration, perfect for beginners. Deploy it as another Docker container, configure upstreams through the web interface, and it handles Let’s Encrypt certificates automatically. Ideal if you want SSL for remote access.
- Traefik: Configuration-as-code approach using Docker labels. More powerful but steeper learning curve. Better choice if you manage infrastructure as code and want deep integration with Docker. A good option for Traefik AI setup.
Example Traefik labels for OpenWebUI:
labels:
  - "traefik.enable=true"
  - "traefik.http.routers.openwebui.rule=Host(`ai.home.lab`)"
  - "traefik.http.services.openwebui.loadbalancer.server.port=8080"
Most homelab users start without a reverse proxy, add Nginx Proxy Manager when the port numbers become annoying, then potentially migrate to Traefik later if they need advanced features.
Validating Your Setup: Performance Benchmarks & Health Checks
After deploying your AI homelab, you need answers to critical questions: Is everything working correctly? Is performance normal or is something misconfigured? This section provides concrete AI performance benchmarks and health check procedures for proper homelab validation.
Why Validation Matters
AI workloads are resource-intensive and complex. Subtle misconfigurations can reduce performance by 50% or more. Perhaps GPU acceleration isn’t actually working. Maybe memory allocation is too restrictive. Without benchmarks, you won’t know if you’re getting the performance your hardware should deliver, making an Ollama speed test essential.
The Validation Workflow
Start with Ollama since it’s the foundation everything else builds on. Then validate each additional service systematically.
Ollama Benchmarking
Run a standardized prompt and measure tokens per second. Use this test prompt for consistency:
time docker exec ollama ollama run llama3 "Explain quantum computing in exactly 100 words"The time command measures execution duration. Divide output word count by seconds to calculate tokens per second (roughly 1.3 tokens per word for English text).
Performance Benchmark Table
| Hardware | 7B Model | 13B Model | 70B Model |
|---|---|---|---|
| CPU-only (Recent i7) | 8-15 t/s | 2-5 t/s | Not Recommended |
| GPU (Tesla P40 24GB) | 35-60 t/s | 20-40 t/s | 8-15 t/s |
| GPU (RTX 3060 12GB) | 25-50 t/s | 15-30 t/s | 3-7 t/s |
| GPU (RTX 4090 24GB) | 80-120+ t/s | 50-90 t/s | 20-35 t/s |
Interpreting Results: If you’re within 70% of these numbers, your setup is healthy. Significantly lower performance indicates issues worth investigating. Check GPU utilization during inference with nvidia-smi running in another terminal you should see near 100% GPU usage. This answers the question “how fast should my AI be”.
Stable Diffusion Health Check
Generate a simple 512×512 image with this prompt: “a photograph of a red apple on a wooden table, studio lighting, high detail”
Expected generation times by GPU:
- RTX 3060 12GB: 25-35 seconds
- RTX 4070 Ti: 15-20 seconds
- RTX 4090: 8-12 seconds
- Tesla P40: 40-60 seconds
Times significantly longer suggest misconfiguration. Check that --xformers is enabled and GPU shows in the startup console output.
Integration Health Checks
Verify containers can actually communicate with each other:
# Test OpenWebUI can reach Ollama
docker exec open-webui curl -s http://ollama:11434/api/tags

# Test n8n can reach Ollama
docker exec n8n curl -s http://ollama:11434/api/tags

# Test AnythingLLM can reach Ollama
docker exec anythingllm curl -s http://ollama:11434/api/tags
Each command should return JSON listing available models. Failures indicate network configuration issues likely containers aren’t on the same Docker network.
Whisper Transcription Test
Download a 30-second clear audio sample and test transcription:
curl -F "audio_file=@test.mp3" http://localhost:9000/asrThe medium model should process 30 seconds of audio in approximately 15 seconds on an RTX 3060. Response includes the transcribed text and processing time.
What to Do If Performance Is Low
Check GPU is actually being used: nvidia-smi during inference should show GPU activity and memory usage. Verify Docker has GPU access: docker run --rm --gpus all nvidia/cuda:12.0-base nvidia-smi should work without errors. Check for resource limits in your compose file that might restrict container resources. Monitor CPU and RAM usage if these max out, the GPU can’t help. Review container logs for warnings: docker logs ollama often reveals configuration issues.
Securing Your AI Homelab: A Defense-in-Depth Approach
Security for AI homelabs requires special consideration. You’re running services that process sensitive data, expose web interfaces, and potentially allow code execution. The expanded attack surface demands a defense-in-depth strategy with multiple layers of protection for a secure AI homelab.
Threat Landscape 2025
AI-specific threats have emerged alongside traditional security concerns. Malicious model files can contain embedded exploits that execute during loading. Third-party extensions and integrations dramatically expand the attack surface. Stable Diffusion extensions are particularly risky since they can execute arbitrary code. Document processing creates data exfiltration risks when you upload sensitive files. Supply chain attacks target popular containers with compromised images.
Security Hardening Checklist
Run as Non-Root
Containers should never run as root unless absolutely necessary. Specify non-root users in your compose file:
user: "1000:1000" # Run as UID 1000, GID 1000This limits damage from container escapes. An attacker gaining shell access inside the container has only regular user permissions.
- Limit Capabilities
Linux capabilities provide fine-grained permission control. Drop all capabilities and add only specific ones required:
cap_drop:
  - ALL
cap_add:
  - CHOWN  # Only if container needs to change file ownership
Most AI containers need zero special capabilities. GPU access doesn’t require capabilities it uses device passthrough instead.
- Prevent Privilege Escalation
Disable privilege escalation to prevent attackers from gaining root even if they exploit a setuid binary:
security_opt:
  - no-new-privileges:true
Read-Only Filesystems
Mount the root filesystem as read-only, using tmpfs for temporary data:
read_only: true
tmpfs:
  - /tmp:rw,noexec,nosuid
This prevents attackers from modifying binaries or installing persistent malware inside containers.
- Secure Docker Daemon
Never expose the Docker socket to containers unless absolutely necessary. Mounting/var/run/docker.sockgives containers complete control over the Docker host essentially root access. Tools like Portainer require this, but AI containers never do. - Image Scanning
Scan images for known vulnerabilities before deployment:
# Using Trivy
docker run aquasec/trivy image ollama/ollama:latest

# Using Docker Scout
docker scout cves ollama/ollama:latest- Address critical and high-severity vulnerabilities before deployment.
Example Secure Configuration
Here’s OpenWebUI with all security hardening applied:
open-webui:
  image: ghcr.io/open-webui/open-webui:main
  container_name: open-webui
  user: "1000:1000"
  read_only: true
  security_opt:
    - no-new-privileges:true
  cap_drop:
    - ALL
  tmpfs:
    - /tmp:rw,noexec,nosuid
  ports:
    - "3000:8080"
  volumes:
    - open-webui:/app/backend/data
  environment:
    - OLLAMA_BASE_URL=http://ollama:11434
  restart: unless-stopped
  networks:
    - ai_network
Network Security & Remote Access
If you need remote access to your AI homelab, VPN is strongly recommended over exposing services directly to the internet. OpenVPN Access Server provides a robust, user-friendly VPN solution deployable in Docker:
openvpn:
  image: openvpn/openvpn-as:latest
  container_name: openvpn
  ports:
    - "943:943"   # Web UI
    - "1194:1194/udp"  # VPN connection
  cap_add:
    - NET_ADMIN  # Required for VPN functionality
  volumes:
    - openvpn_data:/openvpn
  restart: unless-stopped
Note this is one of the rare cases where cap_add is legitimately necessary. VPN functionality requires network administration capabilities.
Firewall Rules
Configure your host firewall to only expose the reverse proxy port if using one, or specific service ports if not. Block direct access to container ports from external networks. Example using ufw:
# Block all by default
sudo ufw default deny incoming
sudo ufw default allow outgoing

# Allow SSH
sudo ufw allow 22/tcp

# Allow reverse proxy
sudo ufw allow 443/tcp

# Allow VPN
sudo ufw allow 1194/udp

sudo ufw enable
Internal container communication happens on the Docker network and bypasses host firewall rules, so services can still communicate while being protected from external access.
Backup & Disaster Recovery: Don’t Lose Your AI Brain
Losing your AI homelab data means losing downloaded models (potentially dozens of GB), curated document libraries with embedded vectors, fine-tuned LoRAs you’ve trained, n8n workflows you’ve built, OpenWebUI chat histories, and application configurations. A week or more of work can vanish in seconds from hardware failure, accidental deletion, or filesystem corruption, making a solid disaster recovery plan essential.
What to Backup: The Critical Data
- Models & LoRAs: Your downloaded LLM models, Stable Diffusion checkpoints, and custom-trained LoRAs. These total tens or hundreds of GB but rarely change once downloaded, making them perfect for backup AI models.
- Vector Databases: AnythingLLM’s document embeddings the processed, indexed representation of your document library. Regenerating these takes hours for large collections.
- Configuration & Scripts: Your docker-compose.yml, environment files, custom scripts, and n8n workflow exports. Small files but critical for reproduction.
- User Data: OpenWebUI chat histories, AnythingLLM workspaces, n8n execution logs. Represent irreplaceable interaction history and working memory.
The 3-2-1 Backup Strategy for AI
Professional backup strategy adapted for homelabs: 3 copies of your data, on 2 different media types, with 1 copy off-site.
- 3 Copies: Your live production data, a local backup on your NAS or external drive, and an off-site backup in cloud storage or at another physical location.
- 2 Different Media: SSD for live data and quick local backups, HDD for cost-effective cold storage, or tape for very large datasets. Different media protects against media-specific failures.
- 1 Off-site: Cloud storage like Backblaze B2 or AWS S3 Glacier, an encrypted drive at a friend’s house or office, or a bank safety deposit box for critical configurations. Protects against fire, theft, and other site-level disasters.
Practical Backup Scripts
Create a backup script that handles the most critical data:
#!/bin/bash
# AI Homelab Backup Script

BACKUP_DIR="$HOME/ai-backups/$(date +%Y%m%d)"
mkdir -p "$BACKUP_DIR"

# Backup Ollama model list (for easy re-download)
docker exec ollama ollama list | awk 'NR>1 {print $1}' > "$BACKUP_DIR/ollama_models.txt"

# Backup Docker volumes
docker run --rm \
  -v ollama_data:/source \
  -v "$BACKUP_DIR:/backup" \
  alpine \
  tar czf /backup/ollama_data.tar.gz -C /source .

docker run --rm \
  -v open-webui:/source \
  -v "$BACKUP_DIR:/backup" \
  alpine \
  tar czf /backup/open-webui.tar.gz -C /source .

docker run --rm \
  -v anythingllm_storage:/source \
  -v "$BACKUP_DIR:/backup" \
  alpine \
  tar czf /backup/anythingllm.tar.gz -C /source .

docker run --rm \
  -v n8n_data:/source \
  -v "$BACKUP_DIR:/backup" \
  alpine \
  tar czf /backup/n8n_data.tar.gz -C /source .

# Backup configurations
cp docker-compose.yml "$BACKUP_DIR/docker-compose_$(date +%Y%m%d).yml"
cp -r .env* "$BACKUP_DIR/" 2>/dev/null || true

# Create checksums
cd "$BACKUP_DIR"
sha256sum *.tar.gz *.yml > checksums.txt

echo "Backup completed: $BACKUP_DIR"
echo "Size: $(du -sh $BACKUP_DIR | cut -f1)"
Make the script executable (chmod +x backup.sh) and schedule it with cron:
# Run backup daily at 2 AM
0 2 * * * /home/user/ai-homelab/backup.sh
Automation & Monitoring
- n8n Integration: Create workflows to automatically export n8n workflows on schedule, backup configuration files to cloud storage, send notifications to Discord or Slack on backup success, and alert on backup failures requiring immediate attention.
- Containerized Backup Solutions: Duplicati provides set-and-forget encrypted backups to cloud storage. Deploy it in Docker and point it at your backup directory:
duplicati:
  image: lscr.io/linuxserver/duplicati:latest
  container_name: duplicati
  ports:
    - "8200:8200"
  volumes:
    - duplicati_config:/config
    - /home/user/ai-backups:/source
  restart: unless-stopped
Configure Duplicati through its web interface to encrypt backups and upload to B2, S3, Google Drive, or other cloud storage.
- Monitoring: Add health checks to verify backups complete successfully. A simple cron job that checks for today’s backup and alerts if missing:
# Check backup exists
0 10 * * * [ -d "$HOME/ai-backups/$(date +%Y%m%d)" ] || echo "ALERT: Backup missing for $(date +%Y%m%d)" | mail -s "Backup Failed" you@email.com
The Recovery Drill
If you haven’t tested a restore, you don’t have a backup you have untested hopes and assumptions. Perform quarterly recovery drills to ensure you can restore AI homelab when needed.
Recovery Test Procedure:
- Deploy containers on a test system or VM
- Restore volumes from your latest backup archives
- Start containers and verify they function correctly
- Check that data (models, documents, chat history) appears intact
- Document any issues discovered during testing
- Fix backup process gaps revealed by the drill
Set a calendar reminder to test recovery every 3 months. This discipline catches backup failures before emergencies when you urgently need that data.
Troubleshooting & Optimization
Even carefully configured AI homelabs encounter issues. Hardware incompatibilities, software bugs, resource constraints, and configuration mistakes all cause problems. This section provides diagnostic procedures and solutions for the most common Docker AI troubleshooting scenarios.
1 GPU Not Detected
- Symptoms: Models run extremely slowly (CPU-only speeds), nvidia-smi fails inside containers, Docker logs show “no NVIDIA GPU found,” a classic NVIDIA Docker issues scenario.
- Diagnostic Steps:
# Test NVIDIA Docker runtime
docker run --rm --runtime=nvidia nvidia/cuda:12.0-base nvidia-smi

# Check Docker runtime configuration
docker info | grep -i runtime

# Verify NVIDIA Container Toolkit installation
dpkg -l | grep nvidia-container-toolkit
Solutions: If the test container fails, NVIDIA Container Toolkit isn’t properly installed. Reinstall following NVIDIA’s official guide. If docker info doesn’t show “nvidia” as an available runtime, edit /etc/docker/daemon.json to add the runtime configuration, then restart Docker with sudo systemctl restart docker. Verify your NVIDIA driver version supports your GPU: older cards may need older driver versions.
2. Out of Memory Errors
- Symptoms: Container crashes with “OOM Killed”, models fail to load, generation stops mid-process, system becomes unresponsive, typical out of memory AI issues.
- Diagnostic Steps:
# Check VRAM usage during inference
nvidia-smi

# Monitor container memory usage
docker stats

# Check system memory
free -h
Solutions: Use smaller modelsa 7B model instead of 13B, or Q4 quantization instead of Q8. Add Docker memory limits to prevent containers from consuming all available RAM:
deploy:
  resources:
    limits:
      memory: 8G
For Stable Diffusion specifically, add --lowvram or --medvram flags. Close unnecessary applications before running large models. Consider adding system swap, though this dramatically impacts performance.
3. Port Conflicts
- Symptoms: Container fails to start with “port already in use” error, services unreachable at expected ports, common Docker networking issues.
- Diagnostic Steps:
# Find what's using the port
sudo lsof -i :11434
sudo netstat -tulpn | grep 11434

# Check Docker containers using the port
docker ps --format "{{.Names}}: {{.Ports}}"
Solutions: Change the host port mapping in your compose file, leaving the container port unchanged:
ports:
  - "11435:11434"  # Access Ollama at port 11435 instead
Alternatively, stop the conflicting service if it’s not needed. Update all references to the service to use the new port.
4. Slow Model Loading
- Symptoms: Models take minutes to load instead of seconds, inference starts slowly then improves, high disk I/O during model loading, answering “why is my local AI slow”.
- Diagnostic Steps:
# Check storage I/O performance
iostat -x 1

# Check where Docker stores data
docker info | grep "Docker Root Dir"

# Measure volume mount performance
docker run --rm -v ollama_data:/data alpine time dd if=/dev/zero of=/data/test bs=1M count=1000
Solutions: Move Docker’s data directory to an SSD if it’s currently on HDD. Edit /etc/docker/daemon.json:
{
  "data-root": "/mnt/ssd/docker"
}
Then migrate existing data and restart Docker. Use quantized models (Q4_K_M, Q5_K_M) which load faster than full-precision versions. Ensure Ollama’s data volume is on fast storage by explicitly mapping to an SSD path. Increase Docker’s memory allocation if models are loading from swap.
5. Container Communication Failures
- Symptoms: OpenWebUI can’t connect to Ollama, n8n workflows fail to reach services, “connection refused” errors in logs.
- Diagnostic Steps:
# Test connectivity between containers
docker exec open-webui ping ollama
docker exec open-webui curl -s http://ollama:11434/api/tags

# Check containers are on the same network
docker network inspect ai_network

# Verify service is actually listening
docker exec ollama netstat -tulpn | grep 11434
Solutions: Ensure all containers use the same Docker network. In your compose file, every service should reference ai_network. Use container names for URLs, not localhost: http://ollama:11434 not http://localhost:11434. Container names only resolve within Docker networks from the host, use localhost and port mappings. If using multiple compose files, ensure networks are external and shared:
networks:
  ai_network:
    external: true
Check firewall rules aren’t blocking Docker network traffic (usually not an issue but possible with strict configurations).
6. Disk Space Exhaustion
- Symptoms: Containers fail to start, image pulls fail, “no space left on device” errors, system becomes unstable.
- Diagnostic Steps:
# Check disk usage
df -h /var/lib/docker

# Check Docker disk usage breakdown
docker system df

# Find large volumes
docker volume ls -q | xargs docker volume inspect | grep -A 5 Mountpoint
Solutions: Clean up Docker system resources periodically:
# Remove stopped containers, unused networks, dangling images
docker system prune -a

# Remove unused volumes (BE CAREFUL - this deletes data)
docker volume prune

# Remove specific large images you don't need
docker images
docker rmi <image-id>
Stable Diffusion models consume enormous space. Review your model collection and delete unused checkpoints. Move model storage to a larger drive by remapping the volume to a specific host path:
volumes:
  - /mnt/large-drive/sd-models:/app/stable-diffusion-webui/models
Set up monitoring to alert before disk space becomes critical, catching it at 80% full prevents emergency situations.
Performance Optimization Strategies
- GPU Scheduling: When running multiple GPU-intensive containers simultaneously, they can compete for resources. Assign specific GPUs to specific containers:
deploy:
  resources:
    reservations:
      devices:
        - driver: nvidia
          device_ids: ['0']  # Use first GPU only
capabilities: [gpu]- Memory Tuning: Adjust model context sizes for your workflow. Smaller context windows (2048 instead of 4096) use less memory and run faster if you don’t need long context. Configure this in Ollama model parameters.
- Monitoring Best Practices: Deploy monitoring tools to catch issues before they become critical. Prometheus and Grafana provide excellent visibility:
prometheus:
  image: prom/prometheus:latest
  volumes:
    - ./prometheus.yml:/etc/prometheus/prometheus.yml
    - prometheus_data:/prometheus
  ports:
    - "9090:9090"
  restart: unless-stopped

grafana:
  image: grafana/grafana:latest
  ports:
    - "3100:3000"
  volumes:
    - grafana_data:/var/lib/grafana
  restart: unless-stopped
Configure Prometheus to scrape Docker metrics and GPU statistics. Grafana dashboards visualize this data, helping identify resource bottlenecks and performance trends over time.
Getting Help, Community & Next Steps
You’ve built a complete AI homelab, but the journey doesn’t end at deployment. This section provides navigation shortcuts, community resources, and structured learning paths to continue developing your skills and find AI homelab support.
Having Issues? Try This Order:
1. Check Your Logs: docker logs -f [container_name]
2. Search Project GitHub: ollama/ollama, open-webui/open-webui issues
3. Community Resources: Discord (Ollama, Open WebUI), Reddit (r/selfhosted, r/LocalLLaMA), Stack Overflow
Your Learning Path – Choose Your Adventure
Different users have different goals. Pick the track matching your objectives.
- The Beginner Track: Building Foundations
Master the core stack before adding complexity. Focus on Ollama, OpenWebUI, and AnythingLLM exclusively for your first month. Learn how different model sizes affect response quality and speed. Experiment with prompt engineering to get better outputs. Build a personal knowledge base with documents you actually reference. Explore the pre-built n8n workflow templates without creating custom ones yet. Prioritize stability and understanding over feature maximization. - The Enthusiast Track: Creative Integration
Start integrating everything through n8n workflows. Build automated content pipelines that process RSS feeds, emails, or documents without manual intervention. Experiment with fine-tuning LoRAs in Stable Diffusion using your own images. Create custom agents combining LLMs with specific tools and knowledge bases. Share your workflows with the community. Optimize for efficiency and automation. - The Developer Track: Building Applications
Use LocalAI’s OpenAI-compatible API to build custom applications. Create tools specific to your workflow or business needs. Contribute to the open-source projects powering your homelab. Explore API boundaries and integration patterns. Build production-ready services on top of your local AI infrastructure. Share your applications with others.
Project Ideas to Spark Inspiration
- Personal Research Assistant: Create a system that monitors academic papers, technical blogs, and industry news. Automatically summarize new content, identify relevant information matching your interests, generate digests with source links, and answer questions about accumulated knowledge.
- Automated Podcast Production Pipeline: Upload raw audio recordings and have the system transcribe with Whisper, generate show notes and summaries with Ollama, create social media posts optimized for different platforms, generate episode artwork with Stable Diffusion, and export everything in podcast-ready format.
- Family Knowledge Base: Build a searchable repository of family documents, recipes, photos with AI-generated descriptions, medical records with privacy protection, and important information accessible to all family members through OpenWebUI.
- Intelligent Home Monitoring: Analyze system logs continuously for anomalies, process security camera footage for event detection, monitor resource usage and predict issues, generate maintenance reports automatically, and send alerts for important events only.
These projects combine multiple containers in useful ways while providing real value. Start small with one feature, then expand based on what works.
FAQ Section
What are the real-world hardware requirements and costs?
See Section 3 for our three-tier hardware breakdown (Budget/Recommended/Ideal) with specific components and pricing. Budget builds start at $300-500 using used server GPUs like the Tesla P40. Recommended builds run $600-800 with consumer cards like the RTX 3060 12GB. Enthusiast setups cost $1500-2000 featuring RTX 4090 or professional cards. Monthly electricity costs range from $10-40 depending on usage intensity and local rates. Compare this to API costs: ChatGPT Plus costs $20 monthly, while developers using APIs easily spend $50-200 monthly. Your homelab breaks even in 3-12 months, depending on usage patterns, then provides free AI indefinitely. Section 14 provides detailed performance benchmarks validating these hardware choices.
Can I run this without a dedicated GPU?
Yes, but with significant limitations covered in Section 3. CPU-only setups work for 7B parameter models, delivering 8-15 tokens per second on recent Intel i7 or AMD Ryzen processors. This is adequate for learning, experimentation, and light usage. Larger models struggle on CPU-only systems. 13B models run extremely slowly (2-5 tokens per second), becoming frustrating for interactive use. 70B models are effectively unusable, taking minutes to generate paragraph-length responses. Stable Diffusion image generation is similarly impractical without GPU acceleration. If you’re unsure whether to invest in a GPU, start CPU-only with 7B models using the 30-minute quick start from Section 2. Experience local AI firsthand, then decide if GPU acceleration is worth the investment based on your actual usage patterns.
Where should a complete beginner start?
Start with Section 2’s 30-minute quick win to get immediate results and validation that local AI actually works. This provides the motivation to continue through the more complex setup steps. Next, carefully read Section 3 to understand hardware requirements and ensure your system meets minimum specifications. Follow the Beginner Track outlined in Section 18: master Ollama and OpenWebUI exclusively for your first month before adding complexity. The phased deployment checklist in Section 13 provides a structured path, adding one layer per week over four weeks. This prevents overwhelm and ensures each component works correctly before adding the next. Most importantly, don’t try to deploy all seven containers simultaneously on day one. Build confidence with the foundation, then expand based on proven success.
How does this AI stack compare to standard homelab setups?
This AI stack complements traditional homelab services rather than replacing them. Standard homelabs typically run Plex/Jellyfin for media, *arr applications for automation, Home Assistant for smart home control, and various utilities. These services continue working alongside your AI containers. The AI stack adds intelligence and automation capabilities traditional homelabs lack. Use n8n to enhance existing services: analyze Plex viewing patterns, generate video thumbnails with AI, transcribe audio files automatically, or create smart home automations using natural language processing. Section 12 covers integration paths if you already run Docker containers. Most users keep their existing services and add AI as a new capability layer. The shared Docker infrastructure makes this integration straightforward everything uses the same management tools and networking. Section 13 shows complete orchestration patterns including how AI containers communicate with each other and can interface with external services.
Are there legal or ethical concerns with running AI locally?
Yes, several considerations deserve attention. Model licensing varies significantly some models allow commercial use, others restrict to personal use only. Review licenses for models you download, especially if using AI for business purposes. Content responsibility rests entirely with you. Generated text and images may require fact-checking before sharing publicly. AI models can produce biased outputs, generate inappropriate content, or create factually incorrect information. You’re responsible for reviewing and filtering outputs. Privacy considerations actually favor local AI. Your data never leaves your network, providing superior privacy compared to cloud AI services. However, ensure anyone using your AI homelab understands that conversations and generated content persist in databases unless explicitly deleted. Copyright issues affect generated images particularly. While you own the outputs your system generates, training data copyright remains contested legally. Use AI-generated content conservatively in commercial contexts until legal precedents clarify ownership and liability. Section 15 covers security and responsible use in more detail, including protecting your system from misuse and ensuring appropriate content filtering when necessary.
How do I keep everything updated and secure?
Follow our comprehensive security checklist in Section 15 for hardening your deployment. This includes running containers as non-root, implementing read-only filesystems, limiting capabilities, and securing network access. Implement the backup strategy from Section 16 before making any major changes. The 3-2-1 backup rule (3 copies, 2 media types, 1 off-site) protects against data loss during updates or configuration changes. For updates, subscribe to our quarterly Compatibility Matrix updates in Section 4. We test new versions and publish compatibility information every three months. Follow project release notes on GitHub for security patches and important updates. Update strategy: Test updates in a non-production environment first if possible. Update one container at a time, verifying functionality before proceeding to the next. Keep recent backups before any update. Document your current working configuration so you can roll back if needed. Monitor security mailing lists for the projects you use. Critical vulnerabilities occasionally require immediate patching. Join project Discord servers where maintainers announce important security updates.
Conclusion: Your AI-Powered Future
You have built something remarkable: a complete, self-hosted AI setup complete ecosystem that provides privacy-first AI, eliminates ongoing costs, and operates entirely offline. The seven containers work in synergy, creating an intelligent platform greater than the sum of its parts, a true AI homelab success story .
What You’ve Accomplished
Your AI homelab provides ChatGPT-quality chat through OpenWebUI powered by Ollama’s efficient inference engine. Document intelligence with AnythingLLM enables asking questions about thousands of pages instantly. Automated workflows through n8n orchestrate complex processes without manual intervention. Professional image generation with Stable Diffusion produces unlimited AI art. Speech recognition through Whisper transcribes audio with remarkable accuracy. All of this runs locally, privately, and without ongoing costs.
The synergistic benefits extend beyond individual capabilities. Your chat interface can reference your documents. Workflows automatically process new content and add it to your knowledge base. Generated images enhance automated content. Transcribed audio becomes searchable text immediately. Each container amplifies the others, creating an ecosystem greater than the sum of its parts.
The Empowerment of Local AI
You’ve achieved something meaningful: complete control over your AI infrastructure. Your conversations remain private no company monitors, analyzes, or stores them. Your documents never leave your network, protecting sensitive information completely. Creative work belongs entirely to you without licensing ambiguity. You’ve eliminated $50-200 monthly API costs permanently. Your AI works offline during internet outages or while traveling.
Perhaps most importantly, you’ve gained deep understanding of how AI systems actually work. You’re not just an AI consumer anymore you understand inference, embeddings, quantization, and model architectures. This knowledge provides career value, enables better use of AI tools, and positions you for the AI-driven future, achieving true AI independence.
Future Trends to Watch
The AI homelab space continues evolving rapidly. Neural Processing Units (NPUs) will appear in mainstream hardware throughout 2025-2026, potentially offering better efficiency than GPU inference for certain workloads. Models continue getting more efficient future 7B models may match today’s 70B quality. Container integration will tighten as projects adopt standard interfaces and protocols. The community grows daily, bringing more templates, guides, and shared knowledge.
Stay engaged with the ecosystem. Join community Discord servers. Follow GitHub repositories for the projects you use. Experiment with new features and models as they release. Share your experiences your workflows and solutions help others building similar systems.
Moving Forward
Your AI journey continues beyond this guide. Experiment with new models as they release. Build workflows solving real problems in your life. Fine-tune models on your own data. Connect your AI homelab to other services. The infrastructure you’ve built provides a foundation for endless possibilities.
Combine this AI stack with our 5 Must-Have Docker Containers guide for a complete self-hosted ecosystem covering AI, media, productivity, and automation.
Share your experiences in the community. Others building AI homelabs benefit from your successes, failures, and lessons learned. The collective knowledge of the homelab community advances through shared experiences.
Your AI-powered future is here, running on hardware in your home. Welcome to the world of local AI and the many benefits of self-hosted AI.
