So, you’ve built your homelab following our comprehensive guide. Congratulations! Now you’re staring at a fresh Linux terminal, wondering, “What’s next?” The answer is simple: Docker containers. More specifically, these 5 Must-Have Docker Containers will turn your homelab from a blank slate into a versatile, self-hosted hub of productivity and fun.
Think of Docker as the ultimate “app store” for self-hosted services. It lets you deploy powerful, isolated applications in minutes, bypassing hours of dependency troubleshooting and configuration headaches. If you’re getting started with Docker homelab projects or still asking why use Docker for self-hosting, the benefits are clear: consistency, security, and effortless management.
This guide is designed to cut through the noise and help you overcome choice paralysis. We’ve selected five foundational containers that deliver immediate value, reinforce core Docker concepts, and set the stage for more advanced homelab projects. Perfect for those looking into homelab Docker setup beginners techniques, this list ensures you start strong and scale smart.
New to homelabs? Ensure you start with a solid foundation. Check out our previous guide: The Beginner’s Guide to Building a Homelab: Automation, AI, and Power Savings
Quick Prerequisites: This post assumes you have both Docker and Docker Compose installed on your system. If you haven’t set these up yet, refer to the installation section in our pillar homelab guide linked above.
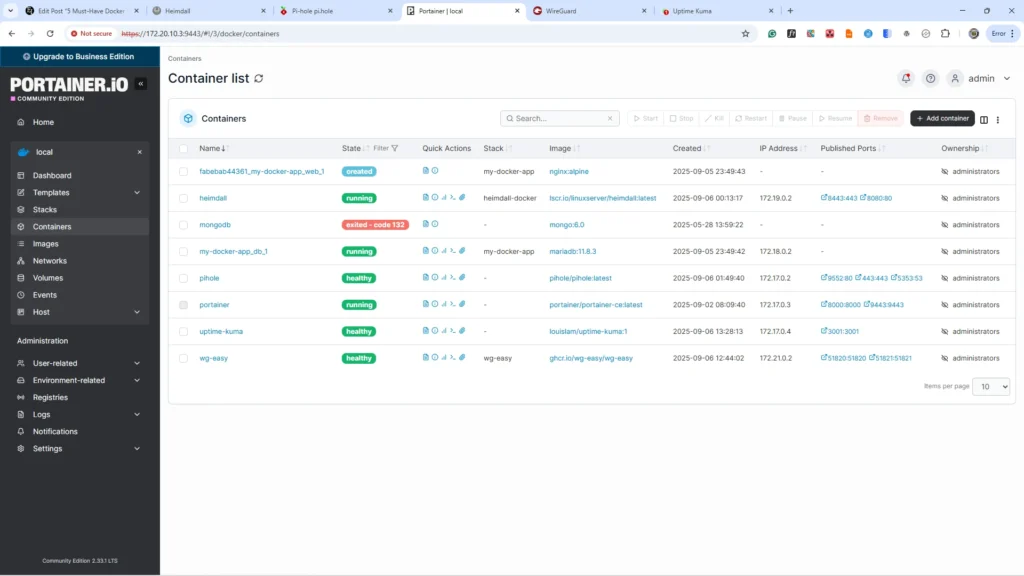
Container 1: Portainer – Your Visual Command Centre
While the Docker CLI is powerful, managing your growing stack of containers through terminal commands can become overwhelming. Enter Portainer, a lightweight, web-based visual Docker interface that acts as your graphical mission control, transforming complex Docker operations into intuitive point-and-click actions.
Why It’s Essential
Portainer is more than just a convenience; it’s a foundational tool for any homelab. It demystifies Docker for beginners, preventing costly CLI mistakes and offering one-click management that saves hours of troubleshooting. It’s the perfect learning tool that builds confidence, making it an indispensable part of your homelab Docker setup beginners journey. For anyone wondering why use Docker for self-hosting, Portainer is the answer to management complexity.
Key Features Deep-dive
- Web-Based Dashboard: Access and manage your entire Docker environment from any device on your network.
- Real-Time Monitoring: Gain instant visibility into container status, CPU usage, memory consumption, and network activity.
- Built-in Templates: Deploy popular applications quickly with a built-in library that eliminates guesswork.
- Stack Management: A powerful Docker Compose GUI that simplifies deploying complex, multi-container applications.
- Access Control: Safely share management capabilities with family or team members through robust user management features.
Implementation: How to Install Portainer
To install Portainer Docker homelab style, use the following command. It creates a secure, persistent deployment that will survive reboots.
docker run -d \
  -p 8000:8000 -p 9000:9000 \
  --name=portainer \
  --restart=always \
  -v /var/run/docker.sock:/var/run/docker.sock \
  -v portainer_data:/data \
  portainer/portainer-ce:latest
Command Breakdown:
-v /var/run/docker.sock:/var/run/docker.sock: Grants Portainer the necessary access to communicate with your Docker daemon.-v portainer_data:/data: Creates a named volume to persist all your Portainer configuration data.--restart=always: Ensures the container automatically restarts if your server reboots.
After deployment, navigate to http://your-server-ip:9000. You will have a five-minute window to create the initial admin user, a crucial security feature.
Pro Tips
- Use the UI to directly access container logs and console sessions, eliminating the need to memorise complex CLI commands.
- A common comparison is Portainer vs Cockpit for homelab use. Remember that Portainer specialises exclusively in container management, while Cockpit is a broader server administration tool; they can complement each other well.
- For enhanced security, consider changing from the default port 9000 to a custom port and placing Portainer behind a reverse proxy as your homelab matures. This Docker management GUI tutorial is just the start!
Container 2: Heimdall – Your Service Directory
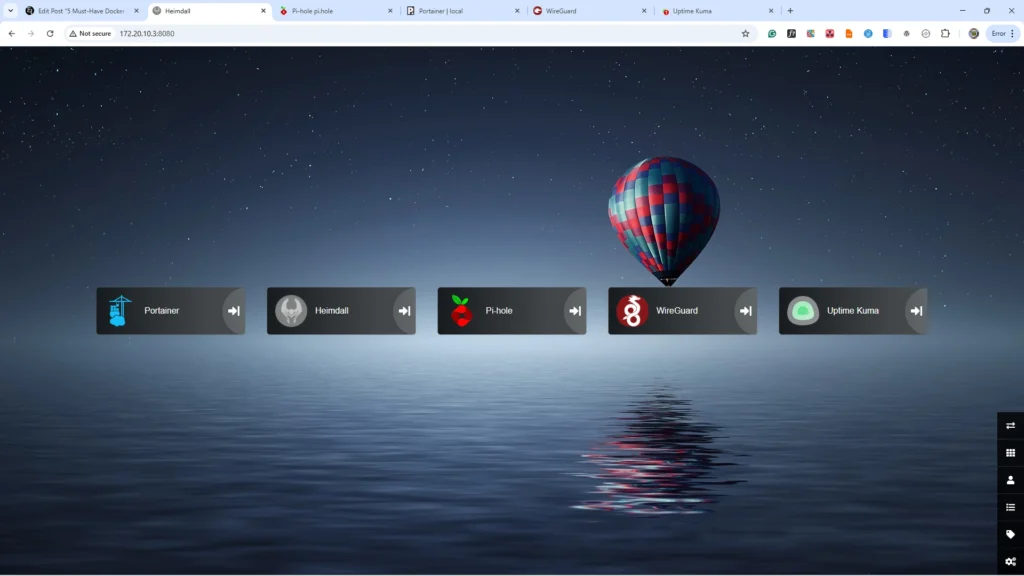
Remembering a growing list of IP addresses and port numbers for all your services is the kind of mental gymnastics that kills productivity. Heimdall Application Dashboard transforms this chaos into an elegant, professional custom homelab homepage, serving as a centralised self-hosted start page Docker deployment that makes accessing your entire homelab effortless.
Why It’s Essential
A proper homelab dashboard application setup creates a single, unified point of access to every service you run. It eliminates the need for a cluttered bookmark bar and the frustration of forgotten ports, significantly streamlining your daily workflow. Beyond personal efficiency, it presents your projects with a polished, professional appearance for family or visitors. Most importantly, it is fully customizable, allowing you to organise homelab services with an interface that perfectly matches your style and needs.
Key Features Deep-dive
- Drag-and-Drop Interface: Arrange application tiles with custom icons and labels to create a logical, personalised service directory.
- Integrated Widgets: Add search bars (Google, DuckDuckGo), weather widgets, and RSS feeds to create a true productivity hub.
- API Integrations: Enhanced apps can display real-time statistics directly on their tiles (e.g., Pi-hole query counts, system health).
- Mobile-Responsive Design: The clean interface works flawlessly on any device, from desktops to phones.
Implementation
Deploying Heimdall is straightforward with Docker Compose. This configuration ensures proper persistence and easy management.
Given this is a new homelab with no project to begin with, we will deploy our Docker compose in our home folder ~/
cd ~/Create a Project Directory
mkdir heimdall-docker
cd heimdall-docker
Create a file named docker-compose.yml with the following content:
nano docker-compose.ymlPaste the following code
version: "3"
services:
  heimdall:
    image: lscr.io/linuxserver/heimdall:latest
    container_name: heimdall
    environment:
      - PUID=1000
      - PGID=1000
      - TZ=America/New_York
    volumes:
      - ./heimdall:/config
    ports:
      - 8080:80
      - 8443:443
    restart: unless-stopped
Configuration Notes:
- The
./heimdall:/configVolume mapping preserves all your settings and customisations. - Port 80 is mapped to 8080 for easy HTTP access. Consider changing this if the port is already in use.
- Mapping port 443 prepares you for future SSL/TLS setup behind a reverse proxy.
Run the file with
docker-compose up -dThe Docker Compose version you are using docker compose up -d can be used for version 2 specifically.
Configuration Walkthrough
After deployment, access Heimdall at http://your-server-ip:8080. Start by adding Portainer as your first application, using its URL. Then, explore the settings to customise colours, backgrounds, and layout. For advanced functionality, explore “Enhanced Apps” to configure services like Pi-hole with API keys, allowing live stats to be displayed directly on your dashboard.
Alternatives to Consider
While Heimdall is our top pick for its balance of simplicity and features, other options cater to different preferences. The common comparison of Heimdall vs Homer homelab setups often comes down to UI: Heimdall offers a graphical setup, while Homer uses a simpler, YAML-based configuration. Dashy provides more advanced customisation and features, while Organizr integrates built-in authentication, making it ideal for shared environments.
Container 3: Pi-hole – Your Network Guardian
Ads, trackers, and malicious domains plague every device on your network, slowing down browsing and compromising privacy. Pi-hole is a powerful network-wide ad blocker that operates at the DNS level, a single solution that protects phones, computers, smart TVs, and IoT devices simultaneously. This Pi-Hole Docker installation guide will help you transform your entire network into a fortified zone against digital annoyances.
Why It’s Essential
Pi-hole delivers a dramatic, immediate improvement in browsing speed and cleanliness across your entire household without requiring any configuration on individual devices. This approach to DNS filtering homelab security provides a massive boost to privacy by preventing data collection before it even starts. It’s one of the most impressive and tangible demonstrations of your homelab’s capabilities. By blocking resource-heavy advertisements and tracking scripts, it doesn’t just block ads entire network; it can significantly speed up page loading times for all users.
Technical Deep-dive
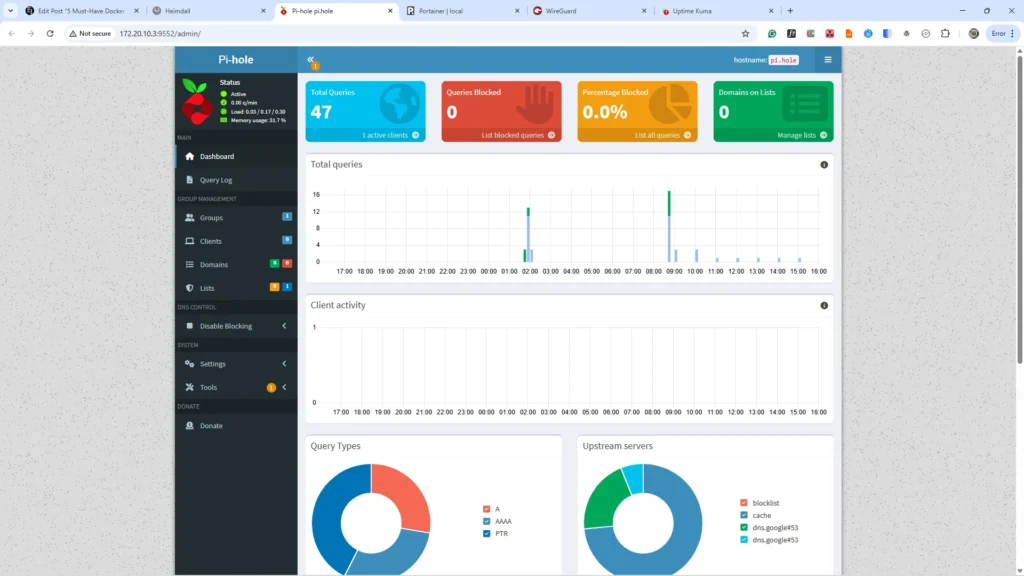
Pi-hole functions as a DNS sinkhole. When any device on your network requests a domain known for advertising, tracking, or malice, Pi-hole intercepts the request and returns a “blocked” response instead of forwarding it. This means the unwanted content never loads. The platform offers comprehensive statistics and logging, giving you fascinating insights into network activity, and its custom blocklist management allows you to fine-tune protection to improve internet privacy homelab-wide.
Implementation
Deploy Pi-hole using the following Docker command, which handles the critical networking requirements:
docker run -d \
    --name pihole \
    -p 5353:53/tcp -p 5353:53/udp \
    -p 9552:80 \
    -p 443:443 \
    -e TZ="America/New_York" \
    -e FTLCONF_webserver_api_password="strong admin password" \
    -v "$(pwd)/etc-pihole:/etc/pihole" \
    -v "$(pwd)/etc-dnsmasq.d:/etc/dnsmasq.d" \
    --dns=127.0.0.1 --dns=1.1.1.1 \
    --restart=unless-stopped \
    --hostname pi.hole \
    pihole/pihole:latest
Command Breakdown:
- The
-p 53:53/tcp -p 53:53/udpFlags are critical for DNS functionality. - The
FTLCONF_webserver_api_passwordenvironment variable sets your admin password for the web interface. - Volume mounts (
-v) Preserve your blocklists and settings across container updates. - The
--dnsflags ensure the container itself uses reliable DNS resolvers.
Critical Configuration Steps
- Router DNS Configuration: This is the most important step. Access your router’s admin panel (often at
192.168.1.1), navigate to DHCP or DNS settings, and change the primary DNS server to your Pi-hole server’s local IP address. - Testing the Setup: Visit
http://your-server-ip/adminorhttp://your-server-ip:9552/adminto access the dashboard. As devices make requests, you should see queries appear. Normally, you will immediately notice fewer ads. - Initial Blocklist Setup: Start with the default Pi-hole lists and StevenBlack’s Unified Hosts list for balanced protection that minimises disruptions.
- Whitelist Management: When a website or service breaks, check the Query Log in the admin interface to identify the blocked domain and add it to your whitelist.
Advanced Tips
- Set up conditional forwarding in the Pi-hole settings so that local client hostnames are displayed in the logs instead of just IP addresses.
- Use Local DNS Records to create easy-to-remember names for your homelab services (e.g.,
portainer.home). - Regularly monitor the query logs to identify unexpected device behaviour and fine-tune your blocklists.
Important Considerations
Be aware that some apps and websites rely on advertising domains and may break. Family members might initially complain about missing ads on familiar sites. Handle this diplomatically by explaining the privacy and performance benefits, and be prepared to quickly whitelist domains that are essential for functionality. The long-term benefits of a cleaner, faster, and more private network far outweigh this initial adjustment period.
Container 4: WireGuard Easy – Your Secure Tunnel Home
Your homelab is a powerhouse of services, but its potential is locked behind your home network. WG-Easy transforms this local setup into a secure, global resource, providing a WireGuard Docker easy setup that lets you access homelab from anywhere safely. This self-hosted vpn server Docker solution is the key to truly unlocking your homelab’s capabilities.
Why It’s Essential
The ability to remote access homelab securely is transformative, not merely convenient. WG-Easy provides military-grade encryption with minimal performance overhead, allowing you to access files, services, and automation while travelling without the sluggishness of traditional VPNs. It creates a secure remote homelab connection that is a far safer alternative to opening multiple individual ports on your router, which dramatically increases your network’s attack surface. For remote work and a mobile lifestyle, this isn’t a luxury; it’s a necessity.
WireGuard vs. WG-Easy Explained
Standard WireGuard is a powerful VPN protocol, but is configured exclusively through the command line, which can be daunting. WG-Easy solves this by providing an intuitive web interface for client management, QR code generation, and simplified setup, all while preserving WireGuard’s renowned performance and security. This wg-easy installation tutorial approach offers the perfect balance of enterprise-grade security and user-friendly management.
Key Features
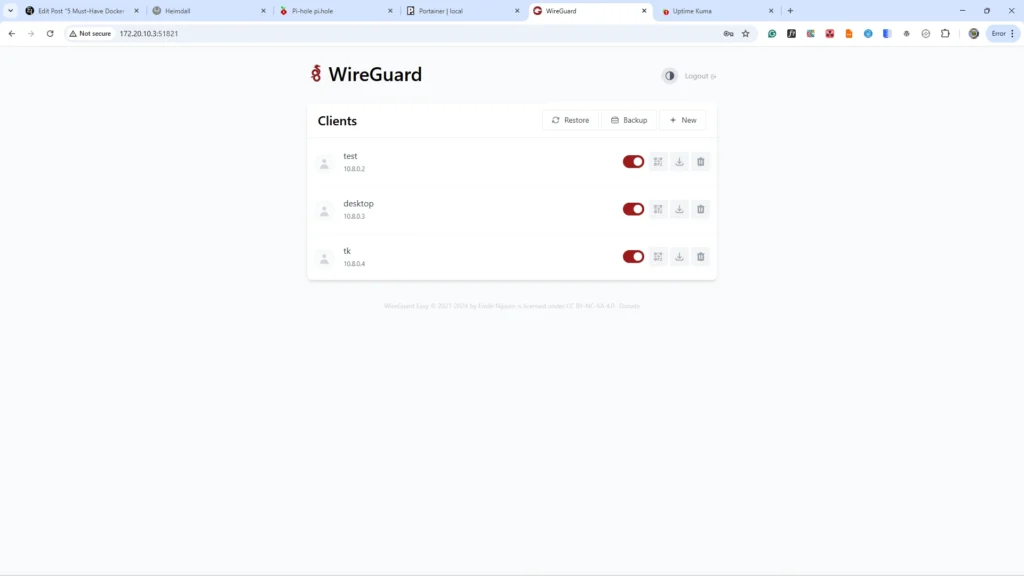
- Web-Based Management: A simple GUI for adding, removing, and managing clients without touching config files.
- QR Code Generation: Enables instant mobile setup. Scan the code with the WireGuard app, and you’re connected.
- Lightweight & Fast: Offers better performance and lower CPU usage than OpenVPN.
- Automatic Key Management: Handles cryptographic key generation and distribution seamlessly.
- Live Connection Monitoring: See active clients and their bandwidth usage in real-time.
Implementation
Deploy WG-Easy using this Docker Compose configuration. The environment variables are crucial for a correct setup.
Create a dedicated directory for your WG-Easy project. This keeps all related files organised and avoids conflicts with other Docker projects.
cd ~/
mkdir -p ~/wg-easy
cd ~/wg-easy
Run this command to generate a secure bcrypt hash of your password. You need Docker to run it. Use the generated hashed password in your YAML file to improve security.
docker run --rm ghcr.io/wg-easy/wg-easy wgpw "password"
Note: Docker Compose uses $ for variable expansion. If you put a hash like $2a$12$… directly in the YAML file, Docker will try to interpret 2a, 12, etc., as environment variables to look up, which will break your hash. You must “escape” the literal $ characters by doubling them ($$).
Place the docker-compose.yml file directly in this directory.
nano docker-compose.ymlCopy and paste this code into docker-compose.yml
version: '3.8'
services:
  wg-easy:
    network_mode: "host"
    environment:
      - WG_HOST=102.90.98.127
      - PASSWORD_HASH=$$2a$$12$$Xt6i4q...... #The generated password hash
      - WG_DEFAULT_ADDRESS=10.8.0.x
      - WG_DEFAULT_DNS=10.8.0.1
      - WG_ALLOWED_IPS=10.8.0.0/24,172.20.10.0/24,192.168.150.0/24
    image: ghcr.io/wg-easy/wg-easy # Strongly recommended over weejewel/wg-easy
    container_name: wg-easy
    volumes:
      - ~/.wg-easy:/etc/wireguard
    restart: unless-stopped
    cap_add:
      - NET_ADMIN
      - SYS_MODULE
    sysctls:
      - net.ipv4.ip_forward=1
      - net.ipv4.conf.all.src_valid_mark=1
Start the Container
docker-compose up -dAccess the web UI at http://your-server-ip:51821.
Configuration Notes:
WG_HOST: Must be your public IP address or a dynamic DNS hostname.WG_ALLOWED_IPS: Critical for defining network access. Include the VPN subnet (10.8.0.0/24) and your local LAN subnet (e.g.,172.20.10.0/24).
Security-First Setup Process
- Test Locally First: Before exposing the service, verify it works by accessing the web interface at
http://your-server-ip:51821. - Router Configuration: Forward UDP port
51820to your server’s IP address. Avoid opening the TCP admin port (51821) to the public internet. - Dynamic DNS (DDNS): If your ISP doesn’t provide a static IP, use a DDNS service (like DuckDNS or No-IP) to maintain reliable access.
- Firewall Rules: Apply the principle of least privilege on your router and server firewall.
Client Configuration & Real-World Use Cases
In the WG-Easy web UI, creating a new client generates a downloadable configuration file and a QR code. Scan the QR code with the WireGuard mobile app for instant setup, or download the .conf file for desktop clients. This enables you to:
- Securely access your homelab dashboard (Heimdall) and services (Portainer) on the go.
- Safely browse on public WiFi by routing your traffic through your home connection.
- Remotely manage files and automation systems without exposing them directly to the internet.
Note: For Desktop clients, download the WireGuard installer from the official page. Run the installation process, and you will be prompted to import the configuration. Select the configuration file you just downloaded from the admin dashboard and activate it. For mobile, just scan the QR code.
Security Best Practices
- Use a strong admin password for the WG-Easy web interface.
- Regularly audit client lists and revoke access for unused devices.
- Monitor the connection logs for any unexpected activity.
- Back up the
~/.wg-easydirectory, as it contains all VPN configuration and private keys. - Remember: your VPN’s security is only as strong as its weakest client; manage access carefully.
Container 5: Uptime Kuma – Your Digital Watchdog
Nothing is more frustrating than discovering your critical services have been down for hours while family members wonder why their favourite streaming service isn’t working. Uptime Kuma ensures you’re the first to know when something breaks, transforming you from a reactive troubleshooter into a proactive service manager with this comprehensive self-hosted monitoring solution.
Why It’s Essential
Peace of mind through proactive monitoring is what separates amateur setups from professional homelab deployments. This Uptime Kuma Docker homelab setup prevents extended downtime situations that can damage your credibility and user trust. When others depend on your services, whether for family streaming, home automation, or shared resources, having confidence in your homelab’s reliability becomes non-negotiable. Professional service management means identifying and resolving issues before users notice them, and Uptime Kuma delivers exactly that capability.
Key Features Deep-dive
- Beautiful Status Pages: Create mobile-friendly, public-facing status pages to display system health.
- Multiple Monitoring Types: Supports HTTP(S), ping, port checks, and SSL certificate expiration tracking.
- Comprehensive Notifications: Receive alerts via Discord, Telegram, email, and webhooks to get alerts when services down.
- Historical Data: View detailed uptime statistics and graphs to track homelab uptime statistics over time.
- Maintenance Windows: Schedule downtime to prevent false alarms during updates.
- Multi-language Support: Access the interface in numerous languages.
Implementation
Deploy your digital watchdog with this straightforward Docker command that ensures persistence and automatic restarts:
docker run -d \
  --restart=always \
  -p 3001:3001 \
  -v uptime-kuma:/app/data \
  --name uptime-kuma \
  louislam/uptime-kuma:1
The volume mount (-v uptime-kuma:/app/data) preserves your monitoring configurations and historical data through container updates. After deployment, access the web interface at http://your-server-ip:3001 and create an admin account, the first user registered is automatically granted administrator privileges.
Configuration Walkthrough
- First Monitor Setup: Begin by monitoring a core service like Portainer or Heimdall using HTTP(S) checks with 60-second intervals.
- Notification Channels: Configure Discord or Telegram integration to ensure you receive immediate alerts during outages.
- Status Page Creation: Build a public homelab status page to provide transparency for anyone using your services.
- SSL Certificate Monitoring: Add checks for your HTTPS endpoints to avoid unexpected certificate expiration issues.
Advanced Monitoring Ideas
- Monitor Docker containers automatically by setting up ping tests for their exposed ports.
- Check internet connectivity by pinging reliable external servers like
1.1.1.1or8.8.8.8. - Set up port checks for critical network hardware like routers and switches.
- Monitor database connectivity for applications that rely on persistent storage.
- Track certificate expiration dates for all your HTTPS services.
Integration Opportunities & Pro Tips
- Embed status widgets on your Heimdall dashboard for at-a-glance health checks.
- Use webhook integrations to trigger automations in other systems when outages occur.
- Set appropriate check intervals: Use 60-second checks for critical services and longer intervals (e.g., 5 minutes) for less vital ones to avoid false positives.
- Group related services logically and use tags for better organisation as your list of monitors grows.
- Regularly review your notification settings to ensure they remain relevant and effective.

All-in-One Docker Compose Stack
Ready to deploy all five essential containers at once? This complete homelab Docker Compose stack solution gets everything running together with a single command, transforming your deployment process from individual container management into orchestrated simplicity. This approach lets you deploy multiple containers together as a cohesive unit.
Complete Stack Benefits
This all-in-one homelab docker setup offers significant advantages:
- Single-Command Deployment: Launch your entire homelab ecosystem with one command, eliminating repetitive setup steps.
- Proper Networking Configuration: A dedicated bridge network enables seamless inter-container communication while maintaining isolation.
- Centralised Volume Management: Consistent data persistence strategies across all services simplify backups and migrations.
- Coordinated Startup: Dependency management ensures services start in the correct order, preventing connection issues.
- Simplified Management: Unified control over all your Docker Compose homelab services makes updates, monitoring, and maintenance dramatically easier.
Docker Compose Implementation
version: '3.8'

networks:
  homelab:
    driver: bridge

volumes:
  portainer_data:
  heimdall_config:
  pihole_config:
  pihole_dnsmasq:
  wireguard_config:
  uptime_kuma_data:

services:
  portainer:
    image: portainer/portainer-ce:latest
    container_name: portainer
    restart: unless-stopped
    ports:
      - "9000:9000"
    volumes:
      - /var/run/docker.sock:/var/run/docker.sock
      - portainer_data:/data
    networks:
      - homelab

  heimdall:
    image: lscr.io/linuxserver/heimdall:latest
    container_name: heimdall
    environment:
      - PUID=1000
      - PGID=1000
      - TZ=America/New_York
    volumes:
      - heimdall_config:/config
    ports:
      - "8080:80"
    restart: unless-stopped
    networks:
      - homelab

  pihole:
    image: pihole/pihole:latest
    container_name: pihole
    ports:
      - "53:53/tcp"
      - "53:53/udp"
      - "80:80"
    environment:
      TZ: 'America/New_York'
      WEBPASSWORD: 'your_secure_password'
    volumes:
      - pihole_config:/etc/pihole
      - pihole_dnsmasq:/etc/dnsmasq.d
    restart: unless-stopped
    networks:
      - homelab

  wg-easy:
    image: weejewel/wg-easy
    container_name: wg-easy
    environment:
      - WG_HOST=your-public-ip-or-domain.com
      - PASSWORD=your_wireguard_password
      - WG_DEFAULT_DNS=172.20.0.3  # Points to Pi-hole container
    volumes:
      - wireguard_config:/etc/wireguard
    ports:
      - "51820:51820/udp"
      - "51821:51821/tcp"
    restart: unless-stopped
    cap_add:
      - NET_ADMIN
      - SYS_MODULE
    sysctls:
      - net.ipv4.ip_forward=1
    networks:
      - homelab
    depends_on:
      - pihole

  uptime-kuma:
    image: louislam/uptime-kuma:1
    container_name: uptime-kuma
    volumes:
      - uptime_kuma_data:/app/data
    ports:
      - "3001:3001"
    restart: unless-stopped
    networks:
      - homelab
Key Configuration Notes:
- Replace
your-public-ip-or-domain.comwith your actual public IP or dynamic DNS hostname.
curl ifconfig.me #Run this in your terminal to get your servers public ip- Set strong, unique passwords for Pi-hole (
WEBPASSWORD) and WG-Easy (PASSWORD). - The
depends_ondirective ensures Pi-hole starts before WG-Easy, providing DNS resolution for VPN clients.
Deployment and Management
- Initial Setup: Create a
docker-compose.ymlfile with the above configuration and customise the environment variables for your setup. - Deployment: Run
docker compose up -dto launch all services simultaneously. - Verification: Check that each service is accessible through its respective port and configure them according to the individual guides.
Ongoing Management:
- Use
docker compose downto stop all services gracefully. - Execute
docker compose pull && docker compose up -dto update all containers to their latest versions. - Monitor logs for specific services with
docker compose logs [service-name]. - For backups, stop the stack with
docker compose downand archive the entire directory containing your compose file and volume data.
This unified approach to managing your Docker Compose homelab services ensures consistency, simplifies maintenance, and provides a solid foundation for expanding your self-hosted ecosystem.
Note: For clarity, I recommend that you deploy each container individually
Conclusion & Your Homelab Journey Ahead
Congratulations! You’ve just built a professional-grade homelab foundation that rivals commercial solutions while mastering essential Docker concepts through practical implementation. Your new infrastructure delivers comprehensive capabilities that would cost hundreds monthly from cloud providers, marking a significant step toward self-hosted independence and digital privacy.
What You’ve Built
Your five-container foundation provides everything needed for serious self-hosting:
- Management: Portainer delivers visual control over your container ecosystem
- Organisation: Heimdall creates unified, professional access to all services
- Protection: Pi-hole provides network-wide security and privacy
- Connectivity: WireGuard enables secure global remote access
- Reliability: Uptime Kuma ensures proactive monitoring and reliability
Through this hands-on project, you’ve developed crucial Docker skills, including container deployment, volume management, networking, security considerations, and stack orchestration knowledge that translates directly to professional environments.
Next Level Expansion: Building on Docker Foundation Homelab
Now that you’re considering what to install after basic Docker containers, these intermediate homelab Docker projects build naturally on your foundation:
- Media Management: Deploy Jellyfin or Plex for personal streaming services
- Home Automation: Add Home Assistant for smart device control and automation
- Network Services: Implement Nginx Proxy Manager for reverse proxy capabilities
- File Management: Install Nextcloud for personal cloud storage with complete data ownership
- Development: Set up Gitea for private code repositories and collaborative development
These homelab expansion ideas next steps leverage your Docker expertise while adding substantial new capabilities to your infrastructure.
The Foundation Mindset
These five containers aren’t just applications; they’re your launching pad for unlimited expansion. Every concept you’ve learned applies to hundreds of available services. You now understand networking, persistence, security, and management principles that make complex deployments approachable, truly building on Docker Foundation homelab excellence.
Join the Conversation
Which container surprised you the most with its capabilities? What’s the first additional service you’re planning to add? Share your success stories, challenges, and creative implementations in the comments below. The homelab community thrives on shared knowledge and mutual support.
Continue Your Journey
Return to our How I Automated Fixes In My Homelab with ChatGPT-5 for how to make your homelab self-heal, and watch for upcoming posts covering advanced Docker topics, security hardening, and specific service deep-dives. You’ve built a solid foundation; now it’s time to create something amazing on top of it.
